Tuesday, 4 February 2020

E2B v1.B9f Beta

This version 1.B9f just has some changes to the Make_E2B_USB_Drive.cmd script which is used to make the E2B drive by the Make_E2B.exe GUI.

Changes are:

Monday, 3 February 2020

a1ive grub2 File Manager v1.5 now available

The 'E2B UEFI File Manager v1.5.zip' latest version is now available from here.

I have modified the RESTORE_E2B.cfg file and there is a new version of agFM_imgPTN_v15.cfg (for switching in .imgPTN files).

Latest grub2 build (todays build)

The second FAT32 partition can be type 0B or type 0C now (some partition tools seem to create type 0B FAT32 partitions).


Saturday, 1 February 2020

a1ive grub2 File Manager v1.4 now available (with .imgPTN support)

The grub2 developer a1ive has done some fantastic work and has added more features to grub2 which means we can update partitions even under UEFI.

The 'E2B UEFI File Manager v1.4.zip' latest version is now available from here.

This version allows you to 'switch-in' any .imgPTN file or restore the E2B partitions from within a1ive's grub2 File Manager (agFM).

By switching in a Windows 10 .imgPTN23 file, we can Secure UEFI64-boot and install Windows 10 on a Secure system.

To update, just copy extract the files to overwrite the current files on your FAT32 partition.

Note: This is in Beta development and you could possibly lose all your data on the E2B drive! I haven't lost any data yet however.

It assumes that your first two partitions are:
Ptn1: NTFS Primary (type 07)
Ptn2: FAT32 Primary (type 0C)

Thursday, 30 January 2020

a1ive grub2 File Manager v1.3 now available

a1ive has fixed a few small bugs and enhanced the grub2 features.

v1.3 contains the latest grub2 files and I have also added some WinPE files (except for a WinPE 64-bit \sources\SWITCH_X64.wim file which you can add yourself).

It is now possible to UEFI-boot to the File Manager and select a .cfg file which will then switch in a particular .imgPTN file and then reboot to the new image. You do not need to boot to WinPE to switch in the .imgPTN file.

Monday, 27 January 2020

UEFI64 Secure Boot to a1ive grub2 File Manager to the Windows 10 Installer

The UEFI64 Secure Boot seems to work quite well even on systems which are set to 'UEFI: Microsoft OS only' except when installing Windows 10 from an ISO.

The solution for this seems to be that we must boot from a Windows 10 .imgPTN file, so we

1. Secure UEFI64-boot to agFM
2. Boot to WinPE
3. Run Switch_E2B.exe and switch in our Windows 10 .imgPTN23 image file
4. Reboot from the new partition and install Windows 10
5. Reboot to agFM and switch back in the E2B partition

I have added the instructions on how to add in the WinPE files here.

It would be nice to not have to boot to WinPE and run SWITCH_E2B.exe, but I am not sure that grub2 can do this like grub4dos can (P.S. see agFM v1.3 for a solution!).

The other alternative is to use agFM to boot to WinPE and then run WinNTSetup.exe from WinPE - this can install directly from a Win10 ISO and there is no need to use .imgPTN files.

Thursday, 23 January 2020

E2B v1.B9d Beta available

Changes from v1.B8 are:
  • The E2B menu system will ignore .grubfm files and .cfg files which are not grub4dos batch files (in case added for a1ive grub2 file manager)
  • Bugfix for Windows ISOs + XML files (unattend answer file error fixed)
  • Bugfix for firadisk/strelec ISO booting
  • Bugfix in NTBOOT for .wim booting when using grub2 File Manager
  • Language file for Simplified Chinese STRINGS.txt updated (thanks to a1ive)
  • Change to MAKE_E2B_USB_DRIVE.cmd script to leave 100MB+ at end of the USB drive so a 2nd FAT32 partition can be easily added without needing to resize the E2B drive.
If you make a new E2B drive now, it will leave approx. 100MB of free unused space on the drive (or if a >128GB drive, it will make a large NTFS partition #2). This allows the user to easily delete the 2nd partition and make a new FAT32 partition of 100MB, so they can easily add the grub2 a1ive File Manager UEFI boot files.

I may add an option to add the UEFI files into the E2B installer later, but I need a lot more feedback from users on how good (or bad) the new UEFI File Manager is.

Download v1.B9d

So please let me have your feedback on the 'a1ive gru2 File Manager' and let me know what works and what doesn't.

KSGER soldering iron reduced in price!

If you are thinking of buying a new soldering iron, it is now available for less than £30 ($35.55) at the moment (via email offer only)!

Create an account with Banggood and subscribe to get newsletters. Use the link in the email that will be sent to you for over £10 discount!

I recommend getting some extra bits at the same time.

See here for details.

Tuesday, 21 January 2020

A1ive grub2 File Manager for E2B v1.1 now available.

The latest version has a few improvements and bug fixes to make it more reliable for booting .WIM files.

I have also added a MEMTEST86 folder so that you can boot to the MemTest86 EFI files whenever you like.

Just extract the files straight to your FAT32 2nd partition to update the old version 1.0 files.

v1.1 1Drive Download link
v1.2 includes UEFI32 support

Monday, 20 January 2020

Bugfix in grub_filemanager.mnu (booting .wim files did not work)

If you are using the grub2 File Manager with Easy2Boot and have used the grub_filemanager.mnu menu file in the Main Menu  AND you have an animation on the menu, you may find that direct booting of some WinPE NT6 .WIM files does not work.

To fix this, we need to unmap the floppy drive that the animation uses before we load the grubfm.iso file.

Here is the new grub_filemanager.mnu file (the additional lines are in red)

iftitle [ if exist (hd0,1)/grubfm.iso || if exist (hd0,2)/grubfm.iso ] Grub2 File Manager (a1ive)\nBoot a file using grub2
splashimage --animated=0
map --unmap=0:03 > nul
map --unhook
find --set-root /grubfm.iso
map --mem /grubfm.iso (0xff)
map --hook
chainloader (0xff)
boot


Friday, 17 January 2020

E2B v1.B9b (with bugfix for unattend answer file error when installing Windows)

Alexander reported a problem with E2B v1.B8.

When using an E2B USB Flash drive (removable type), after the Windows Setup 'copy files' stage had completed and the system reboots, if you allow it to boot directly from the internal hard drive, you will see an error message:

'Windows Setup encountered an internal error while loading or searching for an unattend answer file.'


Tuesday, 14 January 2020

Direct UEFI64 boot from Tails 4.2/4.16 ISO file using a1ive's grub2 File Manager

Note: Later versions of Tails Live DVD ISO files (e.g. Tails v5.1, now have a UEFI-boot grub2 menu with a 'Tails (External Hard Disk) option. So just use a _.isodef.iso file extension and choose that option if you have an E2B USB HDD - otherwise choose one of the first options.

--------

This .grubfm menu can be added to the same folder as the ISO to get a 'User Menu' option when you select the .iso file. This allows us to UEFI-boot to Tails ISOs.

You must test on a real system (not a Virtual Machine) as it needs to detect a USB boot device.

Note: for Tails 4.6, and 4.16 you must delete the union=aufs parameter (why do the devs keep changing linux parameters every distro?).

As Tails seems to change on every version (!), you should look at the isolinux\live64.cfg file to get the correct 'params' parameters if you have a different version.

Tip: If you are booting from a VM or a Fixed-disk type of E2B USB drive (e.g. USB HDD or Corsair GTX flash drive), then you will need to press TAB at the Tails grub menu and edit the kernel parameters to remove the 'live-media=removable' entry each time you boot. For E2B, you can instead use the Tails_generic_for_USB_HDD.mnu from the sample mnu files folder (copy it and the ISO to the \_ISO\LINUX\MNU folder and edit the .mnu file with the name of your tails ISO file in two places).


tails-amd64-4.2.grubfm

Monday, 13 January 2020

E2B "UEFI version"

I have added a new page to the E2B website.
It describes how to add a second FAT32 partition to your E2B USB drive instead of using a .imgPTN file. This means it is more compatible for E2B Removable flash drives when booting Win7/8.1 ISOs.
UEFI-boot and then directly boot from ISO, VHD and WIM files using a1ive's grub2
No need to create .imgPTN files for most payloads. It also supports SDI_CHOCO configuration installs and other XML files.

Download (version 1.0).

Latest a1ive grub2 File manager v1.4 (with Windows 8.1 and XML support)

The new version 1.4 now supports the ability to run a Windows 7/8/10 install ISO with an XML file.

This allows us to:

1. Install any Edition of Windows from a Win7 ISO
2. Install Windows 8.1 without needing to enter a Product Key
3. Install Windows 10 with an unattend.xml file

Just copy your .XML files into the same folder as your ISO

e.g. on your large NTFS partition:
\_ISO\WINDOWS\WIN8  (contains .iso and .xml files)
\_ISO\WINDOWS\WIN7 (contains .iso and .xml files)
etc.

Download and unzip the latest version of the a1ive .imgPTN23 file (e.g. grub2 File Manager v1.4 (by a1ive).imgptn23auto) - see Alternate Downloads - Other folder for this. Place it in the \_ISO\MAINMENU folder.

Download the Sample_WIN8.1_XML_Files.zip, unpack and place in your Win8 folder.

For Win7 - to choose any Edition, use this XML file.

Use the XML file to choose any Edition in the Win7 ISO.

You can also add .xml files for Windows 7 (to install Home from a Pro ISO file for instance, because Win7 Retail ISOs contain all versions of Windows 7).

Win8...
Navigate to your WIN8 folder and choose an ISO file.

Sunday, 12 January 2020

Try this UEFI multiboot E2B drive (just add ISOs)

This E2B drive should run most UEFI payloads once you switch-in the a1ive File Manager.

Once it has been made, just copy your .ISO, .VHD, .VHDX, .WIM, .IMG. EFI, .IPXE payload files to the 3rd NTFS partition then run WinContig or Defraggler to make the ISOs contiguous.

You should then have a USB drive which will Secure or non-Secure UEFI64 boot or non-Secure UEFI32 boot (and MBR boot on some systems too).

It will also allow you to run SWITCHPE so that you can switch out the a1ive File Manager partition and switch in a different .imgPTN file should you need to.

This system is much easier to maintain than the E2B grub2 menu system because you just add (or delete) payload files. No other .imgPTN files need to be made. You can create grub2 menus if you wish however (e.g. UEFI\MBR booting Ubuntu-based ISOs + persistence in my previous blog).

Note: Win8.1 ISOs will require you to enter a Product Key. This can be an installation-only generic key (or you can add a \sources\ei.cfg file into the ISO). Version 1.4 or later also accepts XML unattend files too!

See also here for a E2B UEFI USB drive.

Instructions

Thursday, 9 January 2020

a1ive grub2 file manager menu for Ubuntu with persistence

Here is how to add multiple Ubuntu-based ISOs+persistence to your a1ive grub2 drive.


Instructions

a1ive's grub2 File Manager v1.2

Here is today's version of a1ive's latest grub2 file manager .imgPTN file.

We now have the ability to add our own grub2 menus by adding a .grubfm file which has exactly the same file name as the ISO file.

e.g.


Here we have a .grubfm menu file for the manjaro iso (download link).

The contents of the user-added .grubfm file are:

Wednesday, 8 January 2020

Beware of this ATX PSU tester!

I bought an £8 ATX PSU tester from eBay recently.

I had the idea that I could use this as a cheap display panel for a home-built bench power supply which would be based on an ATX PSU plus a Boost/Buck variable voltage+constant current converter. This would save buying separate voltage displays for the PSU outputs (3.3V, 5V, 12V, -12V) and also provide a shunt resistor (which is inside the tester) plus an ATX PSU socket and a warning buzzer if any of the rails were outside of specification, and all for £8.

Note: The shunt resistor is only intended to be powered for a short time and it got too hot if I left it connected for more that 10 minutes.

However, when I tested it on 3 different ATX PSUs, I spotted an issue - can you see the problem in the picture below?

Measure capacitors with a $10 Arduino

Here is my simple Arduino-based Capacitor Meter which requires no additional components or even a breadboard - just add a display (though you can use the Arduino IDE Serial console if you don't have a display).

It uses an Arduino, some jumper wires, a cheap $3 OLED display and a 9V battery - that's it! You just stick the capacitor under test directly into the Arduino sockets.

Sunday, 5 January 2020

E2B v1.B9a Beta available with Strelec ISO bugfix

This version 1.B9a should work correctly with WinPE x64 Sergei Strelec ISOs as long as you use the .isofira01 file extension.

Previous versions worked OK with 32-bit WinPE but not with 64-bit WinPE.

This issue should now be fixed and you should get the full Desktop icons now.

Let me know how it goes!

P.S. If testing using VBox+VMUB, set VM OS to a 64-bit OS but NOT WINDOWS!  e.g. Windows 10 64-bit does not work (firadisk does not load ISO), but using 'Linux\Ubuntu 64' or 'Other 64-bit' works!


A1ive's grub2 File Manager v1.1

I have made a slight tweak to the grubfm file manager .imgPTN file so that it does not show all the '$' system files on NTFS partitions.

You can download the new v1.1 version from here.

Saturday, 4 January 2020

MBR-boot and UEFI-boot (almost) any file using a1ive's new grub2 and grub2 File Manager

a1ive has been busy modifying and extending a branch of grub2.

 Just copy your ISOs, etc. onto the drive and Secure UEFI boot!
Later versions: 
https://rmprepusb.blogspot.com/2020/01/a1ives-grub2-file-manager-v12.html 
https://rmprepusb.blogspot.com/2020/01/a1ive-grub2-file-manager-menu-for.html

As you know, grub4dos only supports MBR\Legacy-booting but grub2 also supports 32-bit and 64-bit UEFI. Now, a1ive has added support to UEFI-boot Windows Install ISOs, .wim files, .VHD files using NTBOOT. grub2 now supports the partnew and map commands even under UEFI, so we can generically boot most Linux ISO files under UEFI too.

He also has scripted a grub2 menu as a 'File Manager'. You can Legacy or UEFI-boot to grub2, select a partition and then select a file (.iso or .vhd(x) or .wim or .img, .ima or .efi). The File Manager will then offer a range of various options. The current supported list includes:

Also boots Windows Vista//7/8/10 Install ISOs too!
File extensions supported are:
.cfg - run as grub2, syslinux or pxelinux menu
.efi - run as UEFI file (UEFI mode only)
.img - run as disk image
.ipxe - run as ipxe
.iso - run as .iso (also includes .grubfm file of the same file name)
.lst - run as grub4dos menu (MBR mode only)
.lua - run as lua script
.mod - load grub2 module
.pf2 - load font file
.png  - graphics image
.vhd - run as VHD
.wim - run as NT6 .wim file


Add this to your Easy2Boot USB drive

If you want to try this with Easy2Boot, you can download the .imgPTN23 file (from Alternate Download - Other folder).
Note: This .imgPTN23 file also supports an automated workaround for bypassing Secure Boot on UEFI64 systems so you can boot any unsigned payload from a Secure UEFI boot!

Wednesday, 1 January 2020

Happy New Decade!

Happy New Year everyone.

E2B v1.B8 is now officially released.

If you haven't got your 2020 Calendar yet (like me!), why not design and print your own instantly!


Tuesday, 31 December 2019

Who knew Easy2Boot was so scary?


New Spanish video on E2B has just appeared - really scary! Don't watch it if you are of a nervous disposition!

Which country downloads E2B the most?

Here (FYI) are the stats for E2B downloads from the FossHUB E2B page over the last five months of 2019.

P.S. FossHUB provides safe and extermely high-speed downloads for many other apps and software and is always worth trying first if you want to download a popular package, so it's worth Bookmarking!
Downloads of E2B from FossHUB in last 5 months
As you can see, the USA are first, but surprisingly France is second.

The next 10 look like this:

Monday, 30 December 2019

Easy2Boot v1.B8 is now available

This has latest version of grub4dos which has some improvements in the setmenu --string command (can now centre text within a menu and have a background colour for the text).

Difference from v1.B7 are:
  • Latest grub4dos 2019-12-30.
  • Improve E2B scripts to allow user to define a greater number of grub4dos environment variables (grub4dos max is 60).
  • New default background. 
  • Add .vhdx file extension (was removed in last few versions).
  • Update Memtest86 UEFI free version to v8.3.
  • Add Tails_generic_for_USB_HDD.mnu for generic menu for booting Tails ISOs from USB HDD. 

New 2020 eBook on grub4dos is now available

New eBook on grub4dos is now available. Over 170 pages.

Includes all latest commands and features. The price is only $5 but you can pay more if you like ;-).

Exercises to show you how to construct a menu system with wallpaper, unifont, keyboard scancode translation, password, boxed text, animated graphics and tunes, etc.

Based on the latest features of the 2019-12-30 version of grub4dos 0.4.6a.

Each eBook can be downloaded up to 5 times, so you can download a later edition if there is one available in the future.


Friday, 20 December 2019

E2B v1.B8d now available + grub4dos eBook

I hope to release this version as v1.B8 before XMas.

Difference from v1.B7 are:
  • Latest grub4dos 2019-12-20.
  • Improve E2B scripts to allow user to define a greater number of grub4dos environmental variables (grub4dos max is 60).
  • New default background. 
  • Add .vhdx file extension (was removed in last few versions).
  • Update Memtest86 UEFI free version to v8.3.
  • Add Tails_generic_for_USB_HDD.mnu for generic menu for booting Tails ISOs from USB HDD. 
It is in the Alternate Download Area - Latest Beta folder as usual.

New grub4dos eBook

Thursday, 19 December 2019

The IODD Mini is now available

The crowd-funded IODD Mini (<Amazon link - please use this if ordering from USA or UK) seems to have arrived at last, after 2 years of waiting.

IODD on Amazon Germany here.

IODD Mini 256GB version is approx $135
Apparently it contains a KingSpec 2242mm M.2 SSD NGFF Internal Solid State Drive SATA III and so you could swap it out for a different one.

Tuesday, 10 December 2019

Evaluation of the UNI-T UTP1306S 32V 6A 'linear' power supply

Due to some recent instability issues with my switched-mode bench PSU when subjected to a high sudden current demand spike, I decided to get a linear bench power supply. Also, by adding it to my existing bench PSU, I could get a +ve/-ve supply or I could get over 60V if I connect them in series (not quite sure how the CC would work though?).

In particular, I wanted a bench PSU with an Output Enable\Disable switch because I find it useful to be able to set a Voltage and Constant Current setting whilst my test circuit is already connected to the PSU terminals. Why all bench PSUs don't have this is totally beyond me!

One of the few suitable small (cheap) linear bench power supplies was the UNI-T UTP1306S (approx. $100 or £60). I looked at the review on YouTube (see below) before deciding to buy one. I figured that even if it failed on me, at least I would have a nice-looking project case for a future home-made bench PSU!

Note: Another popular PSU is the KA3005D (Bangood affiliate link) (or KA3005P programmable) which actually seems to be better as it has internal relays to control on/off voltage spikes and can be calibrated. It seems to have very low output ripple too.

The first thing I did was to take it apart and inspect it carefully, check soldering, earth connections, tightness of fixings, loose components, etc. The transformer seems remarkably small for a 192W linear PSU...


Some notes:

Another issue with the D3806 power module!

If you read my previous blog, you will see that I found that the D3806 power module produced large over-voltage spikes on its output terminals when you switch on the DC supply to it (even if it's output was programmed to be off on power-up). This could send a surge of up to 10V for approx 10 mS into your nice little 3.3V arduino and blow it up! It also sent spikes when you switched it off too!

I had planned to use this device together with an old ATX power supply to make a nice variable, current-limited bench power supply.

So I decided to try to work around this issue and I designed a delay circuit. The idea is that I would connect the +ve output of the D3806 through the contacts of a Normall-Open 10A-rated relay.

When you switch on the ATX power supply (or any power supply) the relay contacts would remain open for approx. 1 second and then (after the D3806 nasty over-voltage spike had finished) it would close the relay contacts and connect the D3806 ouput to the output terminals.

The delay circuit worked great. I also designed it so that it would open the relay contacts on power-off/decay BEFORE the D3806 over-voltage spike ocurred on it's output too.

Thursday, 5 December 2019

Have you noticed that Google Chrome Translate has been broken for at least month now?

Have you noticed that you can't just right-click on a page and choose the Translate option any more in Chrome?

Being able to translate web pages is one of the main reasons I use Chrome rather than any other browser, but something is broken!

right-click on the text or page...
Computer says 'No'!
and the fix is...

Friday, 29 November 2019

E2B v1.B8c Beta available

Includes latest MemTest86 UEFI v8.3 Free version - here
or from other Alternate Download Areas - Latest Betas.

MemTest86 Pro has many advanced features but is not free.

Is the D3806 Boost/Buck DC-DC power supply any good as a bench power supply? (+D3806 user guide\manual)

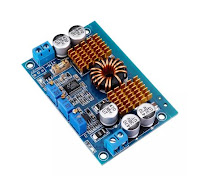
Due to problems I had with LTC3780 boost\buck converter boards and the fact that they are really not designed to be used with adjustable Voltage\Current potentiometers due to the high resistance pots required (the high impedance wires easily pick up stray noise which causes instability), I decided to try the D3806 Boost\Buck converter which has user push-button + LED display. These should be easy to extend to the front panel of a bench PSU as they should be all low-impedance connections.
D3806 - DC-DC boost\buck converter with potential 38V 6A output.
P/N 321510269

The LED+button board is on a separate riser PCB and contains a micro-controller. It is supposed to have reasonable ripple\noise output too (TBD).

But is it any good...?

Tuesday, 12 November 2019

E2B v1.B8b Beta available + grub4dos coding tips

Changes from v1.B7 are are:
  1. Improve E2B scripts to allow the user to use a greater number of grub4dos environment variables in the MyE2B.cfg file (grub4dos max is 60).
  2. Add .vhdx file extension (was removed in last few versions).

About grub4dos environment variables

Sunday, 10 November 2019

Why everyone is building their bench power supplies incorrectly (fix = cut the thin black wire)!

I ordered some  cheap Volt\Amp meters from Banggood and also a DC-DC buck-boost LTC3780 converter board. Many people have made YouTube videos and written Instructables about how to make a variable PSU from this combination (plus a DC source such as 12V from an ATX power supply) but nearly all of them are WRONG - but the solution is simple!

Usually described as "LTC3780 Automatic lifting pressure constant voltage step up step down 10A 130W"
Digital VA meter (note they seem to only have one decimal place for voltage, not two as shown in this stock picture!)

Note: This type of VA meter has thick Black+Red wire and thin Black+Red+Yellow wires. Do not confuse it with the other types which may have a thick blue wire or a thick yellow wire!

Many people who have built a power supply using these two modules have complained that the over-current pot on the Buck\Boost board did not seem to work. Other people have complained that the Ammeter reading was incorrect. A few have blown up their boards.

The diagram below shows the typical wiring arrangement that is used by most of these designs, but I have added in some extra purple lines to indicate the 0V traces which are already inside the DC-DC Buck\Boost board and already inside the VA meter.

Thursday, 7 November 2019

My build of a 30V digitally controlled, current limited bench power supply for £45

Bench power supply for <£50

Note: Some links in this article are affiliate links. This article is not sponsored in any way and all materials used were purchased privately.

I wanted to get an adjustable current-limited bench power supply however good quality retail versions are very expensive and buying a cheap power supply is always risky.

UTP1306S - see blog post

This minileaf is on a flash sale for 2 days at Banggood, only £36 for a 30V 10A <10mV ripple, 5-star rated by 97% of customers) but always comes with the risk that it will stop working and be unrepairable after a while or will arrive in bits.


Due to the problems of returning faulty products when buying from overseas suppliers, if I was going to buy a bench PSU I would buy one from Amazon for £59 as it is easier to return faulty items.

By making my own PSU from modules, it will be easy to repair just by changing the faulty module.

Wednesday, 6 November 2019

My fantastic KSGER soldering iron arrived today - but it had some faults...

This article contains affiliate links which I may earn a small commission from. All items discussed were purchased privately.

I have been looking for a new soldering iron for a while because my old Antex 40W iron is just not powerful enough. It can't cope with soldering to large terminals or other large connectors. This can cause heat damage to the components.
T12 soldering bit
Apparently the soldering irons that use the T12 type of soldering iron bits are highly recommended. These bits are fitted internally with a heating element and a temperature sensor. This means the heat can be controlled - only the tip gets hot which is where you need it. What's more, it can get to (say) 300 degrees C in less than 10 seconds because we are not heating a load of iron and copper in the shaft and collar of the bit - it can be left in 'standby' mode at say 150 degrees C whilst you are not using it and it will shake-and-heat to 300 degrees C in 3-4 seconds.

KSGER T12 soldering station

The KSGER station has a digital display and the 'shake-to-wake-from-standby' feature - if you shake the iron as you pick it up, it wakes from standby and heats up quickly. This helps the bits to last longer.

Monday, 4 November 2019

E2B v1.B7 released

v1.B7 changes:
  1. Support .isomemgrub file extension (loads iso into memory before running it)
  2. Fix bug with .vhdmem file extension
  3. SWITCH_E2B v1.1.29 (bugfix for 'error 52' issue)
  4. Display date&time function now in new grub4dos
  5. grub4dos help menu entries added to the Adjust_E2B_Menu2.mnu file (also included in PimpMyDrive.cmd)
  6. Latest grub4dos 0.4.6a 20191028 for small bugfix and time+date update new function
  7. "\_ISO\docs\Make_E2B_USB_Drive\Make_E2B_Choose_Size_of_Ptn1 (run as admin).cmd" added if you want to make a USB drive with smaller size Ptn 1.
Early release available in Alternate Download Areas for few days before on main site - please report any issues ASAP.

https://rmprepusb.blogspot.com/p/e2b-alternate-download-areas.html

Sunday, 20 October 2019

Weird USB problems with Windows 10 1903!

In the last week or so I have been experiencing very odd things with some of my USB drives under Windows 10 x64 1903.

Windows seems to think that the USB drive is corrupt. However, I can look at the drive sectors using RMPrepUSB and it will show what looks like a good MBR and PBRs. However, Windows cannot read the volumes and wants to format both of them!

Rebooting the system does not help.

If I run TestDisk, that also reports very 'wrong' results.

Windows Disk Manager shows the drive with two partitions but it refuses to let me assign a drive letter to them and asks me to 'refresh' Disk Manager (which does no good).

The strange thing is that the USB drive is OK when connected to another system.

The fix!

1. Download and run NirSoft USBDeview.exe (USB Device Viewer).
2. Highlight the USB drive
3. Right-click - Uninstall Selected Devices
4. Now unplug and reconnect the USB drive.
5. Reboot if required.

Magically, Windows now sees two good partitions and gives them both drive letters and all is sweet!

I also found that none of my Sandisk Extreme Pro 128GB USB flash drives would be recognised by Windows (no 'ding' when inserted) when I plugged either of them into the 2nd USB 3 socket on the front of my PC (but all other USB sockets worked OK and other USB flash drives worked OK in all the USB PC sockets!).  Clearly it did not like 'Sandisk Extreme Pro' + USB port 2' as a valid combination! Using USBDeview also fixed this too (after finding the 'Sandisk Extreme Pro' device and uninistalling it and then rebooting).


Sunday, 13 October 2019

Add Medicat 18.10 to E2B

Because Medicat uses incompatible and mixed versions of syslinux, the ISO may not work 100% by just extracting the files from the ISO. You can use Rufus to prepare a spare flash drive first. Rufus should update and fix any incompatible versions in the ISO as it installs it onto the USB drive. The alternative if to use the E2B MPI ToolKit on the ISO file to make a .imgPTN file.

Note that the Medicat WinPE is NOT intended to be run as a DVD/ISO (even if it could be made to fit) - the files MUST be extracted from the ISO. MiniWindows will not work correctly unless the files are extracted.


Once you have prepared the spare flash drive you can test that all menu items work and then make a .imgPTN file using the spare flash drive as the 'source' by dragging-and-dropping the spare USB drive icon\letter in Explorer onto the MPI_FAT32 Desktop icon.

Note that Medicat has bugs even when you prepare it in the 'official' way using Rufus.

If you don't have a spare USB drive then just use the Medicat ISO as the source. The latest version of the MPI Tool Kit should prompt you to use syslinux '604' too.

When prompted by MakePartImage to AUTO-CORRECT - answer N, do NOT update the configuration files.

AFAIK the functionality is the same if you directly use the ISO file instead of a 'Rufus' flash drive as the source.


You can also UEFI64 boot from the .imgPTN file to MiniWindows x64.


Medicat - notes and bug fixes

Friday, 11 October 2019

XMLtoE2B version 2.0.48 with bugfix

The previous version sometimes added an extra
</RunSynchronousCommand>
line when adding an SDI_CHOCO section.

This new version should fix the problem.

Thursday, 10 October 2019

Easy2Boot v1.B7b with bugfix for non-contiguous files hanging menu loading

I just came across a long-standing bug in grub4dos which has the affect of making E2B freeze when listing a non-contiguous ISO file, as shown below...

It is not supposed to hang!!!
Version 1.B7b avoids this bug by not showing the Volume and UUID details of the ISO which is normally listed under the menu and so avoids the issue.

By habit, I always make files contiguous after I copy them to the E2B drive, so I never noticed until now!  This issue must have been present since E2B v1.B0!

The grub4dos bug report is here.

Monday, 30 September 2019

E2B v1.B6 released


Changes from v1.B5:
  • Bugfix - Easy2Boot download self-extracting exe no longer adds the Make_E2B.exe program into the Windows Start Menu
  • Bugfix - SWITCH_E2B.exe v1.1.25 - if C: drive compressed/encrypted will still work after warning
  • Improve SIZE_E2B and SIZE_HD1 values to nearest GiB instead of nearest 4GiB.
  • Licence readme files added for 3rd-party s/w - see \_ISO\docs\Licenses
  • E2B now checks for 2019-08-09 version of grub4dos 0.4.6a or later
  • MyPwd.g4b added to Sample mnu Files\E2B folder to show example of how to prompt for a master password and have different wallpapers when asking for password
  • Latest grub4dos (allows animation to play during user input, adds grub4dos 'setmenu --keyhelp-on and --keyhelp-off commands)
  • KBD_DVORAK_USA.g4b keyboard translation file added (thanks to Alex R).
  • Latest version of RMPartUSB.exe
  • menu.lst changed to fix first frame of animation graphics being displayed just before Main menu (due to new grub4dos)
  • ArchiveOS link added to \_ISO\docs\Download URLs folder.
  • Change to \_ISO\e2b\grub\bsd.imgptn to fix bug of not booting if located past 2GB on drive (thanks to James for reporting and extensive testing!)
  • .isogrub file extension now directly loads \menu.lst if it exists (for all-in-one Acronis ISOs, etc.).

Download from Alternate Sites.

It will be available on FossHub in a few days.

The XJW01 LCR (0.3% accuracy) YouTube video is now uploaded

XJW01 LCR Bridge Meter


Hutale 4.2 LCR-DDS-F meter: LCR ESR Bridge Meter / DDS Function Generator / Frequency Meter


Another interesting LCR Bridge (without any case or 5V power supply) which has approx the same accuracy can be found here. Contact the developer - price is around 60 Euros delivered.

I have not tested this yet but it can also measure Frequency and be used as a frequency generator too!

Sunday, 29 September 2019

English User Manual for the XJW01 LCR Bridge

I have spent a lot of time testing, experimenting and then writing this User Manual. I hope it is useful to the owners of this very useful XJW01 Bridge which comes in two case styles (as a kit or ready-made).
Type 2 Mains powered

Type 1 for external power source

Many owners have had difficulties with these, mainly because if you press the wrong button you can destroy all the preset calibration values without warning! With one button press, you can also overwrite the factory preset calibration values. This manual explains how to avoid this pitfall and other gotchas!

Once you understand how to use it, it is a very useful piece of kit.

You can now download my PDF manual from here for a modest fee.

The PDF also includes an example front panel template with the correct (or at least more easily understood) button labels.


    Table of Contents

    Saturday, 28 September 2019

    Getting to know the XJW01 LCR Bridge

    I was looking for an accurate LCR Bridge recently which could also measure ESR values of capacitors.

    I also wanted a low-voltage LCR so that I could test components whilst they were still on the PCB without exceeding any diode/transistor junction voltages and thus get false readings.

    The XJW01 LCR bridge seems to be quite good and inexpensive. It is sold on many sites including eBay, Amazon and Ali Express.


    Thursday, 26 September 2019

    E2B v1.B6e with .isoBSD bugfix

    James reported a problem when using the .isoBSD file extension with E2B (flashing cursor on boot).

    This file extension can be used to boot to FreeBSD and other BSD-based ISOs which are otherwise difficult to multi-boot from.

    http://www.easy2boot.com/add-payload-files/freebsd/

    The .isoBSD file extension actually uses E2B's \_ISO\e2b\grub\bsd.imgptn (fat12 disk image) file together with the original BSD ISO file to create two new partitions on the E2B drive.

    The Beta version 1.6Be ('Latest Beta' folder) has a modified version of the bsd.imgptn file which fixes the issue.

    If you are interested in more details, visit the thread at reboot.pro.


    Tuesday, 24 September 2019

    Boot KDE Neon with persistence from an ISO

    Here is the .mnu file for booting KDE Neon with persistence.


    It is essentially the same as the Ubuntu persistence .mnu file except that it loads the kernel file /casper/vmlinuz instead of vminux.efi (which does not exist in KDE Neon).

    Sunday, 22 September 2019

    How I fixed the HP "incompatible ink cartridges' error


    So, as you all know, HP and various other printer manufacturers sell their bottom-end printers at a loss. They often come with a 'starter pack' of ink which lasts long enough to print a few test pages and then the printer driver refuses to print any more until you buy some more ink.

    However, when you try to buy more ink, you find that a black+tricolour cartridge set costs more than the printer did in the first place!

    This is the well-established 'Razor and blades' tactic - you sell the razor at a loss but make a regular income from selling the blades.

    To top it all, the firmware in my old printer does all it can to ensure that you only use 'compatible' (HP) ink cartridge replacements. However, in 2017 the Supreme Court in the USA (Impression products Ink Inc. v. Lexmark) frowned upon this practise. Since that court case, some manufacturers now provide firmware updates to 'unblock' their printers and more recent printers don't usually block refilled cartridges.