Showing posts with label persistent. Show all posts

Thursday, 27 October 2022

Boot pmagic_2022_09_04.iso from E2B\agFM\Ventoy with persistence

This version requires a 64-bit CPU and needs at least 2GB of RAM (and 4GB if not using save feature).

It is possible to boot Partition Magic 2022  from an ISO file and use the LIVE SAVE (persistence) feature which allows you to create a persistence file which is saved on exit and automatically loaded on boot.

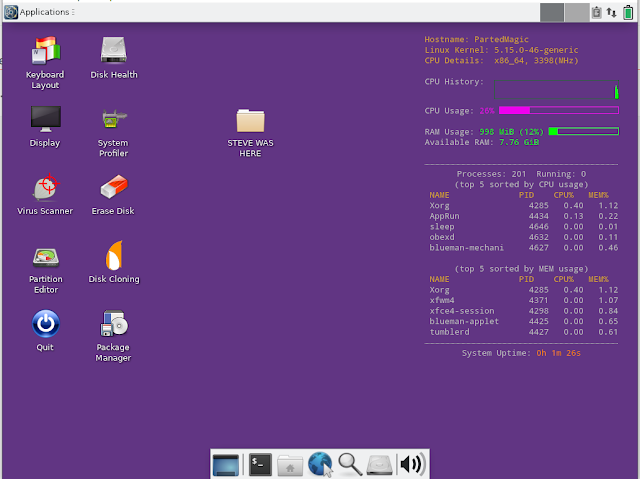
My personalized purple Pmagic with persistence.

Monday, 26 September 2022

E2B v2.16g and agFM v1.92 now have .vtoy support for full Linux OS VHD\VDI booting

Ventoy has the ability to boot from full Linux installations which have been installed onto a fixed .VHD file, fixed .VDI file or a disk raw image file. However, the code used can also be used under grub2 and grub4dos too. If you have an existing disk with Linux on it, you should be able to use the RMPrepUSB - Disk>File button to capture a .img file (although I haven't tried it with a Linux disk).

This means that a E2B USB drive (or any drive or partition) can contain multiple VHD or VDI Linux files and you can boot to a full Linux and run it at full speed (no persistence file is used). The only problem is that you cannot update the Linux kernel when booting in this way. If you wish to update the Linux version, you should do this by booting the VHD/VDI file under a Virtual Machine again - update the kernel - and then re-run the vtoyboot.sh script again. Then you can copy the new file to the E2B USB drive.

To update your E2B USB drive

See Alternate Downloads - Latest Beta folder for latest E2B version. If you wish to also test grub4efi, you can download the experimental 2.16gEFI version.
agFM v1.92 supports .vtoy files - run Ptn2:\e2b\Update agFM\Download and update agFM_v2.cmd to get the latest version of agFM.

Saturday, 6 August 2022

Add MX Linux with persistence to agFM

If you want to UEFI64 (or legacy) boot to an MX-Linux ISO and have persistence, you can use a .grubfm file. The .grubfm file must be the same name as the ISO file and in the same folder, e.g.

  • \_ISO\LINUX\MX-21.1_x64.iso
  • \_ISO\LINUX\MX-21.1_x64.grubfm

1. Copy on the two files. The grubfm file can be found on Partition 2 at "\e2b\Sample agFM menu files\LINUX\MX-21.1_x64.grubfm" folder or download from here.

2. The persistence files that will be created by MX-Linux must be stored on either Partition 2 of the E2B USB drive or Partition 3. Check that you have enough room (the default files are 8GB and 10GB but you can choose a smaller size). If you do not have a Partition 3 on the E2B USB drive then you could resize the partitions using EaseUS Home Partition Master or a similar tool. 

3. Edit the .grubfm file and change the partition number to the one that you are going to use - either 2 or 3, e.g.  line 15-17, make sure set PERSIST_PTN= 2 (or 3) as the only line and comment out any other set PERSIST_PTN= line...

Wednesday, 2 February 2022

'Getting started with Ventoy v1.07' revised edition with extra info on booting ISOs from Partition 3

I have added an extra section to the chapter on booting from payloads that are situated on Partition 3 of a Ventoy USB drive. The examples included are for a Linux-based StorageCraft ISO and a Ubuntu 64-bit ISO and it uses the F6 Extended grub2 menu facility of Ventoy.

As usual, all my eBook updates are free - just use the link that was sent to you in the original Payhip purchase confirmation email.

Amazon Ventoy Kindle version.

Getting started with Ventoy (v1.07 - 2022-02-02)

Contents:
Chapter 1 - Introduction .. 5
Chapter 2 - Glossary of terms ... 6
Chapter 3 - Make a Ventoy multiboot USB drive .... 8
GPT or MBR? ... 8
Ventoy partitions .. 8
Is your USB drive larger than 128GiB? ...... 9
4K sector disks (Advanced Format Storage) ... 9
Typical Ventoy Legacy\MBR partition arrangement .. 11
Secure Boot ... 12
Using the Ventoy installer. 14
Beware of fake flash drives!...... 14
Recommended USB drives .. 14
Exercise 1: Make a Ventoy drive under Windows ...... 15
Troubleshooting Ventoy installation and updates ..... 15
Exercise 2: Make a Ventoy drive under Linux ...... 17
Re-format Partition 1. 19
Updating Ventoy ... 20
Chapter 4 - Using the Ventoy USB drive ... 21
Exercise 3: MBR-boot to the Ventoy menu... 22
Exercise 4: Add an Ubuntu ISO.. 24
Exercise 5: Add more Linux ISOs. 28
Chapter 5 - Using the Ventoy menu .. 29
Ventoy menu keys ..... 30
Ventoy Menu Function keys ... 31
Special Ventoy keys ... 31
Debug mode .... 33
Exercise 6: Grub2 mode ...... 34
Troubleshooting summary...... 36
Chapter 6 - Add more payload files... 37
Exercise 7: Add a Windows 10 Install ISO ..... 37
Exercise 8: Add the Parted Magic ISO..... 39
Exercise 9: Add PassMark's MemTest86 memory test ..... 40
Chapter 7 - Hide some files/folders from Ventoy ... 43
Chapter 8 - The Ventoy user configuration file (ventoy.json)... 45
Ventoy.json syntax rules: .... 46
JSON Syntax checker..... 48
VentoyPlugson. 48
Multimode. 54
Chapter 9 - Ubuntu with persistence ... 55
Exercise 10: Ubuntu 64-bit ISO with persistence ... 55
Exercise 11: Kali 64-bit ISO with persistence ... 63
Chapter 10 - Windows Installs using an XML file .. 65
Exercise 12: Install Windows 10 Professional onto any computer. 67
Exercise 13: Platform specific XML file ... 70
Chapter 11 - Install Windows 11 to systems with no TPM ... 72
Exercise 14: Install Windows 11 on old hardware...... 73
Chapter 12 - Add WinPE ISOs...... 77
Strelec WinPE ...... 77
Exercise 15: Add the Strelec WinPE ISO.. 78
Hirens Boot CD WinPE ...... 79
Exercise 16: Add HBCD_PE ISO.. 79
Other useful WinPE ISOs... 80
Chapter 13 - Add AntiVirus ISOs.. 81
Chapter 14 - Add Chrome OS ISOs (CloudReady and FydeOS) ... 82
CloudReady (UEFI64 only). 82
FydeOS ... 82
Chapter 15 - Add Windows .wim files (wimboot plugin).... 83
Exercise 17: Add support for booting .wim files... 83
Chapter 16 - Add Windows .VHD files (Win VHD plugin) .. 84
Exercise 18: Add support for .VHD files .. 84
Chapter 17 - Boot from other drives/partitions/files (grubfm) ... 85
Exercise 19: Add grubfm and boot ISOs from any drive or partition.... 85
Boot from Partition 3 using Ventoy...... 88
Exercise 20: Add StorageCraft Recovery Environment Cross Platform to Partition 3 ..... 88
Chapter 18 - Add rEFInd to UEFI-boot from any disk/partition ... 91
Exercise 21: Add rEFInd.img...... 91
Chapter 19 - Change the default Ventoy menu theme ...... 94
Exercise 22: Add a 'Seven-of-nine' theme..... 97
Exercise 23: Random themes .. 100
Exercise 24: How to make your own Ventoy theme ...... 101
Chapter 20 - Specify the exact menu entries (Image List plugin)... 102
Exercise 25: Exclude legacy-only ISO files in the UEFI menu. 102
Whitelist menu .... 105
Chapter 21 - Replace the menu filenames with text (Alias plugin)...... 106
Chapter 22 - How to display grub2 menu icons (Class plugin). 107
Chapter 23 - Display payload tips to the user (MenuTip plugin) ... 109
Chapter 24 - Add your own grub2 menus (Extension plugin). 112
Exercise 26: Make a simple ventoy_grub Extended menu ... 119
Chapter 25 - Auto-select Memdisk mode for some payloads (Auto-memdisk) ...... 121
Chapter 26 - Add passwords (Password plugin).. 122
Chapter 27 - Other Ventoy features. 124
Chapter 28 - How to recompile the Ventoy source code ... 125
Chapter 29 - Add Easy2Boot (Legacy) to Ventoy ... 126
Chapter 30 - Important BIOS bugs and features that you really need to know about! ... 129
Chapter 31 - Bootable devices (USB 3 devices are best!). 131
IODD Mini...... 132
Chapter 32 - So how does UEFI-booting actually work then? ... 133
UEFI booting...... 135
EFI Shell. 136
Chapter 33 - Secure Boot.... 137
About UEFI Security (PK, KEK, DB and DBX) .... 138
Platform Key (PK). 138
Key Exchange Key (KEK) .... 138
Whitelist Database (DB) .... 138
Blacklist Database (DBX) ... 139
Machine Owner Key (MOK)..... 139
How Secure Boot works.. 139
Secure Boot and Mok Manager... 140
How to disable Secure Boot .. 141
Chapter 34 - Grub2 configuration file syntax...... 143
Words .. 143
Reserved words. 143
Quoting ... 143
Variable expansion .. 143
Locale strings. 144
Comments... 144
Simple commands ... 144
Compound commands.... 144
Built-in Commands .. 145
Chapter 35 - grub2 troubleshooting. 146
Linux ISO boot issues ...... 147
Theme errors - 'alloc magic is broken'...... 147
Corrupt screen/bad screen resolution...... 147
Chapter 36 - Useful links..... 149
Monday, 10 May 2021

Add Kali+Persistence to agFM menu system

 I have added a post here which describes how to add a .cfg file to boot Kali with Persistence.

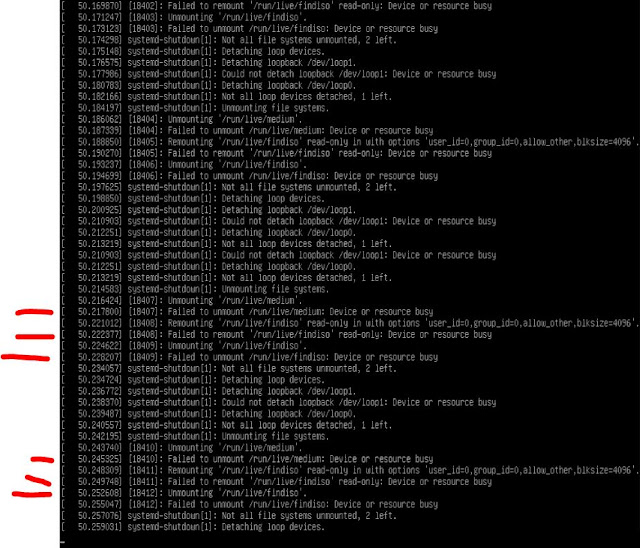
agFM seems to have a small problem when the findiso parameter is used. It seems to 'lock' a partition and this causes Kali to not shutdown. The persistence file seems to be saved OK, but it won't then turn off the system or restart it.

This also occurs if you just boot the Kali ISO using agFM (without persistence) and choose the 'Debian - Debian Live' boot entry (which also uses findiso=).


I cannot report the issue as a1ive's grub and grubfm project seem to be in 'archive' read-only status recently.

Monday, 12 April 2021

Fedora 33 live boot with persistence (fixed)

Fedora 33 with persistence

The Fedora LiveCD ISO can support persistence but the persistence file must be on a FAT32 or ext2/3/4 partition.

To boot from an Easy2Boot NTFS USB drive, we can convert the ISO to a FAT32 .imgPTN file and then add in the persistence file to the new FAT32 partition.

This process was described in a 2017 blog article here, however it seems Fedora persistence has changed slightly since then and recent versions no longer recognise the persistence file.

The blog instructions have now been updated so that you can Legacy and UEFI64-boot to a Fedora 33 .imgPTN file with a persistence file. Two folders needed to be added inside the persistence volume to fix the problem.


Tuesday, 6 April 2021

Latest Betas with bugfixes available and Puppy persistence

 E2B v2.09c

  • Add check in various .cmd files to check for wmic command in PATH 'wbem' environment
  • Remove Update E2B link from Launcher app.
  • Memtest86 .imgPTN23 updated to v9 build 2020 free version
  • Small text help changes to some Mainmenu .mnu files
  • Bugfix - fix Puppy ISOs with .isopup extension not booting

agFM 1.71c

  • Support for Strelec ISOs on UEFI32 devices with 64-bit CPUs (e.g. Asus T100).
  • Memtest86 v9 build 2020 EFI files updated.
  • Add DrWeb+persistence .grubfm example to \e2b\Sample agFM Menu Files folder
  • Add slacko_v7.grubfm and .cfg sample file added to \e2b\Sample agFM Menu Files\Linux folder for Puppy booting.
The new Beta versions can be found in the 'Latest Betas' folder in either of the two 'Alternate Download Areas' (see sidebar).

Puppy (.isopup)

I discovered that the .isopup file extension seems to no longer work in recent versions of E2B (grub4dos seems to have changed and broken it!), so I have modified the code in QRUN.cmd to now work again. 

Friday, 21 February 2020

ESET + persistent updates instructions now revised

The previous Eset blog article was tested (with much frustration) by 'Pusher' who could not get the Eset SysRescue app to auto-run.

It turns out that my instructions were wrong and the ext3 persistence file must be copied from a working Eset flash drive (as detailed in a previous blog).

I have revised the previous instructions now and provided a download for the persistence file to make it easier to set up.

Sorry for any frustration that this may have caused anyone!

Wednesday, 12 February 2020

Add ESET + persistence to E2B+agFM

Recent versions of the ESET antivirus ISO have changed the way they use a persistent ext partition.


ESET will now only store the virus definition update files on an ext3 partition with a specific volume name of ESR-USB-DAT and it must be located as Primary Partition 2 (2nd partition) on the USB drive.

This change means that it won't work as a normal xxxx.imgPTN+xxxxx image pair in E2B because the persistent partition is mapped to partition 3 by Easy2Boot.

This means we need to modify the \menu.lst file inside the .imgPTN file.

If you have made an E2B multiboot USB drive with the a1ive grub2 File System on the 2nd FAT32 partition, then you can add a UEFI64-bootable (and MBR-bootable) version of ESET with persistence by using a special .cfg file.

Instructions

Thursday, 9 January 2020

a1ive grub2 file manager menu for Ubuntu with persistence

Here is how to add multiple Ubuntu-based ISOs+persistence to your a1ive grub2 drive.


Instructions

Tuesday, 24 September 2019

Boot KDE Neon with persistence from an ISO

Here is the .mnu file for booting KDE Neon with persistence.


It is essentially the same as the Ubuntu persistence .mnu file except that it loads the kernel file /casper/vmlinuz instead of vminux.efi (which does not exist in KDE Neon).

Tuesday, 30 July 2019

SysRescueCD MBR+UEFI+persistence

The latest SysRescueCD v6.0.3  now uses Arch Linux, so I have updated the instructions in the previous SysRescueCD blog article.


Thursday, 17 January 2019

Add NetRunner ISO with persistence to E2B

You can add persistence to a NetRunner Live ISO using a .mnu file.


Here is one for 19.01. Just follow the instructions in the .mnu file. I used a 500MB persistence file.

The kernel parameters were discovered by looking at the live.cfg file from inside the ISO.

The name of the persistence file does not have to be netrun-rw. You can have multiple .mnu files and multiple persistence files if you wish.

If you want to move the persistence file to the same folder as the .ISO file, then specify $HOME$/netrun-rw for the PF variable value.


Thursday, 18 January 2018

Add Dr Web LiveCD ISO + persistence to E2B

Here is the .mnu file for Dr Web 900 LiveDisk ISO with persistence

A copy is available from the Alternate Downloads Area here.

Tuesday, 17 October 2017

How to add Ubuntu\LinuxMint to E2B with MBR+UEFI persistence (and an unfixed bug in Ubuntu!)

Early versions of Ubuntu (pre-v14) and Ubuntu-based linuxmint distros (pre-v17.03) could be set up with persistence with no problem.

As long as you added the 'persistent' boot parameter, the kernel script would look for either:

1) a 'casper-rw' file (formatted internally as ext2/3/4)

    - OR -

2) a FAT or ext partition with a volume label of 'casper-rw' which has been formatted as ext2/3/4.


Ubuntu bug!

However, Ubuntu 14.04 and linuxmint 17.03 and (all?) later versions have a bug in the casper boot script which means that they may fail to boot when a casper-rw partition is present and if that partition is located after the filesystem partition in the partition table. This bug does not apply if you booted from an ISO file (only from a 'flat-file' partition), so the .mnu files used by E2B which boot from ISOs are not affected by this bug.

Bug report for Ubuntu here.

So there is no problem if you use a casper-rw file (except it must be on the same partition and it must be a FAT32 or ext partition). So you can create a very large (>4GB) ext3 file on the E2B NTFS USB drive and use a .mnu file to get persistence - but this only works in MBR\Legacy mode.

For UEFI-booting, we need to create a FAT32 .imgPTN file. However, this issue does affect E2B when using .imgPTN partition images...

Sunday, 24 September 2017

Add Kali Linux + persistence (UEFI+MBR) to E2B

There is already a .mnu file for booting to a Kali ISO file in MBR mode with persistence.
E2B v1.B4+ also supports the special .isopersistdebian file extension so no .mnu file is required.
There is also a blog tutorial for a full OS install of Kali onto E2B here.


Recommended method: See also the Kali with persistence sample agFM .cfg file in the \e2b folder on the 2nd agFM partition (see here).


Friday, 23 June 2017

Add PeppermintOS 8 + persistence to E2B

PeppermintOS 8 is based on Ubuntu\Lubuntu, so I have modified one of the Ubuntu_Persistence Sample menu files.


I used the Peppermint-8-20170527-amd64.iso (1.2GB) with the .mnu file shown below:

Friday, 14 April 2017

Add Fedora with persistence to E2B

Updated 2021-04-12 for Fedora 33

Linux ISOs + persistence

To set up most linux ISOs with persistence, find a suitable .mnu file in the
\_ISO\docs\Sample mnu Files folder on the E2B USB drive and read the instructions at the top of the file.

You will need to change the  name of the ISO in the title line and a line below the title line.

You will need to create a ext2\3\4 persistence file (ext3 recommended as ext2 files are easily corrupted) using RMPrepUSB.

See here for instructions.

Fedora + persistence

However, Fedora is different!

The sample menu provided in the E2B \_ISO\docs\Sample Mnu Files folder for Fedora+persistence only works if you have a FAT32 E2B USB drive - Fedora does not like NTFS volumes when 'flat-file' booting.

Here is a way to add Fedora+persistence to an NTFS E2B USB drive (MBR and UEFI).

Thursday, 12 January 2017

Add Raspberry Raspbian\Pi Pixel x86 with persistence to E2B

The PIXEL ISO (Debian+PIXEL for Intel x86 CPUs) will boot if you copy the ISO to your E2B drive. It is designed to run on old, low-spec systems and be easy to use.


However, to be able to use the persistence option, you need to create a pixel-rw ext4 file and then create a persistence.conf file within it.

Here is the .mnu file for it.

Friday, 23 December 2016

Add the SystemRescueCD + persistence (MBR and UEFI) to E2B


The SystemRescueCD contains several useful features:

Description: 
SystemRescueCd is a Linux system rescue disk available as a bootable CD-ROM or USB stick for administrating or repairing your system and data after a crash. It aims to provide an easy way to carry out admin tasks on your computer, such as creating and editing the hard disk partitions. 
It comes with a lot of linux software such as system tools (parted, partimage, fstools, ...) and basic tools (editors, midnight commander, network tools). It can be used for both Linux and windows computers, and on desktops as well as servers. This rescue system requires no installation as it can be booted from a CD/DVD drive or USB stick, but it can be installed on the hard disk if you wish. The kernel supports all important file systems (ext2/ext3/ext4, reiserfs, btrfs, xfs, jfs, vfat, ntfs), as well as network filesystems (samba and nfs).

It can be used with E2B for MBR-booting just by adding the ISO file (no persistence, no danger of the .iso file getting infected or corrupted).

The current (2019) version is version 6 and is based on Arch Linux (see end of article for details)...