Saturday, 18 March 2017

Beware when downloading files via a USB WiFi dongle !!!

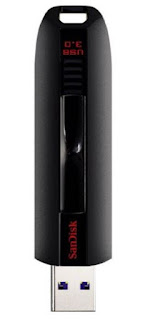
Whenever I am using a WiFi USB dongle to download files, I always check the CRC/MD5 hash value of the file using the free Windows utility HashTab. This is a really handy utility which integrates nicely with the standard Windows - Properties feature to give an extra File Hashes tab...


The reason for checking the hash value of the downloaded file (even though it appears to be the correct size and it downloaded without error) is that external interference can cause the file to be corrupt!

Yes, honestly! I have tested this myself and proved that electromagnetic interference caused a perfectly good .ZIP file to be successfully downloaded from t'internet BUT it often was corrupt and 7Zip would tell me so when I tried to unzip it!

In this case, the interference was caused by a room-light dimmer switch (hence file corruption
occurred only at night!) - see my previous blog for more details here.

I don't know if the data corruption occurred in the USB data transfer or the WiFi-to-data decoding, but it was repeatable and reproducible!

So if strange things start to happen with downloaded files, always check that the file was downloaded without any data corruption by checking it's CRC\MD5\SHA-1 hash value!

Tip: As long as the last 4 characters are correct, then the chances are extremely remote that the other characters in the hash value are not also correct. So I just compare the last 4 characters.

P.S. I also know that USB 3 can interfere with Bluetooth/wireless mouse transmission, so you need to keep USB 3 devices well away from 2.4GHz dongles (see here for more details).

Friday, 17 March 2017

Split_WinISO utility by Chandra v1.0.8

Chandra's new Split-WinISO utility now will automatically add the missing bootx64.efi boot file to MS Windows 7 x64 ISOs when it makes a .imgPTN file to allow it to UEFI-boot.


Source Files: ISO or Folder  (most Windows Install and AIO ISOs should work)
Output File: .ISO or .imgPTN file

Split_WinISO will split large .wim, .esd files into smaller .swm split-wim files for you automatically.

It will even add the winpeshl.ini and mysetup.cmd files into the boot .wim for you and add an example \auto.cmd file plus XML files too (optional)! This allows you to UEFI-boot and then pick from a range of XML files to install different Windows versions or configurations. See here for more details.

To follow the development and get the download, see reboot.pro.

Wednesday, 15 March 2017

Easy2Boot v1.91c is available

E2B v1.91c/d
  • Fix 'WARNING: WinBuilder ISOs must have .iso file extension' message being shown even when not a WinBuilder ISO
  • Latest grub4dos version \grldr 2017-02-04 
  • 'blacklist' sample .mnu files (see previous blog post)
  • Latest version of RMPartUSB
  • New version of Make_E2B.exe (1.91c)
  • New SCROLL LOCK feature (1.91c)
  • New TSUG variable to control auto-suggest feature better (1.91d)

If you are bothered by the 'WARNING: WinBuilder ISOs must have a .ISO file extension!' message followed by a 5 second delay in v1.90, this bug is fixed in v1.91.

The new Make_E2B.exe now enables the QEMU button after you have made a new E2B USB drive.

The new SCROLL LOCK feature is added into QRUN.g4b. If SCROLL LOCK is on (press the Scroll Lock key once), then redir, redirp and NOSUG will be removed/cleared. This allows you to see all E2B messages when a payload is executed. This is useful if, for instance, you have used one or more of these settings in your MyE2B.cfg file but now wish to see the E2B messages when running a new payload file. (E2B v1.91+).

Only payloads that are run using QRUN.g4b are affected - the E2B messages displayed during menu file enumeration, etc. are not affected by the SCROLL LOCK key state.

If SCROLL LOCK is ON, then QRUN will show all messages.

P.S. It is no longer necessary to set the value of redir and redirp to exactly '> nul', you can now set any value and they will work (e.g. set redir=1).

I have also added a new page to the E2B website about how to reduce the number of E2B text messages here.


Stop Press: UK Mymemory Half-Price Offer on Lexar S75 128GB USB 3.0 (150MB/s read / 60MB/s write) for only £25. Not as good as a SanDisk Extreme 128GB (245/190MB/s) but much cheaper.

Tuesday, 14 March 2017

Official Windows ISO and Office download web page

A recent ghacks.net article has identified a new website which allows you to easily download various official MS Windows ISOs and Office installation files.

The downloads come from the Microsoft servers, similar to the sources used by the Windows Download app. but there is now no need to download the latest version of the download application first (as long as the new site page is kept up to date).

A direct link is here.

Note:
'Single Language' ISOs = Home\Core only (does not include Pro)
'English' = English USA only
'English International' = English UK plus other English-speaking countries

The rest of the rg-adguard.net site seems to contain various (Russian\English) Windows AIO ISOs and some invasive advert pop-ups appear if you try to download them, so browse/download the rest of the site at your own risk!

Monday, 13 March 2017

Instant BSOD when running WinContig (Acronis True Image issue)!

During testing of Acronis True Image 2017 NG, I noticed that as soon as I ran WinContig to make the files on my Easy2Boot USB drive contiguous, my Windows 10 64-bit system instantly gave a Blue Screen of Death! There was not even enough time to see the WinContig form appear!

I repeated this several times and it always gave an instant BSOD.

As WinContig has always been stable in the past, I suspected that the problem was with the trial version of True Image that I had just installed (downloaded from the Acronis website). So I uninstalled True Image and lo and behold, WinContig now launches and runs just fine again!

After a spot of Googling, I noticed many other users reporting BSODs with various versions of Acronis products, so I decided to report the issue to their technical department who confirmed that there were known BSOD issues...


P.S. True Image also prevented Switch_E2B.exe from working because it blocked writes to the USB MBR!

Sunday, 12 March 2017

Boot Acronis True Image 2017 NG and Acronis Backup 11.7.50064 from .imgPTN file

If you want to boot a licenced version of Acronis True Image 2017 NG, you can simply add the .ISO file to E2B.

If you convert the ISO to a .imgPTN file, you can then UEFI-boot from it too, however the MBR\CSM boot entry will boot in 'Trial Mode' only with the linux version.

To fix this, add the following lines to very end of the  \menu.lst file in the .imgPTN file:

#Acronis 32 - must use quiet switch or will get busybox error!
iftitle [if exist /Recovery\ Manager/kernel.dat if exist /dat3.dat && if exist /dat2.dat] Acronis 32-bit \n Acronis True Image
kernel /dat2.dat  vga=791 force_modules=usbhid quiet
if exist /dat4.dat set d4=/dat4.dat
initrd /dat3.dat %d4%
boot

#Acronis 64  - must use quiet switch or will get busybox error!
iftitle [checkrange 2,3 is64bit && if exist /Recovery\ Manager/kernel.dat if exist /dat10.dat && if exist /dat11.dat] Acronis 64-bit\n Acronis True Image
kernel /dat10.dat vga=791 force_modules=usbhid quiet
if exist /dat12.dat set d12=/dat12.dat
initrd /dat11.dat %d12%
boot

GOTCHA! Note that you MUST include the quiet parameter or it will fail to boot!
Under VBOX, I had to add vga=791, otherwise I just got a kernel panic or busybox prompt.

The dat4 and dat12 files will contain the license data (if valid).

If you also want the report options which will save a zip file to a (removable) USB Flash drive, add these lines:

iftitle [if exist /Recovery\ Manager/kernel.dat if exist /dat6.dat && if exist /dat7.dat] Acronis Report 32-bit \n Acronis True Image
kernel /dat6.dat  vga=791 product=system_report force_modules=usbhid quiet
if exist /dat8.dat set d8=/dat8.dat
initrd /dat7.dat %d8%
boot

iftitle [checkrange 2,3 is64bit && if exist /Recovery\ Manager/kernel.dat if exist /dat14.dat && if exist /dat15.dat] Acronis Report 64-bit\n Acronis True Image
kernel /dat14.dat vga=791 product=system_report force_modules=usbhid quiet
if exist /dat16.dat set d16=/dat16.dat
initrd /dat15.dat %d16%
boot


For Acronis Backup Advanced 11.7.50064


title Acronis Backup 11.7.50064  (32-bit)\n Use vga=ask if problems with some displays
kernel /abr32ker.dat product=bootagent media_for_windows vga=791 quiet
initrd /abr32ram.dat /dat4.dat
boot

title Acronis Backup 11.7.50064  (64-bit)\n Use vga=ask if problems with some displays
kernel /abr64ker.dat product=bootagent media_for_windows vga=791 quiet
initrd /abr64ram.dat /dat8.dat
boot


Saturday, 11 March 2017

E2B v1.91b latest BETA available

E2B v1.91b
  • Fix 'WARNING: WinBuilder ISOs must have .iso file extension' message being shown even when not a WinBuilder ISO
  • Latest grub4dos version \grldr 2017-02-04 
  • 'blacklist' sample .mnu files (see previous blog post)
  • Latest version of RMPartUSB
If you are bothered by the 'WARNING: WinBuilder ISOs must have a .ISO file extension!' message followed by a 5 second delay in v1.90, this bug is fixed in v1.91.

Monday, 6 March 2017

New 'Split_WinISO' utility by Chandra

Chandra has written a Windows utility that will split Install.ESD or Install.WIM files into .SWM split-wim files.


You just point it at the Windows ISO and it will create a new .ISO file containing the split-wim files.

If you place the utility in the MPI Tool Pack folder, you will get extra options which will allow you to create a FAT32 .imgPTN file directly from the original ISO (instead of creating a new ISO file).

Note: The Yellow MPI button does NOT convert to SWM, use the CONVERT button to split the WIM file (you will be asked to save as ISO or .imgPTN).

Split_WinISO will also insert the winpeshl.ini and mysetup.cmd files into image #2 of boot.wim for you and add a \auto.cmd file to the image (you will be prompted). This creates a .imgPTN file which will prompt you to select from a number of XML files which you can add to the image later. In this way, you can have various XML files containing say Home and Pro product keys, or even SDI_Choco XML files, etc. See here for more details.

This allows us to easily make FAT32 .imgPTN files for Windows Installers that can be UEFI-booted.

To follow the development and get the download, see reboot.pro.

I may add this utility into the MPI Tool Pack download for the next version.

Sunday, 5 March 2017

Blacklisting modules for linux by detecting PC\NoteBook model strings in the BIOS

Stepdown recently asked on reboot.pro about how to detect specific makes\models of hardware so that the correct linux kernel parameters can be used automatically.

For instance, a certain model of system may not boot using the default linux kernel parameters unless nomodeset or a 'blacklist' module is specified as a kernel parameter.

The 'sample' example below shows how you can  detect the type of system you are using and automatically use the correct kernel parameters for that system.

I will put example .mnu files in E2B v1.91b and later versions.

Sunday, 19 February 2017

Grub2 Menu system Beta 6 available for E2B

The new Beta 6 version of the grub2 menu system is available in the Alternate Downloads Area.

By default, it now does not use a grub2 theme because on some systems, it seems to cause a very slow menu response in MBR-boot mode.

You can now change the menu text colours in the \ISO\MAINMENU\grub2\defaults.txt file.
You can also specify a wallpaper .jpg or .png file to use as a background in the defaults.txt file too.

Saturday, 18 February 2017

E2B v1.90 now released

The changes from v1.89 are mainly for WinBuilder ISOs and tidying up files in the root folder of the USB drive:

v1.90 2017-02-18 (v1.91 Beta has a small bugfix to stop the 'WinBuilder ISOs must end in .ISO' message.)

  1. Support for WinBuilder_ISO.mnu sample menu file (see here)
  2. Remove 20 character filename limit for WinBuilder ISOs (.isoWB files)
  3. Add three common WinPE .ini files to root of drive
  4. QRUN.g4b will auto-detect WinBuilder .ISO files and automatically update the .ini files to correctly boot and load the ISO as Y: drive
  5. Moved sample Windows XML files to SAMPLE XML FILES folders (user must copy them up one level if needed)
  6. \_ISO\CONTIG.ISO is now not updated/copied by the update script
  7. Make_E2B.exe updated to latest version (QEMU button inactive if no E2B drive selected)
  8. If user sets hidden file attribute on USB:\menu.lst file, then Update script will hide most files in root each time
  9. The three .cmd scripts can be moved by user to \_ISO folder to keep the root tidy

If you are updating your E2B drive with v1.90, you may want to:

  1. Set the hidden attribute on \menu.lst first, and then run the Update script. This will cause most of the files in the root of the E2B drive to be hidden.
  2. Move the three v1.90 .cmd files in the root of the E2B drive to \_ISO folder to keep the root folder looking tidy.
  3. Delete any unwanted XML files in your \_ISO\WINDOWS\xxxx folders to reduce the number of XML files listed by E2B. They will not be replaced when you update in future.
  4. If you have any WinBuilder-based ISOs (e.g. Gandalf, ChrisR WinPESE's, WinPE-Yol, Dium, MediCat, etc.), you might like to try just leaving them with a .ISO file extension (and ensure no spaces in the filename) and see if they 'just work' without needing any other .WB file, etc. See this page if you want to remove the QRUN auto-suggest messages each time it runs.
  5. You can just rename the download to .zip and extract it as usual if you wish.
  6. Delete the 500MB \_ISO\CONTIG.ISO file to save space - any future update will not replace it.

Friday, 17 February 2017

Configure Windows Install ISOs with WinReducer


A recent PC Welt article described WinReducer which may be of interest to you.

This is a utility that allows you create bespoke Windows Setup files (.ISO or a USB drive). It also creates an AutoUnattend.xml file for you.

It is not too obvious how to get started and the Tutorials link did not seem to be working on the site, but you can watch a Video here.

It does nag you to Activate (purchase a licence) a lot too!

I still haven't worked out what the difference is between ES and EX versions!

Quickly make a USB drive to directly UEFI-boot from Ubuntu ISOs

If you follow Tutorial #136, you should be able to UEFI-boot directly from most Ubuntu-based ISO files.

Just copy the ISO file to the \efi\boot folder on the USB drive and rename it as boot.iso.

This is a way to quickly prepare a UEFI-bootable USB drive.

It relies on the ISO containing a \boot\grub\loopback.cfg file.

At a minimum, only two files are needed on the USB drive, the ISO and a .efi boot file.

Make a generic grub2 boot menu (using loopback.cfg)

If you have ever tried to boot directly to a linux ISO file, then you will know that it is necessary to tell the linux boot kernel/scripts where to find the ISO file so that it can load it as a 'cdrom' (loop) device and access the files inside the ISO. If this is not done, you will typically see a 'squashfs file not found' error message!

Typically we can fix this by specifying a kernel parameter or 'cheat code'.

A typical grub2 command line which loads the Ubuntu boot kernel and specifies the location of the ISO file would be:

linux (loop)/casper/vmlinuz.efi boot=casper iso-scan/filename=/_ISO/ubuntu64.iso quiet splash

This allows us to boot from a grub2 USB drive (say), mount the ISO as a loop device and load the kernel and initial ramdrive files from inside the ISO file and then pass on the location of the ISO file so that when the linux kernel boots, it can re-load the ISO file as a loop device again (because the first loop device is lost when the linux kernel loads).

So to boot to linux in this way, we need to know what all these parameters need to be.

The problem is that they vary from version to version and distro to distro and we always have to do some 'research' and experimentation to try to find out what parameters we need. There also may be several menu entries (for live cd, install, safe mode, memtest, etc.) and we would need to make grub2 menus for each of them.

Enter the loopback.cfg file!

However, some distros, such as Ubuntu, contain a useful loopback.cfg file (located at \boot\grub\loopback.cfg).

Here is a typical Ubuntu loopback.cfg file which is inside the ISO file:

Thursday, 16 February 2017

Make fancy E2B wallpapers, collages, web graphics, etc. with a web-based photo editor

I got some junk email this morning asking me to visit the www.fotojet.com and review it.

Normally, I immediately delete such emails, but today I thought I would take a look...

Wednesday, 15 February 2017

Installing linux using E2B

If you use an E2B USB drive to boot from a linux ISO or .imgPTN file, you will often run into a problem if you are trying to install linux onto a system.

Many linux OS installation scripts or GUI's will look for the source linux files on a 'CD-ROM' drive, because they 'think' that we have booted from a CD or DVD.

I have added a new page to the E2B site here, which details how to specify the location of the linux source files.

Tuesday, 14 February 2017

Easy2Boot v1.90c BETA

Version 1.90c Beta has the following changes from v1.89:

  • Automatic support for WinBuilder-based ISOs (e.g. Gandalf, Dium, Yol, ChrisR PEs)
  • The three most common INI files used by WinBuilder ISOs now added to root of the E2B drive
  • QRUN.g4b improved to automatically detect WinBuilder ISOs
  • WinBuilder ISOs are checked to ensure no spaces in filename and end with .ISO extension
  • UPDATE_E2B_DRIVE.CMD will automatically 'tidy' files if \menu.lst is hidden by user
  • Windows 7/8/10 XML files now in SAMPLE XML FILES subfolders. To use them, copy them to the appropriate folder, e.g. from \_ISO\WINDOWS\WIN10\SAMPLE XML FILES to \_ISO\WINDOWS\WIN10
v1.90c is available from the Alternate Downloads Areas as usual.

How to keep things tidy!

Sunday, 12 February 2017

Easy2Boot v1.90b BETA now available

E2B v1.90b now has three extra blank files added:
  • \Win7PESE.ini
  • \Win8PESE.ini
  • \Win10PESE.ini
These are the most common .ini files used by WinBuilder ISOs.

I have also modified QRUN.g4b so that if you try to run an .ISO file that contains WinBuilder files inside the ISO, QRUN will update the three .ini files with the name of the ISO. The WinBuilder PE OS should then automatically load the ISO as a virtual Y: CD drive when it reaches the Desktop.

This seems to work for most normal WinBuilder ISOs (e.g. made using ChrisR's project or TheOven projects) and also Gandalf, MediCat and WinPEYol ISOs, etc.

With most WinBuilder ISOs, you need to follow a few rules though or WinBuilder won't load the ISO as drive Y: correctly:

Thursday, 9 February 2017

E2B v1.90a Beta has improved WinBuilder ISO support

As an alternative way to boot WinBuilder ISOs such as Gandalf WinPE WinBuilder ISOs, starting with E2B v1.90, you can also use a simple .mnu file.

The v1.90a Beta includes a sample WinBuilder_ISO.mnu file which you can copy and modify for each of your WinBuilder ISOs.

# WinBuilder sample .mnu file - example for Gandalf x86 64-bit WinPE 2016-11 version (requires E2B v1.90 or later)
# click on the Desktop Yellow Warning Triangle to find .ini file name for each WinBuilder ISO
# ISO filename must not contain spaces or it won't be loaded as Y: virtual CD!!!
# You must create the \WIN10PESE.ini file in root of E2B drive and fill it with 1000 characters of random junk
title Gandalf PE 64-bit WinBuilder ISO\n Boot a WinBuilder ISO
set ISOFN=Gandalfx64WindowsPE.iso
set IniName=WIN10PESE.ini
if not exist $HOME$/%ISOFN% echo ERROR: $HOME$/%ISOFN% NOT FOUND! && pause
if exist     $HOME$/%ISOFN% call /%grub%/QRUN.g4b force.isoWB $HOME$/%ISOFN%
boot

So all you need are three files:
  • \WIN10PESE.ini - must be approx 1K (any contents)
  • \_ISO\WINPE\MNU\Gandalfx64WindowsPE.iso
  • \_ISO\WINPE\MNU\Gandalfx64WindowsPE.mnu - the .mnu file
This saves having to make a WB folder and a xxxxx.WB file although this method is still supported in v1.90.

The improved code in QRUN.g4b also checks that the filename does not contain spaces and removes the 20-character filename limit/bug that was in previous versions of E2B.

E2B v1.90a will be uploaded in a day or so to the Alternate Download Areas!

If using SysPrep and DISM\IMAGEX to deploy Windows, watch out for this trap!

If you boot to Windows PE and use some sort of script to install Windows OS's to systems using ImageX or DISM, you should check your NTFS Junction points!

So after you have deployed the image and it is booting to Windows nicely, simply drop to an Admin command shell and type  dir /aL

Check your Junctions!

You should see that the Junctions and Symlinks all point to the Windows drive.

If they do not, then you may get some weird problems when installing or running some programs, or with some internal Windows functions.

How to boot 'Gandalf's Win10PE x86 Redstone-11-07-2016_x64.iso' (or any WinBuilder ISO)

The Gandalf WinPE ISO Gandalf's Win10PE x86 Redstone-11-07-2016_x64.iso cannot be easily booted using Easy2Boot (or any similar system).

This is because the filename used by Gandalf contains spaces and there is a bug in the MountPEMedia.exe utility used by WinBuilder PE's - they will not load the .ISO file as the Y: drive if it uses a .ini file and the .iso file contains spaces in the filename.

Note:
If you use E2B v1.90+, then Gandalf and other WinBuilder-based WinPE ISOs will just work! Simply ensure that there are no spaces in the filename and that the file extension is .iso (not .isodefault).

Wednesday, 8 February 2017

E2B v1.89 released


  • New self-extracting exe file format for downloads (can be renamed to .zip for extraction)
  • MAKE_E2B_USB_DRIVE.cmd script now tests for >137GB drives and prompts you to select a partition size of 137GB for best compatibility (or MAX)
  • Make_E2B.exe red button automatically reduces partition size to 137GB if target drive is over 137GB (no user prompt) and always uses NTFS
  • German translation for E2B menu has minor changes (thanks to Frettt!).
  • Utilities - Measure BIOS performance, now reports results in seconds
  • SWITCH_E2B new version 1.0.14
  • NoF1F7F8F9F10 MyE2B.cfg file in Themes folder added (to configure a Menu without the menu items for F1-F10)
Download page here.


New version of WinNTSetup available from JFX

Using WinNTSetup, you can install from virtually any Windows Installer ISO from within a WinPE environment.

Version 3.8.7.1  (latest is now 3.8.7.3) of WinNTSetup3 is now available from here from JFX on MSFN.

It has several bug fixes. You should now be able to run a diskpart script (using undocumented ctrl+shift+D command) to partition and format a drive and also it can now directly access a Windows ISO file to get at the install.wim or install.esd file without needing to extract it. The .iso file will be mounted by ImDisk when selected.

This new version also now works with Microsoft ISOs that contain \Sources\Install.esd files and \x86\Sources\Install.esd and \x64\Source\Install.esd files.

For more details (and how to MBR-boot to WinPE to prepare a GPT disk for a UEFI installation of Windows - even using SDI_CHOC too) see here for the best way to use WinNTSetup from an E2B USB drive.

Tuesday, 7 February 2017

E2B v.1.89e Beta available

Changes from previous Beta:

  • Utilities - Measure BIOS performance, now reports results in seconds
  • SWITCH_E2B.exe  v1.0.14
Brian contacted me about a problem he had with SWITCH_E2B.exe v.1.0.13 on his Windows 8.1 system. It reported a getFileExtents (GFE) error when first launched, and after pressing OK, it would not list any drives in the drive list.

It turns out that the GFE error was due to the getFileExtents.exe helper file not liking BitLocker C: drives (SWITCH_E2B.exe extracts it's files to a temporary folder on the C: drive and then checks that getFileExtents works).

The next issue was caused by one of the other USB drives that he had already attached to his Windows system. It had a drive letter of B: (A: and B: are usually reserved for floppy drives). He got a 'READ ERROR' and the drive list code aborted. The new version of SWITCH_E2B.exe does not abort (but will not list drives A: or B:). RMPrepUSB also does not like USB drives being drive A: or B: either!

Fix non-adjustable brightness on AMD Mobility Radeon HD 5000 series notebooks for Windows 10

If you have a notebook with Windows 10 that uses the AMD Radeon (Catalyst) graphics chipset, you may find that the default AMD video driver that is automatically installed by Windows does not support any brightness adjustment.

This means that the notebook battery will not last as long because it is always on full brightness.

This is a VERY common problem on Windows 10 notebooks with AMD graphics that have been re-installed, so you should always check that the brightness controls work after re-installing Windows or Windows drivers and for that matter, all the special control features (Fn keys, etc) on the notebook.

You can install the standard Microsoft Windows 10 VGA driver, but this reduces the maximum screen resolution (even though the brightness control does then work).

It turns out the solution is a simple registry fix.

Sunday, 5 February 2017

Virtual Box 'VT-x is not available. (VERR_VMX_NO_VMX)' error

Most modern CPUs support VT-x. This allows VBox to run much faster.

You can use VBox+VMUB to boot directly from a USB drive within Windows.
Note that the USB drive will be seen as a SATA or IDE hard disk by the guest OS (not as a USB drive and not as a 'Removable' drive - so E2B Windows Installs from an ISO will not work correctly).

In order to enable VT-x, you need to have a VT-x capable CPU, then enable VT-x in the BIOS settings and make sure that no other software is 'grabbing' that resource (e.g. Hyper-V).

There is a good article on How-to Geek about this.

My VBox was working fine until I upgraded my system to Win10 Pro for £2.84 (see previous blog post)  and installed Hyper-V as a Windows 'Feature'. Then I got the dreaded Virtual Box 'VT-x is not available. (VERR_VMX_NO_VMX)' error message when trying to use VMUB.

It seems the only solution was to uninstall Hyper-V, so now it is all working again!

How to make a .VHD from a .imgPTN file (or how to copy all Windows files to a different drive)

Basically, I had a complete working Windows installation on a disk Volume and I just wanted to copy all files to another disk Volume...

Actually, I had created a new 16GB NTFS  .imgPTN file and installed WindowsToGo onto it.
The .imgPTN file booted to Windows nicely.

However, I wanted to convert the partition to a .VHD fixed-size (not dynamic) file so I could add it to my E2B drive and boot directly to it without having to 'switch' partitions - this would allow me to directly access all of the files on the E2B drive after I had booted from the VHD.

Since the WinToGo partition was located on a 500GB USB drive, I did not want to use a DisktoVHD conversion tool because I would end up with a 500GB .VHD file!

I could not find a way to simply copy the files from the USB drive to an empty VHD virtual drive. I kept running into permission issues, symbolic link issues, locked files and other access problems caused by Windows thinking the files were important OS files!

Even upgrading my Windows Home OS to Pro and using VSS didn't help.

After asking the good guys on reboot.pro, it was suggested I use Olof's strarc utility and it worked a treat!

Here is what I did:

Saturday, 4 February 2017

How to upgrade to (or get) Win 10 Pro for £2.84p!

I wanted to copy a full Windows installation from a USB drive to a VHD, but I was being constantly frustrated by Windows 10 locking some of the files in the \Windows folder on the USB drive. This was preventing me from copying many of the Windows files on the USB drive to the VHD, even though I had booted to Windows 10 Home from my hard disk and Windows shouldn't even be locking the files on the USB drive!

Now there are several solutions to copying 'locked' files, but none of them were successful because I was running Windows 10 Home and I suspected that the problem might be connected the Volume Shadow Copy Service (VSS) and Hyper-V not being supported in Windows Home. I could have resorted to booting to WinPE, mounting the VHD using Diskpart and then copying over the files, but this would be inconvenient if I had to do this many times in a day.

So, I decided to upgrade my Windows 10 Home to Windows 10 Pro and spend the £2.84p required (and hang the expense!).

Here is how I did it...

Friday, 3 February 2017

Add LibreElec 'Krypton' KODI to E2B

The new Kodi 'Krypton' version is available as a LibreElec Beta build here.

I used LibreELEC-Generic.x86_64-7.95.1.img.gz
You can follow the instructions in a previous blog to get it working with persistence on your E2B drive.

LibreElec Krypton booted from E2B on my IdeaPad 300


You may need to use a real system (not VBOX) and a USB 2.0 port to get it to work!


Thursday, 2 February 2017

UEFI-booting a Windows Installer with a large (>4GB) Install.wim files using Easy2Boot

If you are trying to boot to a Windows Installer via UEFI, then you will need to use a FAT partition to hold the boot files because UEFI will only boot from a FAT partition (the EFI boot partition on a GPT disk is formatted as FAT).

The easiest thing to do, is to simply convert the whole ISO to a FAT32 partition image by dragging-and-dropping the ISO file onto the MPI_FAT32 Desktop shortcut to make a .imgPTN file.

The resultant .imgPTN file should then be UEFI-bootable and MBR-bootable (though for Win7 x64 UEFI booting, you need to tweak the files a bit - see here for details).

Large Install.wim or Install.esd files

The problem comes when you meet a Windows Installer ISO that contains a file that is over 4GB in size (for instance \Sources\Install.wim or \Sources\Install.esd). If you try to make a FAT32 .imgPTN file using MakePartImage, it will fail when it tries to copy the very large file to the FAT32 volume!

The best (most compatible) way to UEFI-boot is to have a USB drive containing a single FAT32 partition. However, the maximum file size for FAT32 is 4GB.

The solution is to split the Install.wim or Install.esd file into smaller files.

The new Split_WinISO.exe Windows utility will do this for you. Just feed it the ISO and it will make a .imgPTN file for you (or a new ISO with split WIM files).

Wednesday, 1 February 2017

E2B v1.89b/c Beta now available

I have added a few tweaks to the v0.0.3 Make_E2B.exe GUI:
  • Button added to run MAKE_E2B_USB_DRIVE.cmd script - you can use this if you want FAT32 or configure the MyE2B.cfg file in a different way.
  • MAKE_E2B_USB_DRIVE.cmd script now tests for >137GB drives and prompts you to select a partition size of 137GB for best compatibility
  • Make_E2B.exe button automatically reduces partition size to 137GB if target drive is over 137GB (no user prompt)
  • E2B version number now displayed in title bar
  • Remove dependency on COMDLG32.OCX (OCX is not present in Win8/10 standard OS) 
  • 'Extract E2B' button now creates a folder on your Desktop automatically (e.g. .\E2B_v1.89b)
  • v1.89c - you do not need to connect a USB drive first.
  • v.189c - German translation for E2B menu has minor changes (thanks to Frettt!).

Please try it and let me have your feedback.

The other E2B files have not been changed from v1.88.

Download from Alternate Download Areas as usual.

If you have tried it and it works, please tick the Interesting reactions box below.
if you found a problem, you can quickly send me feedback from here.

Tuesday, 31 January 2017

Easy2Boot v1.89a Beta now available with Make_E2B.exe Windows GUI utility

It seems that some strange people have a pathological aversion to the Windows command shell or maybe cannot read English text and type Y or a number on a keyboard (??) and so they do not like running the E2B .cmd script files to make a USB drive.

So I have written a small Windows GUI called Make_E2B.exe which will run the scripts for them!

Make_E2B.exe

Saturday, 28 January 2017

MPI Tool Kit v0.072 is available

Apart from small changes to the MakePartImage script (only affects text messages) and the \menu.lst file (for Acronis 2016 and 2017 conversion to .imgPTN), the \grldr grub4dos file and \e2b\SWITCH_E2B.exe have been updated.
If you wish to update to this version, unpack the download onto your Desktop and double-click on the CreateDesktopShortcuts.cmd file to update the MPI Desktop shortcuts for v0.072. If you have modified the old CUSTOM folder, you will also need to copy this across to the v.0.072 folder too. You can then delete the old MPI folder.

Friday, 27 January 2017

E2B v1.88 now available

v1.88 is now released and can be found in the Alternate Download Areas as .zip files (you can update a DPMS or non-DPMS version of your E2B drive just by using the smaller non-DPMS version - just run the UPDATE_E2B_DRIVE.CMD file from the download).

I will add the self-extracting .exe files and .7z files in a few days, as well as update the E2B website with 1.88 version.

See previous blog for a list of changes. Please comment if you spot a problem.


Tuesday, 24 January 2017

E2B v1.88m Beta now available

I hope to release v1.88m as 1.88 Full Release version in a few days.
Please try it and let me know if you find any problems.

Changes from 1.87 are:
  • Add Server 2012 R2 Std Eval Product Key file
  • Update of Wincontig
  • Update SDI executables
  • Can now use .isofira or .isofira01 for Strelec WinPE ISOs
  • MAKE_THIS_DRIVE_CONTIGUOUS.cmd now only works on the USB root (\) folder and all folders under \_ISO. Any user folders under the root (e.g. disk backups, applications, etc.) will not be made contiguous when the script is run.
  • MAKE_E2B_USB_DRIVE.cmd can now be run from your E2B USB drive to make a new E2B drive.
  • Later version of grub4dos 0.4.6a
  • New jpeg-based default purple background for 2017
  • Some changes to QRUN.g4b
  • Spanish language updated and a few other language files improved
  • Pi_pixel_x86_Persistent.mnu sample mnu file added for PIXEL iso
  • Gandalf sample .mnu files added, 
  • Boot_Recovery_WIM.mnu sample menu added (boot from any systems winre.wim)
  • Fix for case where grub4dos 0.4.5c tries to load jpg as wallpaper (jpg not supported by 0.4.5c),

Download is available from the Alternate Download Areas.

Read more: http://www.easy2boot.com/download/e2b-version-history/

Sunday, 22 January 2017

How to fix 'BSOD: STOP 0x000000A5 - not fully ACPI compliant' issues

If you are trying to boot to a Windows payload that is based on BartPE, Windows XP, 2003 or Vista, you may occasionally see this BSOD screen when booting to these types of payloads on some systems:
ACPI  0x000000A5 BSOD!
Often the simple fix is to press the F7 key repeatedly just as it starts to boot to PE. This F7 trick worked a treat when I tried to boot to PCUnlocker and Active Password Changer (via MediCat and a large .imgPTN file) on my Lenovo IdeaPad 300 notebook!

In many cases, you will see a text message to press F6 - this is your cue to go crazy on the F7 key!

Gotcha!
Before you do this however, you need to check the BIOS settings to see if there is any 'special' setting for the Fn function keys if you have a notebook. For instance, on my Lenovo IdeaPad 300, there is a 'HotKey Mode' in the Configuration page of the BIOS Settings menu. If this setting is Enabled (which is the default!), then you have to press Fn+F7 in order for the keyboard to generate the F7 scan code.

Other incantations to try
If no end of hammering the F7 (or Fn+F7) key seems to work for you, here are some other things to try which has apparently worked for other people:
  • Check the BIOS settings, set USB to USB 2.0.
  • Set all BIOS OS compatible settings to Legacy and XP/Win7 and not Win8/10 or UEFI. 
  • Reset the BIOS settings to default and then try the above BIOS settings.  
  • If you have an LPT option in the BIOS for a parallel printer port, try it set to LPT=Enabled as well as ACPI & PnP=Enabled and APM=Disabled.
  • Try disabling ACPI in the BIOS.
  • Try changing any CPU options in the BIOS (Safe Execution, VxD, etc.).
  • You can also try an older version of the BIOS (newer versions may have been made compatible for Win8/10 only).
  • If you have ever added extra RAM to the system, restore the memory to it's original configuration and size (and test the memory with a memory test program - the problem may be due to bad or mismatched memory!).

P.S. MediCat can be used on E2B if you convert it to a FAT32 .imgPTN file. It does contain illegal copies of some software though, so make sure you hold licences for any software it contains!

Thursday, 19 January 2017

E2B 1.88l (with bugfix for previous 1.88 versions)

Flaming Floe has reported a problem when installing Win7 from an ISO with the latest v1.88k version. The AutoUnattend.xml file is not correctly cleared and so appears corrupt when Windows Setup loads it. This bug will probably affect most Windows Install ISO runs, but not all systems will show the symptoms and some will appear to work (and others will give an Unattend error).

After investigation, is seems that there is a bug in the new 2016-12-24 version of grub4dos (\grldr) that is used in v1.88k.

E2B v1.88l now uses a previous version of grub4dos (2016-12-23) which I think is OK.

I have reported the bug here.

Wednesday, 18 January 2017

Tips for making files contiguous on your E2B drive

Unless your E2B USB drive has become almost full at one stage in it's life after formatting it, the \MAKE_THIS_DRIVE_CONTIGUOUS.cmd script should run WinContig fairly quickly and without any problems. Obviously, having a fast USB 3.0 E2B drive helps though!

Here are a few tips:

  1. Never download from the internet directly onto your E2B USB drive. This can cause the file to be heavily fragmented (even if you have lots of contiguous free space on it). You will find it best to always download files onto one of your internal drives first and then copy the file to your E2B USB drive. That way you also have a backup too!
  2. Do not use 'special' fast-copy programs like robocopy or TeraCopy, etc. to copy files to your E2B USB drive. These often open multiple threads which results in fragmented files. This just means WinContig will then have to defragment them on the USB drive and so it just takes much longer overall!
  3. Only start one copy session at a time. You can select multiple files and then drag-and-drop them onto the E2B drive, but don't start another copy session until the first one has finished. Not only can this cause file fragmentation, but it often takes longer too when copying to a USB drive.
  4. You can only defragment a file if there is enough free space on the USB drive to hold a second copy of it. A 6GB file will require at least 6GB of free space (in a single chunk).
  5. If your E2B USB drive has become nearly full at one stage and WinContig is not able to defragment a large file even though there is enough free space for the defragmented file, try using Defraggler - Action - Advanced - Defrag Freespace. This will consolidate the free clusters into one nice run. However, you should first delete any large fragmented files before you run it. This action can also fragment some files that were previously unfragmented, so the next run of WinContig will need to defragment them again. Then try adding your large file(s) again and finally run WinContig again. Defraggler will also show you a nice map of the used clusters and fragmented files (Analyze). You can also right-click on any single file in Explorer and use the Defraggler option to 'Defragment' it.
  6. If using an 8GB NTFS E2B drive, it may not be able to hold a contiguous 4GB+ file. This is because the directory table ($MFT) will be at the 3GB position on the drive and so a 4GB+ file may have to be split if other files are also present. See here for more details and a way to work around this issue (or you could just buy a bigger USB drive!).
  7. Finally, don't buy USB 2.0 drives. A USB 3.0/3.1 drive should always be faster, even on a 2.0 USB port and they are backwards compatible. I highly recommend the SanDisk Extreme USB 3.0 range.
If you have any other tips, leave a comment below.

P.S. As chi zhang says in the comments below, if you have a nearly full USB drive which is quite slow, it is often faster to just remake the USB drive again - then all the files will be contiguous because the drive will be reformatted. See here for more details.

Tuesday, 17 January 2017

Which is best, the SanDisk Extreme Pro or the cheaper SanDisk Extreme (you may be surprised!)?

Hurray! My new SanDisk Extreme Pro USB 3.0 128GB flash drive just came this morning.

Extreme Pro 128GB $70
Extreme 128GB $60

I have now run a few tests on it and compared it directly with the SanDisk Extreme USB 3.0 64GB flash drive.

I tested the Pro using Crystal DiskMark and then filled to entire drive with junk data and then repeated the test. This ensured that the flash controller had to perform a read-erase-write cycle on every write when running any further tests. However, there was no difference between benchmarks after I had filled it with junk data and then re-formatted it. This indicates that the USB controller always does a read-erase-write cycle on every write (so not an SSD controller).

The Crystal DiskMark results are shown below:

Monday, 16 January 2017

Find and boot to a Windows recovery.wim file (e.g. winre.wim)

Alex had a problem...

Often a Windows system cannot boot (not even to the recovery mode), but the recovery partition on that system will contain the correct WinRE.wim file that can be used to repair that OS.

He wanted to be able to boot to Easy2Boot and then boot to the WinRE.wim recovery file that was on the internal hard disk. That way, he could be sure he was using the correct version of the recovery .wim file for that system. Also, his E2B drive did not need to contain all of the possible Windows install ISO versions that there are in the world!

E2B can directly boot to an NT6 .wim file; you just need to specify the full path of the .wim file.

The problem is that different Windows systems keep the .wim file in different folders.

To further compound the issue, on his Windows 7 systems, the directory name often varied on different systems, e.g.

/Recovery/398cea27-6312-11e6-a670-10604b8d82a9/WinRe.wim

Saturday, 14 January 2017

You need to be an experienced techie to make an E2B USB drive, don't you?


Watch this video by young Marcus for your answer (and give him a 'like' too)!

Add the recent Gandalf PE builds to E2B


The latest Gandalf PE builds from WindowsMatters.com are (at the time of writing):

Gandalf’s Win10PE x64 Redstone build 14393 version 11-10-2016

Gandalf’s Win10PE x86 Redstone build 14393 version 11-07-2016

Using a partition image (UEFI+MBR)

You can add these to your E2B drive is to convert each ISO to a .imgPTN file using the MPI_FAT32 shortcut provided by the MPI Tool Kit. It should then MBR or UEFI-boot.

For the x64 ISO you will need to increase the suggested size to 5100MB.
For the x86 ISO you will need to increase the suggested size to 4300MB.

Tips: If you want as small a .imgPTN file as possible, extract the contents of the ISO to an empty folder on your desktop and then drag-and-drop the folder onto the MPI_FAT32 shortcut.
Use a file extension of .imgPTNauto so that it goes directly to the CSM menu and also add a timeout 3 line to the \menu.lst file inside the image.

Direct MBR-boot from ISOs (MBR only)

E2B v1.90 and later supports direct booting of WinBuilder-based ISOs.

1. Ensure the .ISO file has no spaces in the file name
2. Keep the file extension as .ISO (do not use any other extension)
3. (optional) If you want to suppress the QRUN suggestion prompt, ensure the filename ends with the letter q or Q - e.g. Gandalfx64_q.iso.

Friday, 13 January 2017

Animated Flags for E2B available


I have uploaded an Animated_Flags.zip file to the Alternate Downloads - Other files folders.

UK wavy flag at top-right

Thursday, 12 January 2017

Add Raspberry Raspbian\Pi Pixel x86 with persistence to E2B

The PIXEL ISO (Debian+PIXEL for Intel x86 CPUs) will boot if you copy the ISO to your E2B drive. It is designed to run on old, low-spec systems and be easy to use.


However, to be able to use the persistence option, you need to create a pixel-rw ext4 file and then create a persistence.conf file within it.

Here is the .mnu file for it.

E2B v1.88h/i available

Previously the \MAKE_E2B_USB_DRIVE (run as admin).cmd file was deleted from the E2B USB drive when a new one was made, in order to prevent the user from formatting his/her E2B drive.

I have now modified the script so that it checks for the case where the source drive has also been selected by the user as the target drive.

This means that if you or a friend wants a copy of your E2B USB drive, you can simply run the \MAKE_E2B_USB_DRIVE (run as admin).cmd file from your E2B drive and make an identical copy (complete with all payload files) onto another USB drive.

You will also need to copy any of your own user folders in the root of the source E2B drive to the target drive afterwards. For instance \MyFolder would not be copied to the target drive, only the \_ISO folder is copied.

Check the Alternate Download Areas for the new version.

Note: v1.88h had a bug in MAKE_E2B_USB_DRIVE.cmd. Please use v1.88i.

If copying a E2B Removable Flash drive to a USB hard  drive , you should remove the NOHELPER variable from within the \_ISO\MyE2B.cfg file on the USB HDD or else Windows Install ISOs when used with an E2B WinHelper Flash drive will not work!

Tuesday, 10 January 2017

E2B v1.88g Beta available


Changes from 1.87 are:
Changes from previous Beta version 1.88e are in bold
  • Add Server 2012 R2 Std Eval Product Key file
  • Update of Wincontig
  • Update SDI executables
  • Can now use .isofira or .isofira01 for Strelec WinPE ISOs
  • MAKE_THIS_DRIVE_CONTIGUOUS.cmd now only works on the USB root (\) folder and all folders under \_ISO. Any user folders under the root (e.g. disk backups, applications, etc.) will not be made contiguous when the script is run.
  • Latest version of grub4dos 0.4.6a
  • New jpeg-based default purple background for 2017 - should load faster.
  • Some changes to QRUN.g4b and language files.
  • New version of SWITCH_E2B.exe 1.0.13 (small bugfix)
  • Improved Spanish language files (thanks DW!)

The v1.88g Beta Download is available from the Alternate Download Areas.

Sunday, 8 January 2017

SanDisk Extreme PRO CZ88 128GB USB 3.0 for $71 from Amazon.com (USA)

 I have just ordered one of these for $71 from here as the price has just been reduced (£67 in the UK).

SanDisk Extreme Pro 128GB


I have not tested one yet, but I am hoping it will prove to be slightly faster than the SanDisk Extreme USB 3.0 flash drive ($58) which I highly recommend for normal E2B use.

SanDisk Extreme 128GB
See also 'Beware of this (fast) USB 3.0 drive!'

Friday, 6 January 2017

E2B v1.88e Beta is now available


Changes from 1.87 are:
  • Add Server 2012 R2 Std Eval Product Key file
  • Update of Wincontig
  • Update SDI executables
  • Can now use .isofira or .isofira01 for Strelec WinPE ISOs
  • MAKE_THIS_DRIVE_CONTIGUOUS.cmd now only works on the USB root (\) folder and all folders under \_ISO. Any user folders under the root (e.g. disk backups, applications, etc.) will not be made contiguous when the script is run.
  • Latest version of grub4dos 0.4.6a
  • New jpeg-based default purple background for 2017 (see screenshot below). 
  • Some changes to QRUN.g4b and language files.
Download is available from the Alternate Download Areas.


Please update your E2B drives and let me know if you spot a problem or have a comment. This is considered a 'release candidate' for 1.88.

Wednesday, 4 January 2017

Foolish IT - 20% off sale now on!

The guys at Foolish IT have a 20% sale on all their products at the moment (if you are quick).

For IT Technicians look at their d7ii software.

  • Provides quick automation with profile switching and execution for different repair scenarios
  • Keep work logs automatically, or quickly build a custom work report with logged actions and templates
  • Extremely customizable configurations enable personalization of tech workflow to your preferences
  • Provides techs with a consistent procedure, ensuring quality performance increases
  • New techs get ‘on the job training’ to your guidelines, while handling 80-90% of the bench work like a seasoned pro!
  • Bottom Line:  Increase technician productivity and efficiency, save time and dramatically increase revenue!

Their latest video about the d7ii Support Online tool is here and they have a channel on YouTube here too.

For their crypto-prevention malware solution (they were the original pioneers of the honey-pot method) check out their CryptoPrevent product (there is a free version too!).

They also have some other free software which you can download here.

Wednesday, 28 December 2016

E2B v1.88d Beta available

Marco has kindly made some changes to WinContig which allows me to now make the MAKE_THIS_DRIVE_CONTIGUOUS.cmd script just operate on files in the root of the drive and then it runs on files under the \_ISO folder (so WinContig runs twice).

This means that WinContig does not attempt to make any files in the user's own folders contiguous.

The E2B 1.88d Beta is available from the Alternate Download Areas.

Note: WinContig.exe is a Beta version.

P.S. If you are wondering about v1.88c, it only lasted a few minutes, I decided it was better to do it this way!

Tip: If you only want to make files in the root contiguous, or files under \_ISO contiguous, you can simply copy one of the .cmd scripts from the \_ISO\docs\WINCONTIG folder to the root of your E2B drive.