Sunday 24 August 2014

Easy2Boot v1.55 released (at last!)

Quite a few changes in version 1.55, thanks to many others for ideas, improvements, language files and bug reports!

E2B v1.55 changes:
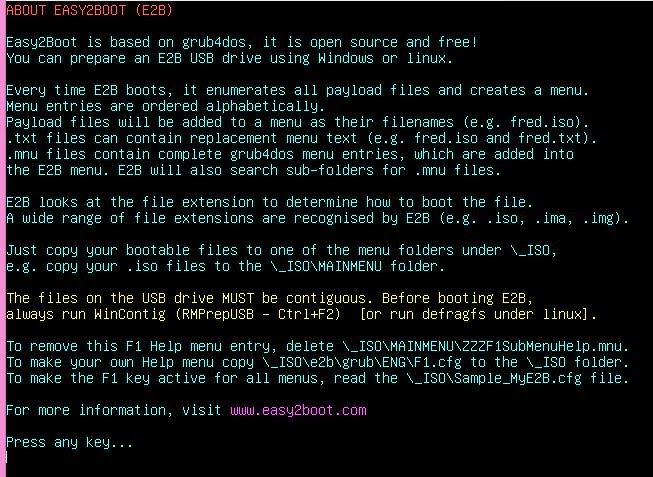
  • F1 Help Main menu added (English only). F1.cfg help file can be translated into other languages.
  • \_ISO\e2b\grub\menu.lst code change to work around incompatibility issue between AMI BIOSes and MyDigitalSSD OTG USB drive - grub4dos losing all variables! Affects HP Compaq dx2400 microtower, Asus M4A89GTDPRO-USB3 motherboard, Asus x550ca - all have American MegaTrends BIOS. Exact cause still under investigation.
  • Portuguese language STRINGS.txt added (thanks Carlos).
  • Romanian language STRINGS.txt added (thanks Anto).
  • French language STRINGS.txt added (thanks Nicolas).
  • New \_ISO\docs\mythemes folder added - supports adding a $Change_Theme.mnu menu file to the Main menu. Read the ReadMe.txt file in the folder for more info.
  • .cfg file extension support added - can now switch themes by copying a MyE2B.cfg-style file to a menu folder.
  • \_ISO\docs\Sample E2B Templates folder name changed to Templates due to path length limitations in grub4dos. If updating, you can delete the old Sample E2B Templates folder.
  • Latest grub4dos grldr versions included in E2B (important long-standing NTFS bug fixed in new version). Longer paths allowed for splashimage, etc. see http://grub4dos.chenall.net/categories/downloads/ for details of fixes.
  • EXTOFF variable added for MyE2B.cfg file - if set to 1, file names are listed in the menu without their file extension.
  • Various small changes to Qrun.g4b, English STRINGS.txt and other E2B files.
  • You can change or remove the menu   arrow marker symbol which indicates the highlighted menu entry, using a new grub4dos feature (see Sample_MyE2B.cfg).
  • If you prematurely abort an .imgPTN file selection, the 4th partition is now cleared instead of leaving it switched in.
  • Sample_MyE2B.cfg has sample code to detect host display resolution and choose different wallpapers.
  • linux fmt.sh script revised so works with older bash shells (thanks Todd).
New files added to \_ISO\docs\Sample mnu Files folder:
  • linuxmint-17-mate-32bit-v2_Persistent.mnu - for new versions of Mint
  • Tails_for_USB_HDD_Persistent.mnu - required if running Tails from a USB HDD or if you want persistence
  • Change_Wallpaper.mnu - allows user to change the wallpaper background from a menu entry
  • Change_Language.mnu - menu entry to change E2B language
  • Change_Theme.mnu - menu entry to allow user to select a theme
  • BlueTheme.mnu  - example of how user can select an alternate Theme template
  • Desinfect_2014_Peristent.mnu
  • Desinfect_2014_with_Updates.mnu
  • A_BlankMenuEntrySeparator.mnu - fancy 3-line separator
  • Win_Vista_7_2K8R2_Direct.mnu - for Win install menu entry with preset XML file
  • Win_Win8_2012_Direct.mnu - for Win install menu entry with preset XML file and/or KEY
  • PTN_LOG1_Menu.mnu - If you have an E2B drive with a Logical partition, you can boot from files on that partition with this menu.
As always, let me know if you find any problems - there are many 1000's of happy E2B users who don't have a problem, so if you do find a problem ,it will probably be due to an incompatibility with your particular system or payload file. Many of these sorts of problems can be worked-around or fixed, but only if you let me know using the Contact Me page on the www.easy2boot.com website!

Let me know what you think of the new changes.

 Please tick 'funny' 'interesting' or 'cool' or add a comment to let me know which posts you most enjoy.

Saturday 23 August 2014

A problem with a wireless mouse and USB 3.0 flash drives was driving me crazy!

If you have read my blog, you may remember that I had built a new system a few months ago - see here.

On the whole I have been very pleased with the system. It is quiet and fast.

The front panel has four USB ports, the top two are USB 2.0 and the bottom two are USB 3.0.
I specifically wanted this Cooler Master N600 case so that I could have convenient access to both types of ports.

I needed easy access because, of course, I need to test Easy2Boot USB drives a lot!


The only problem that I have been having for months now was with the Anker Wireless Mouse and dongle that I had plugged into one of  the front panel USB 2.0 ports of my new PC.

Most of the time the mouse+dongle worked just great, but I noticed that whenever I plugged in a USB 3.0 Flash drive into the USB 3.0 port on the front panel, the wireless mouse started to respond in an unreliable and jerky fashion, particularly just after the USB 3.0 Flash drive had been connected (and Windows would start to access\scan it).

If left it for a few minutes, the wireless mouse response would improve slightly, but it still gave me trouble (I humbly apologise for any physical harm that I may have caused to the poor, long-suffering creature and I also apologise for any abusive comments that I may have shouted at it in sheer frustration whenever the cursor started to behave erratically)!

My first thought was that perhaps the single AA battery in the mouse was getting flat, but I found that if I changed it for a new one every week, the response did seem to improve slightly, however it still wasn't perfect and it soon started to play up again.

As always, as soon as I unplugged the USB 3.0 Flash drive - the mouse responded perfectly!

I tried many different USB drives and found that:

1. The issue only occurred with USB 3.0 Flash drives  (not external USB 3.0 hard disks which, of course, had a short USB 3.0 lead)
2. The issue only occurred when I connected a USB 3.0 flash drive to the USB 3.0 front port - if I connected the same flash drive to the other spare USB 2.0 front port or rear USB 3.0 port - no problem!
3. If I connected a USB 2.0 Flash drive to a front USB 3.0 port there was no problem.
4. There was no difference in behaviour, whether I connected the USB 2.0 wireless dongle to the front USB 3.0 port or to the front USB 2.0 port.
5. If I replaced the wireless dongle with an ordinary wired USB 2.0 mouse it worked fine.
6. The wireless dongle worked in the rear USB ports (but this was inconvenient if I wanted to use the dongle in another system, because I could not easily get access to the rear of the PC to remove it).

Over the last few months, I have tried updating the USB chipset drivers of my Haswell mainboard but to no avail.

Today however, I Googled for 'USB 3.0 wireless mouse jerky' and found this thread.

It said that USB 3.0 signals can cause interference with the 2.4GHz wireless mouse dongle and that I should separate the USB 3.0 flash drive from the USB 2.0 wireless Bluetooth dongle. It cited an Intel PDF on the subject here (esp. see 4.3).

So I got out a spare, well-shielded USB 2.0 extension cable and used it to connect the wireless dongle to the same USB 2.0 front port as before.


Fig. 1   Before (mouse was jerky)    - and -     Fig.2  After (works perfectly)!

The result was  (drumroll......)   >>>   the wireless mouse now works fine!

Even if I taped the wireless dongle directly on top of the USB 3.0 Flash drive it still worked without any problems! This suggests to me that Intel's assumption that the problem was caused by radiated interference is not correct. It seems to me that the problem is caused by electrically transmitted noise.

Another test was to completely wrap the USB 3.0 Flash drive in tin foil and earth the foil to prevent any wireless interference (without using an extension cable). Again this proved ineffective.

I also tried inserting a 1m USB 3.0 extension cable between the Corsair GT USB 3.0 Flash drive and the front panel USB 3.0 port with the wireless dongle directly plugged into the USB 2.0 port  (i.e. as in Fig.1 but using a USB 3.0 cable to connect the Flash drive). I deliberately placed the flash drive on top of the wireless dongle so it would cause maximum radiated interference - but again the mouse worked fine!

So it seems that merely using a USB extension cable fixes the problem - this may be because the RF frequencies in the USB 3 data lines or power lines are being absorbed by the USB cable's ground shield, so that less electrical RF noise get's back to the front panel PCB via the signal/data wires.

So I am not at all convinced that this is a case of wireless interference - more likely, it is a case of poor grounding and isolation on the USB port PCB that is inside the front panel of the case. It may be that a few high-frequency decoupling capacitors sprinkled around the USB port PCB may fix the problem, but I am going to leave that for another day! Getting rid of high-frequency noise such as 2.4GHz is tricky and often a multi-layer PCB with close ground-Vcc planes is the only way - this would mean Cooler Master would need to make a decent multilayer front panel PCB. Better grounding would also help!

Equally, there may be a lack of high-frequency decoupling inside the USB 3.0 Flash drives too (I tried 3 different makes and they all gave problems - Corsair Voyager GT 32GB, a Pretec Rex 100 8GB and a Busbi 16GB, the Busbi USB 3.0 Flash drive had a silver 'metalic-paint' plastic case and did not seem to cause quite as much of a problem as the other two). The PCBs inside these pen drives are often simple dual-layer PCBs.

Summary

So just bear in mind that if you have  USB 3.0 devices  AND wireless devices such as  wireless mouse dongles, bluetooth dongles or WiFi dongles (or perhaps TV tuner dongles) - keep all USB 3.0 devices away from them. If possible, use rear ports for one and front USB ports for the other.

If you are still having problems, try using short, well-shielded USB cables instead of connecting them directly to the system's USB ports.

If they ever start making USB 3.0 versions of wireless dongles - I can see this issue becoming a BIG problem!

P.S. Since sorting out this problem, I have noticed that the battery in my wireless mouse lasts for several months now instead of just a few weeks. My guess is that it had to keep re-transmitting 100's of bluetooth packets due to the interference problems and that this quickly depleted the battery.

If you found this blog post useful please tick one of the Reactions boxes below.

Wednesday 20 August 2014

Easy2Boot v1.55 can display files in the menu without their file extensions

Files in E2B menus are normally displayed by using their full  filename + extension, as below...


You can use a .txt file to define an alternate menu entry for each file.

However, now with v1.55, if you use  set EXTOFF=1 in the \_ISO\MyE2B.cfg file, all files in all menus will be displayed without their file extensions, as shown below...

You can use spaces in the filename if you wish (see #4).

A Beta7 version of 1.55 is available in the Alternate Downloads area as usual.

It is almost ready for release, I am just waiting for one bugfix to grub4dos 0.4.6a from the developers.
E2B v1.55 will complain if the latest version of grub4dos is not used. Although it may work using earlier versions of grub4dos, some bugs have been fixed recently in grub4dos (one of which was quite serious to do with writing to NTFS files not working), so a new version is 'required'.

Many thanks to the E2B users who have suggested small tweaks and improvements to make E2B even better!

The latest grub4dos also allows you to disable or change the ► symbol that is displayed at the side of the highlighted menu entry - see the \_ISO\Sample_MyE2B.cfg file for details.

P.S. MakePartImage has also been updated to v 0.037 and now includes RMPartUSB.exe in the \e2b folder so you can restore the E2B partition from Windows using the RestoreE2B.cmd script, without needing to boot from the E2B USB drive to the CSM menu.

Please tick 'funny' 'interesting' or 'cool' or add a comment to let me know which posts you most enjoy.

Sunday 17 August 2014

Add Desinfect+Persistent Virus Updates to your Easy2Boot USB drive

Here are the steps to add the Desinfect 2014 (and 2015/2016/2017/2018/201819) ISO to you E2B USB drive and have persistent virus definition updates too ...

Saturday 16 August 2014

Add Desinfect 2014 + Persistence to your Easy2Boot multiboot USB drive

As with most ISO files, you can just add the Desinfect 2014 ISO file to your Easy2Boot USB drive and boot from it in BIOS/MBR mode - OR - you can drag-and-drop the ISO onto the MPI Toolkit FAT32 Windows Desktop icon to make a partition image file and then add the ct_desinfect_2014.imgPTN file to your Easy2Boot drive, if you want to 64-bit UEFI-boot to Desinfect as well as MBR-boot.


If you want to enable persistence however, you will need to use a special .mnu file as well as the Desinfect ISO file.

Adding a persistence ext2 file allows some Desktop settings to be remembered after a reboot. For instance, any files placed on the Desktop will be preserved. However, the background wallpaper is reset to the Desinfect wallpaper after every boot.

I also could not get the antivirus updates to be persistent using this method, they have to be downloaded each time you boot to Desinfect.

Note: You can have persistent updates, but not with persistence as well - see the next blog post!

Here is the .mnu file. The top lines are comment lines and contain instructions on how to add persistence. The .mnu file is also available in the Alternate Download Area from here.

# Make a \casper-rw ext2 file using RMPrepUSB in the root of the drive using RMPrepUSB
# File Name=desinfect-rw  Volume Name=casper-rw size=500MB or change as desired
# Place this .mnu file and the ISO in either \_ISO\MainMenu\MNU or \_ISO\LINUX\MNU
# This menu will work even on an NTFS USB boot drive
# IMPORTANT: you MUST run WinContig (Ctrl+F2) before booting E2B.

iftitle [if exist $HOME$/ct_Desinfect_2014.iso] Desinfect 2014 PERSISTENT\n Boot using .mnu file with persistence
if exist CD echo WARNING: Cannot use partnew command! && pause && configfile (bd)/menu.lst
if "%E2BDEV%"=="" set E2BDEV=hd0 && pause E2BDEV forced to hd0!
set ISO=ct_Desinfect_2014.iso
set PER=/desinfect-rw
#enable parttype output
debug 1
# make empty table entry in 3rd position in ptn table
parttype (%E2BDEV%,2) | set check=
debug off
set check=%check:~-5,4%
if "%check%"=="0x00" partnew (%E2BDEV%,2) 0 0 0
if not "%check%"=="0x00" echo WARNING: PTN TABLE 3 IS ALREADY IN USE - PERSISTENCE MAY NOT WORK! && pause
debug 1
if not exist %PER% echo WARNING: %PER% persistence file not found! && pause
errorcheck off
set P=0
if "%check%"=="0x00" partnew (%E2BDEV%,2) 0x0 %PER% && set P=1
errorcheck on

#Language
set L=debian-installer/language=de console-setup/layoutcode?=de
echo
set ask=
#English text below can be changed to German
if "%P%"=="1" echo -e PERSISTENCE IS ENABLED: Some settings, Desktop items, etc. will be remembered after reboot.\n\nNote: The background will always be reset back to the Desinfect wallpaper.\n      Virus updates are not persistent.\n      Always SHUTDOWN correctly to avoid corrupting the persistence file.\n

set /p:3 ask=Press E and [Enter] for English (within 3 seconds)... 

if /i "%ask%"=="E" set L=
#set L=debian-installer/language=en console-setup/layoutcode?=en

echo
echo
#map ptn 4 to ISO
partnew (%E2BDEV%,3) 0x0 $HOME$/%ISO%
map $HOME$/%ISO% (0xff)
map --hook
root (0xff)
set A=file=/cdrom/preseed/ubuntu.seed boot=casper 
set B=iso-scan/filename=
set INTISO=/software/desinfect-2014.iso
set C=quiet splash memtest=4 -- 
set D=persistent persistent-path=/
echo
if not exist %INTISO% echo ERROR: INTISO is set to %INTISO% but it is not present inside %ISO% && pause

kernel /casper/vmlinuz %A% %B%%INTISO% %C% %L% %D%
initrd /casper/initrd.lz

Note that the ct_Desinfect_2104.iso file actually contains a second ISO file inside it (/software/desinfect-2104.iso). It is this ISO file that we must use for the iso-scan/filename parameter.


Thursday 14 August 2014

F1 Help function added to Easy2Boot v1.55

A user requested an F1 help hotkey feature, so I have added this into E2B v1.55.

There is a new .mnu file for the Help Main menu entry and the actual Help text (English only) is held in an F1.cfg file:

  • \_ISO\MAINMENU\ZZZF1SubMenuHelp.mnu
  • \_ISO\e2b\grub\ENG\F1.cfg


Help menu screen (F1.cfg)

Help text is displayed in the console screen.


It is expected that the user will want his own F1 menu, so all they have to do is copy the \_ISO\e2b\grub\ENG\F1.cfg file to the \_ISO folder and edit it to show whatever help text they want for their E2B payload files and hotkeys, etc.

If you do not want a Main menu entry, but you still want the F1 hotkey to work, then you can specify a generic F1 hotkey in the \_ISO\MyE2B.cfg file. The user can then press F1 in any E2B menu and they will see the Help menu and so no Main Menu entry is needed.

There is example code in the Sample_MyE2B.cfg file for this (just uncomment the 3 lines):

# Make the F1 key show the Help Menu from any menu (uncomment 3 lines below) - you can put your own help file in \_ISO\F1.cfg
###if exist /_ISO/F1.cfg   ()/%grub%/hotkey [F1] "configfile /_ISO/F1.cfg" > nul && goto :f1skp
###if exist /%grub%/%LANG%/F1.cfg ()/%grub%/hotkey [F1] "configfile /%grub%/%LANG%/F1.cfg" > nul && goto :f1skp
###if exist /%grub%/ENG/F1.cfg ()/%grub%/hotkey [F1] "configfile /%grub%/ENG/F1.cfg" > nul
:f1skp


The F1 Help menu can be removed from the MAIN Menu by deleting the file \_ISO\MAINMENU\ZZZF1SubMenuHelp.mnu (in later versions of E2B use 'set NOF1=1' in the \_ISO\MyE2B.cfg file).


V1.55_Beta3.zip is available from the Alternate Download links on the Easy2Boot Download page.

Friday 8 August 2014

New .cfg file extension recognised by Easy2Boot

The new version 1.55 of E2B recognises the .cfg file extension which can be used for changing the 'theme' of E2B  (non-volatile, the change will be remembered on reboot).

Any .cfg files that are in a menu folder (e.g. \_ISO\MAINMENU or \_ISO\UTILITIES, etc.) will be enumerated and listed in the relevant menu.

The contents of the .cfg file should be the same as the contents of a valid MyE2B.cfg file.
When you select a .cfg file from the menu, QRUN.g4b runs and copies the contents of the file to the \_ISO\MyE2B.cfg file (which, of course, must be present).

The \_ISO\MyE2B.cfg file must be at least as big as your .cfg file.

To change the menu entry from just listing the filename+extension, you can make a .txt file for each .cfg file (containing a 'title' entry) in the usual way or use the 'set EXTOFF=1' line in the \_ISO\MyE2B.cfg file.

In this way you can switch to any 'theme' from a menu entry.


Jolene.cfg added to MAINMENU

To demo E2B menu capabilities or compare 'themes'  see http://www.easy2boot.com/configuring-e2b/demo-mode/ for ideas.

Thursday 7 August 2014

Add graphics adapter resolution auto-detection into Easy2Boot

You may want to display your E2B menu in the highest/best resolution possible.
For instance, some odd systems may not support 800x600 mode.

I always advise you to use the most common display resolution so that the menu will appear correctly on all systems. However, you can arrange E2B so that it will cope with a variety of different systems.

You will need a range of wallpaper bitmaps for each resolution (though in some cases the largest bitmap may work for smaller resolution displays).

Auto-Detect highest resolution and use correct wallpaper

The code below can be used in a \_ISO\MyE2B.cfg menu to auto-detect the highest resolution available and then set the graphicsmode and wallpaper for that resolution. 

Note that the position of the menu will remain the same (unless you also add extra code - e.g. if "%GMODE%"=="1024 768 24" set rstart=5) and so will the text colours, etc. See the Sample MyE2B.cfg file for an example.

So each wallpaper bitmap should be similar in colour and content because the menu position and text colours will not change.

# allow vbeprobe command to output text
debug 1
# list all available BIOS graphics adpapter modes
vbeprobe > (md)0x220+5
# turn off text output for future commands
debug off
# look for 640, 800 and 1024 modes - be careful to only use x24 or x32 modes for full colour bitmaps
cat --locate=", 640x480x24"  (md)0x220+5 > nul && set GMODE=640 480 24 && set MYWBMPGZ=/_ISO/nice640.bmp.gz
cat --locate=", 800x600x24"  (md)0x220+5 > nul && set GMODE=800 600 24 && set MYWBMPGZ=/_ISO/nice800.bmp.gz
cat --locate=", 1024x768x24" (md)0x220+5 > nul && set GMODE=1024 768 24 && set MYWBMPGZ=/_ISO/nice1024.bmp.gz

# DELETE THESE TWO LINES ONCE IT IS WORKING
cat (md)0x220+5
echo GMODE=%GMODE%  MYWBMPGZ=%MYWBMPGZ% && pause

Add a Change Language menu entry to Easy2Boot

This Change_Language.mnu file will be in the Sample mnu Files folder in v1.55 and later versions.
It allows the user to temporarily change the language strings (until reboot).

Using this and the Change_Theme.mnu, you can demo E2B to your colleagues!

You can modify it by adding or removing languages or write it in a different language other than English (save the file as UTF-8 if using non ASCII characters).

title Change the E2B Language\n Change the standard E2B menus to a different language
echo
echo Change Language
echo -e ===============
echo
echo Only the standard E2B menu entries, headings and some prompts will change.
echo  Note: This does not change the E2B Header or the Footer help text
echo
echo Please choose a language...
echo
echo 1 English
echo 2 Spanish
echo 3 German
echo 4 Brazilian Portuguese
echo 5 Simplified Chinese
echo 6 Traditional Chinese
echo
set ask=
set /p ask=Please enter a number : 
set LANG=ENG
if "%ask%"=="2" set LANG=SPANISH
if "%ask%"=="3" set LANG=GERMAN
if "%ask%"=="4" set LANG=PORTU_BRAZIL
if "%ask%"=="5" set LANG=SIMP_CHINESE
if "%ask%"=="6" set LANG=TRAD_CHINESE

configfile /%grub%/Menu.lst


Note that you can set a default language in your \_ISO\MyE2B.cfg file, but it must be set using a line like this - otherwise the Change Language menu will not work:

if "%LANG%"=="" set LANG=SPANISH


Add a 'Change Theme' menu to Easy2Boot

It is fairly easy to add a .mnu file which allows the user to choose a different background wallpaper:

title Change Wallpaper\n Choose a new E2B menu background
set CHOSEN=
call /%grub%/pickafile.g4b /_ISO .gz
if "%CHOSEN%"=="" configfile (md)0xa000+0x50
clear
splashimage /_ISO/%CHOSEN%
configfile (md)0xa000+0x50

The .gz files must contain a bitmap of exactly the correct resolution size - e.g. 800x600  (801x588 will NOT work!). The actual existing menu text and border positions, etc. is not changed however, so the images that you use should work with the same settings used by E2B as the default (or as used in your \_ISO\MyE2B.cfg file). So you will need to pick your images carefully (plain colour ones work best).


Today, devdevadev asked me if he could have a menu to switch between themes. You can use this to demo E2B, e.g. switch backgrounds, language, font, colours, etc.

A menu would prompt you to pick a .cfg file as shown below:


Here is the .mnu file that I came up with:

# Place all MyE2B.cfg and wallpaper files in \_ISO\mythemes and all rename .cfg files (amd any message GFXBoot file if more than one)
# Edit each \_ISO\mythemes\xx.cfg file so background or GFX has correct path
# e.g. set MYWBMPGZ=/_ISO/mythemes/stripedflat.bmp.gz  OR set GFX=mythemes/message  (note: no /_ISO/ for GFX path)
# Rename \_ISO\Sample_MyE2B.cfg to \_ISO\MyE2B.cfg (must be >1KB and larger than largest xxx.cfg file)
# For the default E2B theme, make a \_ISO\mythemes\Default_Theme.cfg file with just !BAT on the first line
# \_ISO\MyE2B.cfg file must be contiguous due to bug in grub4dos!

title Change Theme\n Choose a new E2B Theme

if not exist /_ISO/MyE2B.cfg echo ERROR: Please create a large \_ISO\MyE2B.cfg file && pause && configfile (md)0xa000+0x50
set CHOSEN=
errorcheck on
debug normal
graphicsmode 3
clear
echo Pick a Theme...
call /%grub%/pickafile.g4b /_ISO/mythemes .cfg
if "%CHOSEN%"=="" set DONEMENU= && configfile ()/%grub%/menu.lst
echo
echo Overwriting \_ISO\MyE2B.cfg file with \_ISO\mythemes\%CHOSEN%...
# fill (rd) with 0's , 0x82d0 is rd-base mem address, Fn24 is memset - fill memory  <addr> <string> <size>
map (md)0x300+200 (rd) > nul ;; read 0x82d0 > nul ;; call Fn.24  %@retval% 0x20  102400 > nul  
dd if=(rd)+1 of=()/_ISO/MYE2B.cfg > nul
if exist ()/_ISO/mythemes/%CHOSEN% dd if=()/_ISO/mythemes/%CHOSEN% of=()/_ISO/MyE2B.cfg > nul
if exist ()/_ISO/mythemes/%CHOSEN% chainloader /grldr
boot

I tested this using these files in the E2B \_ISO\mythemes folder :


The 'graphicsmode 3switch is required only if you use GFX Boot menus such as the sample Jolene_GFX.mnu. You can delete it if you don't have any GFXBoot .cfg files. If you do use GFXBoot menus, you will also need to copy all the \_ISO\docs\GFXSubMenu Files .mnu files into \_ISO\MAINMENU or else some menu entries will be missing from the GFXBoot menu when selected (this applies to any GFXBoot menu).

Both .mnu files will be in the Sample mnu Files folder in v1.55 of E2B and I will also put them in the Alternate Download area for a while too.

v1.55 will have the mythemes folder and a selection of .cfg files to choose from. You will just need to copy a $Default E2B Menu.cfg file to \_ISO\MyE2B.cfg and the .mnu file to \_ISO\MAINMENU.

Notes: due to a bug I just discovered in grub4dos, make sure you run WinContig on the E2B drive to make all files contiguous. It seems there is a problem with grub4dos and NTFS volumes if this is not done (if the target file is fragmented, then only the first 8096 bytes are actually copied when using dd on some files!).

And due to another bug, the full path for the bitmap file needs to be kept shorter than approx 64 characters as the splashimage command cannot handle long pathnames!