Webconverger is a professional Kiosk Browser which you can run from a LiveCD ISO or as an installed OS on a hard disk or USB drive (it is based on Debian and FireFox). It can also be configured as a 'signage' panel.
Kai Hendy of Webconverger offers a 30-day free trial which is needed if you want to make use of the 'control-panel' configuration features (though it seemed to mostly work without subscription for me).
Kai Hendy tells me:
The way it works is once your credit card is provided, you have a 30 day
free trial. So no deductions are made if you want to experiment for a
month. If there is a charge on a test machine, I can refund it, don't
worry.
For those customers, if they want to cancel for any reason, I offer a 30
day money back guarantee.
Once a machine is 'subscribed', all remote control-panel seemed to work well and as expected, although for some changes, a reboot was required.
If your E2B USB drive is a Removable drive (e.g. most USB Flash drives) then you can just directly boot from it as an .iso file from E2B (or use .isodefault to suppress the suggestion messages). You can enter the email address that you can also use for your subscription.
However, if your E2B USB drive is of the Fixed-disk type (e.g. USB HDD) then it will not boot directly from the ISO because the pre-defined linux boot parameters include the cheat code bootfrom=removable so that it will only boot from removable media.
A simple way to remove the bootfrom=removable code is...
to boot to the isolinux boot menu, select the menu item you want and then press TAB and edit the parameters to remove the bootfrom=removable words.

# Webconverger ISO contains cheat code so that it only boots from Removable media (e.g. USB Flash drive)
# To boot from USB HDD, we need this .mnu file
# Place WebConverger.iso and this menu file in \_ISO\LINUX\MNU folder
# This permanently patches the ISO file on the E2B drive after it has been run once
iftitle [if exist $HOME$/WebConverger.iso] WebConverger (permanent) \n Modify the ISO file
set ISO=WebConverger.iso
set NOSUG=1
set redir=> nul
/%grub%/QRUN.g4b $HOME$/%ISO%
echo
pause --wait=3 'bootfrom=removable' will be removed from the ISO, so we can boot from HDD...
# patch out word removable from boot menu
cat --locate==removable --replace="= " (0xff)/boot/live.cfg > nul
chainloader (0xff)
boot
NOTE: Method 2 (below) supersedes Method 1 and is a better method.
If this is done, Webconverger will automatically install updates and can also be configured.
You can clone an existing Webconverger flash drive and add the image to E2B as follows:
1. Boot to the Webconverger linux menu on your E2B drive
2. Insert a small USB Removable-type flash drive. I suggest you use no larger than a 2GB USB flash drive because a 2GB flash drive will produce a 2GB image file.
3. Install Webconverger to the USB flash drive - boot from it and check that it runs correctly.
4. Now we need to image the partition on the flash drive.
Use RMPrepUSB - select flash drive - Drive>File - C:\temp\WebconvergerInstalled - P1 - PALL - 0.
This will make a file called WebconvergerInstalled (no file extension) starting at the beginning of the first partition P1.
5. Create an empty folder on your Windows system Desktop called EMPTY and then drag and drop the empty folder onto the MPI_FAT32 Desktop shortcut to make a file called WebconvergerInstalled.imgPTN.
6. Copy the two files to your E2B drive:
\_ISO\LINUX\WebconvergerInstalled.imgPTN (30MB)
\_ISO\LINUX\WebconvergerInstalled (1 - 2GB image of your installed flash drive)
7. Run \MAKE_THIS_DRIVE_CONTIGUOUS (run as admin).cmd to make sure they are contiguous.
8. Now you can switch to the CSM menu (if you use SWITCH_E2B.exe then the files do not need to be re-ordered).
9. Add the following menu to the bottom of the \menu.lst file
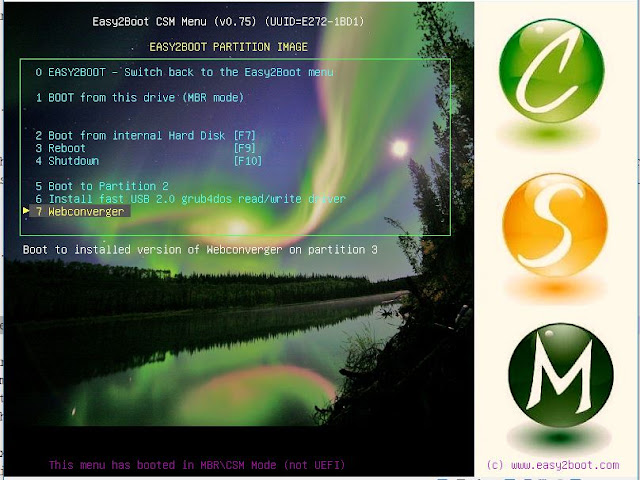
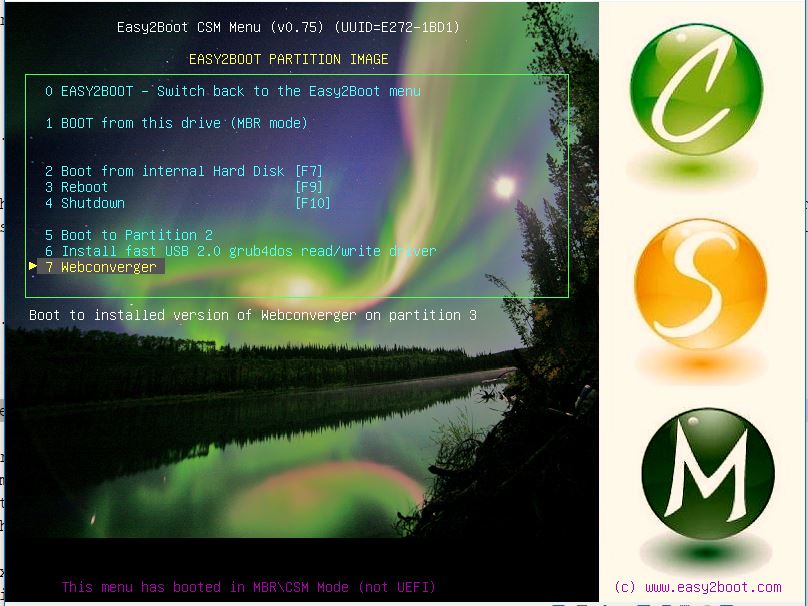
title Webconverger \n Boot to installed version of Webconverger on partition 3
parttype (hd0,2) 0x83 > nul
root (hd0,2) || rootnoverify (hd0,2)
# get params from /boot/extlinux/extlinux.conf
cat --locate=boot=live (hd0,2)/boot/extlinux/extlinux.conf > nul
cat --skip=%?% (hd0,2)/boot/extlinux/extlinux.conf | set params=
echo
#uncomment next line to open two tabs
#set params=%params% homepage=http://www.easy2boot.com%20http://www.rmprepusb.com xkb=-layout%20gb
### next line causes reload of firefox every 10 mins - for signage refresh so you can change homepage contents
#set params=%params% cron=*/10%20*%20*%20*%20*%20root%20killall%20firefox instantupdate
### ask user for any extra params
#echo
#set params=%params% %ask%
pause --wait=3 extlinux.conf params: %params%
echo
kernel /live/vmlinuz %params%
initrd /live/initrd.img
boot
This menu find the parameters that were used in the extlinux.conf file (they start with boot=live) and then uses them in it's own menu. This is necessary because the parameters used in the extlinux.conf file will change from one installation to another or when the version changes or is updated.
10. At the CSM menu, choose the Webconverger menu entry
The menu entries for 1 and 5 can be deleted from the \menu.lst if you wish and you can move the Webconverger menu up and maybe add a 'timeout 5' line too.
The Webconverger version number can be found by typing about: into the Webconverger browser address bar.
If you don't have a subscription, you can try adding extra parameters after the %params% string - just uncomment and edit the green line(s).
Note that if you have paid for a subscription, then adding extra parameters may affect any configuration changes you make, so I advise you not to add any extra parameters in this way.
Details of boot configuration options can be found here. Debug info here.
instantupdate - as soon as you change the home page all clients will update
kioskresetstation=2 - reset system after 2 mins (minimum is 60 secs, max 2hrs)
blank=1 - blank screen after 1 min, user can wake using key/mouse
blank=0 - don't blank screen after 10 mins
chrome=neon - use neon theme (no address bar) - signage mode
chrome=debug - remove Webconverter mods to Firefox
debug - boot in debug mode
xkb=-layout%20gb - set uk kbd
locale=uk
nobrand
showcursor
bgurl=http://files.easy2boot.com/200001601-700747101d/E2B.gif
cron=*/10%20*%20*%20*%20*%20root%20killall%20firefox - kill and relaunch firefox after 10 mins
Play full-screen YouTube video in endless loop (YouTube parameters)
homepage='https://www.youtube.com/v/9obNfwWjwj4?start=0&autoplay=1&loop=1&rel=0&showinfo=0&controls=0'
Play all videos in a channel
https://www.youtube.com/v/9obNfwWjwj4?start=0&autoplay=1&loop=1&rel=0&modestbranding=1&showinfo=0&listType=Playlist&list=PLtKQtLR6UfQ_CUlt9TZM5GiFiVpzazTMS
Show PDF
homepage=http://climato.free.fr/upload/easy2boot.pdf
Some options require a reboot before they take affect (e.g. chrome=).
Make sure you keep the configuration lines 'legal' - do not add any comments or illegal characters.
Use %20 instead of a space, if possible check that a URL works and then cut and paste it from the browser address bar into the configuration window. Do not use = in a URL when using the web page to update configuration because it cannot parse the URL correctly - e.g. YouTube URLs must not have = signs unless you use single-quotes around URL.
I found the instantupdate feature to be erratic. Sometimes, as soon as I entered the password, my Webconverger machines immediately loaded the new homepage (pretty awesome!) and sometimes I had to reboot each system to get the new homepage setting to take affect (not so awesome). This was my fault and due to using invalid characters such as a space or = or # or " in the configuration - e.g. modifying the homepage URL or trying to put comments in the config! This was fixed simply by enclosing the URL in single-quotes.
Note: When you connect the E2B USB drive to a Windows 10 Creator system, you will be prompted to format the ext partition - just close the Format dialogue box - do NOT format it!
Kai Hendy of Webconverger offers a 30-day free trial which is needed if you want to make use of the 'control-panel' configuration features (though it seemed to mostly work without subscription for me).
Kai Hendy tells me:
The way it works is once your credit card is provided, you have a 30 day
free trial. So no deductions are made if you want to experiment for a
month. If there is a charge on a test machine, I can refund it, don't
worry.
For those customers, if they want to cancel for any reason, I offer a 30
day money back guarantee.
 |
| The online configuration form can control many machines all registered to the same email account. |
Once a machine is 'subscribed', all remote control-panel seemed to work well and as expected, although for some changes, a reboot was required.
If your E2B USB drive is a Removable drive (e.g. most USB Flash drives) then you can just directly boot from it as an .iso file from E2B (or use .isodefault to suppress the suggestion messages). You can enter the email address that you can also use for your subscription.
However, if your E2B USB drive is of the Fixed-disk type (e.g. USB HDD) then it will not boot directly from the ISO because the pre-defined linux boot parameters include the cheat code bootfrom=removable so that it will only boot from removable media.
A simple way to remove the bootfrom=removable code is...
to boot to the isolinux boot menu, select the menu item you want and then press TAB and edit the parameters to remove the bootfrom=removable words.

Webconverger.mnu for E2B HDD
If you don't want to have to do this, you can use the following menu:# Webconverger ISO contains cheat code so that it only boots from Removable media (e.g. USB Flash drive)
# To boot from USB HDD, we need this .mnu file
# Place WebConverger.iso and this menu file in \_ISO\LINUX\MNU folder
# This permanently patches the ISO file on the E2B drive after it has been run once
iftitle [if exist $HOME$/WebConverger.iso] WebConverger (permanent) \n Modify the ISO file
set ISO=WebConverger.iso
set NOSUG=1
set redir=> nul
/%grub%/QRUN.g4b $HOME$/%ISO%
echo
pause --wait=3 'bootfrom=removable' will be removed from the ISO, so we can boot from HDD...
# patch out word removable from boot menu
cat --locate==removable --replace="= " (0xff)/boot/live.cfg > nul
chainloader (0xff)
boot
Installed Webconverger on E2B
You can have a fully installed version on your E2B USB drive (Removable or HDD).
Requirements
MPI Tool Kit v0.074 or later
RMPrepUSB v2.1.739 or later
1 or 2GB USB Flash drive (if you don't have one see the next section)
E2B drive
1 or 2GB USB Flash drive (if you don't have one see the next section)
E2B drive
NOTE: Method 2 (below) supersedes Method 1 and is a better method.
Method 1 - keep ext filesystem on separate partition (clone)
It is possible to install Webconverger to another USB drive by using the Install menu entry.If this is done, Webconverger will automatically install updates and can also be configured.
You can clone an existing Webconverger flash drive and add the image to E2B as follows:
1. Boot to the Webconverger linux menu on your E2B drive
2. Insert a small USB Removable-type flash drive. I suggest you use no larger than a 2GB USB flash drive because a 2GB flash drive will produce a 2GB image file.
3. Install Webconverger to the USB flash drive - boot from it and check that it runs correctly.
4. Now we need to image the partition on the flash drive.
Use RMPrepUSB - select flash drive - Drive>File - C:\temp\WebconvergerInstalled - P1 - PALL - 0.
This will make a file called WebconvergerInstalled (no file extension) starting at the beginning of the first partition P1.
5. Create an empty folder on your Windows system Desktop called EMPTY and then drag and drop the empty folder onto the MPI_FAT32 Desktop shortcut to make a file called WebconvergerInstalled.imgPTN.
6. Copy the two files to your E2B drive:
\_ISO\LINUX\WebconvergerInstalled.imgPTN (30MB)
\_ISO\LINUX\WebconvergerInstalled (1 - 2GB image of your installed flash drive)
7. Run \MAKE_THIS_DRIVE_CONTIGUOUS (run as admin).cmd to make sure they are contiguous.
8. Now you can switch to the CSM menu (if you use SWITCH_E2B.exe then the files do not need to be re-ordered).
9. Add the following menu to the bottom of the \menu.lst file
title Webconverger \n Boot to installed version of Webconverger on partition 3
parttype (hd0,2) 0x83 > nul
root (hd0,2) || rootnoverify (hd0,2)
# get params from /boot/extlinux/extlinux.conf
cat --locate=boot=live (hd0,2)/boot/extlinux/extlinux.conf > nul
cat --skip=%?% (hd0,2)/boot/extlinux/extlinux.conf | set params=
echo
#uncomment next line to open two tabs
#set params=%params% homepage=http://www.easy2boot.com%20http://www.rmprepusb.com xkb=-layout%20gb
### next line causes reload of firefox every 10 mins - for signage refresh so you can change homepage contents
#set params=%params% cron=*/10%20*%20*%20*%20*%20root%20killall%20firefox instantupdate
### ask user for any extra params
#echo
#set ask=
#set /p:3 ask=Add API params (e.g. debug chrome=neon blank=10) : #set params=%params% %ask%
pause --wait=3 extlinux.conf params: %params%
echo
kernel /live/vmlinuz %params%
initrd /live/initrd.img
boot
This menu find the parameters that were used in the extlinux.conf file (they start with boot=live) and then uses them in it's own menu. This is necessary because the parameters used in the extlinux.conf file will change from one installation to another or when the version changes or is updated.
10. At the CSM menu, choose the Webconverger menu entry
The menu entries for 1 and 5 can be deleted from the \menu.lst if you wish and you can move the Webconverger menu up and maybe add a 'timeout 5' line too.
The Webconverger version number can be found by typing about: into the Webconverger browser address bar.
If you don't have a subscription, you can try adding extra parameters after the %params% string - just uncomment and edit the green line(s).
Note that if you have paid for a subscription, then adding extra parameters may affect any configuration changes you make, so I advise you not to add any extra parameters in this way.
Details of boot configuration options can be found here. Debug info here.
instantupdate - as soon as you change the home page all clients will update
kioskresetstation=2 - reset system after 2 mins (minimum is 60 secs, max 2hrs)
blank=1 - blank screen after 1 min, user can wake using key/mouse
blank=0 - don't blank screen after 10 mins
chrome=neon - use neon theme (no address bar) - signage mode
chrome=debug - remove Webconverter mods to Firefox
debug - boot in debug mode
xkb=-layout%20gb - set uk kbd
locale=uk
nobrand
showcursor
bgurl=http://files.easy2boot.com/200001601-700747101d/E2B.gif
cron=*/10%20*%20*%20*%20*%20root%20killall%20firefox - kill and relaunch firefox after 10 mins
Play full-screen YouTube video in endless loop (YouTube parameters)
homepage='https://www.youtube.com/v/9obNfwWjwj4?start=0&autoplay=1&loop=1&rel=0&showinfo=0&controls=0'
Play all videos in a channel
https://www.youtube.com/v/9obNfwWjwj4?start=0&autoplay=1&loop=1&rel=0&modestbranding=1&showinfo=0&listType=Playlist&list=PLtKQtLR6UfQ_CUlt9TZM5GiFiVpzazTMS
Show PDF
homepage=http://climato.free.fr/upload/easy2boot.pdf
Some options require a reboot before they take affect (e.g. chrome=).
Make sure you keep the configuration lines 'legal' - do not add any comments or illegal characters.
Tip: Try enclosing the whole URL in single quotes if they contain & = # or other characters: homepage='https://youtu.be/CqWdKkM6-zk?t=1346'
Use %20 instead of a space, if possible check that a URL works and then cut and paste it from the browser address bar into the configuration window. Do not use = in a URL when using the web page to update configuration because it cannot parse the URL correctly - e.g. YouTube URLs must not have = signs unless you use single-quotes around URL.
I found the instantupdate feature to be erratic. Sometimes, as soon as I entered the password, my Webconverger machines immediately loaded the new homepage (pretty awesome!) and sometimes I had to reboot each system to get the new homepage setting to take affect (not so awesome). This was my fault and due to using invalid characters such as a space or = or # or " in the configuration - e.g. modifying the homepage URL or trying to put comments in the config! This was fixed simply by enclosing the URL in single-quotes.
Note: When you connect the E2B USB drive to a Windows 10 Creator system, you will be prompted to format the ext partition - just close the Format dialogue box - do NOT format it!
I have not tested whether this installation will auto-update to a newer version yet as there is no newer update available yet.
Boot to the Webconverger ISO on an E2B drive and use the Install WebConverger menu to install onto any USB Flash drive you have handy (it will wipe the drive).
Boot from the drive and test it. Then quit Webconverger and connect the Flash drive to your Windows system.
The files on the installed Webconverger flash drive are on a single ext volume.
If you install the Paragon extfs Windows driver on your Windows system (trial, time-limited version), you can have direct access to the files on the flash drive and copy them over.
If you have a linux system (or Virtual Machine), you can simply copy them to an empty folder on your Windows Desktop (via a FAT32 USB drive perhaps) and then make a FAT32 .imgPTN file from that folder.
Here is how I did it using the free DiskInternals.com linux reader application. It does not allow you to write to ext filesystems, but you can preview files (it will show hex contents too) and also extract files onto your Windows system.
This is a safer and more stable option than installing a driver.
1. Install diskinternals Linux Reader for Windows
2. Create a new WC folder on the Desktop
2. Use the Save option to copy the two folders, live and boot and the swap file to the WC folder on the Desktop (tip: I needed to press F5 after inserting the linux USB drive under Windows 10).
3. Drag-and-drop that WC folder onto the MPI_FAT32 shortcut to make a .imgPTN file. My .imgPTN file was 830MB in size.
4 Select and switch to the .imgPTN file
5. Now add the menu below to the bottom of the CSM \menu.lst file
title Webconverger \n Boot to installed version of Webconverger
# get params from /boot/extlinux/extlinux.conf
cat --locate=boot=live /boot/extlinux/extlinux.conf > nul
cat --skip=%?% /boot/extlinux/extlinux.conf | set params=
echo
#uncomment next line to open two tabs
#set params=%params% homepage=http://www.easy2boot.com%20http://www.rmprepusb.com xkb=-layout%20gb
### next line causes reload of firefox every 10 mins - for signage refresh so you can change homepage contents
#set params=%params% cron=*/10%20*%20*%20*%20*%20root%20killall%20firefox instantupdate
### ask user for any extra params
#echo
#set params=%params% %ask%
#echo
pause --wait=3 extlinux.conf params: %params%
echo
kernel /live/vmlinuz %params%
initrd /live/initrd.img
boot
See method 1 above for other hints and tips
Method 2 - Making a smaller single FAT32 .imgPTN file
If you do not have a spare 1GB or 2GB flash drive, you can use any flash drive with the following method...Boot to the Webconverger ISO on an E2B drive and use the Install WebConverger menu to install onto any USB Flash drive you have handy (it will wipe the drive).
Boot from the drive and test it. Then quit Webconverger and connect the Flash drive to your Windows system.
The files on the installed Webconverger flash drive are on a single ext volume.
If you install the Paragon extfs Windows driver on your Windows system (trial, time-limited version), you can have direct access to the files on the flash drive and copy them over.
If you have a linux system (or Virtual Machine), you can simply copy them to an empty folder on your Windows Desktop (via a FAT32 USB drive perhaps) and then make a FAT32 .imgPTN file from that folder.
Here is how I did it using the free DiskInternals.com linux reader application. It does not allow you to write to ext filesystems, but you can preview files (it will show hex contents too) and also extract files onto your Windows system.
This is a safer and more stable option than installing a driver.
1. Install diskinternals Linux Reader for Windows
2. Create a new WC folder on the Desktop
2. Use the Save option to copy the two folders, live and boot and the swap file to the WC folder on the Desktop (tip: I needed to press F5 after inserting the linux USB drive under Windows 10).
3. Drag-and-drop that WC folder onto the MPI_FAT32 shortcut to make a .imgPTN file. My .imgPTN file was 830MB in size.
 |
| Linux Reader application. |
5. Now add the menu below to the bottom of the CSM \menu.lst file
title Webconverger \n Boot to installed version of Webconverger
# get params from /boot/extlinux/extlinux.conf
cat --locate=boot=live /boot/extlinux/extlinux.conf > nul
cat --skip=%?% /boot/extlinux/extlinux.conf | set params=
echo
#uncomment next line to open two tabs
#set params=%params% homepage=http://www.easy2boot.com%20http://www.rmprepusb.com xkb=-layout%20gb
### next line causes reload of firefox every 10 mins - for signage refresh so you can change homepage contents
#set params=%params% cron=*/10%20*%20*%20*%20*%20root%20killall%20firefox instantupdate
### ask user for any extra params
#echo
#set ask=
#set /p:3 ask=Add API params (e.g. debug chrome=neon blank=10) : #set params=%params% %ask%
#echo
pause --wait=3 extlinux.conf params: %params%
echo
kernel /live/vmlinuz %params%
initrd /live/initrd.img
boot
See method 1 above for other hints and tips
No comments:
Post a Comment