You can run android x86 on an Intel\AMD x86 system from an ISO with persistence directly from your E2B drive.
The steps are:
1. Download a suitable version of Android x86 as an ISO file. Note that you can obtain versions to match different systems (e.g. eeePC, etc.). Using the wrong version on some systems may result in problems with the mouse or touchscreen, etc.
4. Create an ext2 file in the E2B root (top level folder) using the RMPrepUSB - Create ext2 FS button - the file name should be \android-rw, but the volume name and size can be whatever you like.
You can instead use Make_ext.exe which is already on the E2B drive. (\_ISO\_Make_Ext.bat).

The steps are:
1. Download a suitable version of Android x86 as an ISO file. Note that you can obtain versions to match different systems (e.g. eeePC, etc.). Using the wrong version on some systems may result in problems with the mouse or touchscreen, etc.
- android-x86-4.0-r1.1-asus_laptop.iso for ASUS Laptops/Tablets
- android-x86-4.0-r1-amd_brazos.iso for AMD Brazos platform
- android-x86-4.0-r1-eeepc.iso for ASUS Eee PC family
- android-x86-4.0-r1-s103t.iso for Lenovo S10-3t tablet
- android-x86-4.0-r1-tegav2.iso for Tega v2(Atom N455)
- android-x86-4.0-r1-thinkpad.iso for IBM thinkpad tablet
- android-x86-4.0-r1-tx2500.iso for HP tx2500
2. Copy the ISO file to a MNU folder on your E2B USB multiboot drive (e.g. \_ISO\MAINMENU\MNU or \_ISO\LINUX\MNU).
3. Copy the android_x86_Persistent.mnu file to the same folder as your Android ISO file.
Then Edit the .mnu file so that the ISO filename matches your ISO filename.
Then Edit the .mnu file so that the ISO filename matches your ISO filename.
4. Create an ext2 file in the E2B root (top level folder) using the RMPrepUSB - Create ext2 FS button - the file name should be \android-rw, but the volume name and size can be whatever you like.
You can instead use Make_ext.exe which is already on the E2B drive. (\_ISO\_Make_Ext.bat).
5. Make all files contiguous using RMPrepUSB - Ctrl+F2.
You can find the android .mnu file in the Alternate Downloads area (link on this page) or in later versions of E2B in the \_ISO\docs\Sample mnu files folder (1.54 or later).
Note that for persistence, we must specify the linux drive name in the kernel parameters. The .mnu code tries to calculate this, but you can override it by typing in the correct letter if it guesses wrongly.
For instance, if you boot from your E2B USB drive on a laptop containing a single HDD, the .mnu file will guess that the USB drive will be 'sdb' once android boots - if this is incorrect, and it will actually be 'sdc' then just type c followed by the [ENTER] key when you are prompted by the E2B menu. If you don't type anything within 2-3 seconds then it will just use the calculated value. If the drive letter is wrong, you just won't get persistence!

In this case it was a (sda)
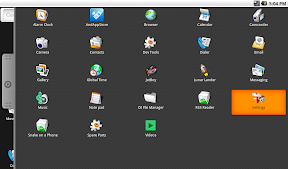
If your mouse is not working in android x86, use the TAB, ESC and ENTER keys as well as other keys to navigate the menus and icons.
Note: I had a few problems booting some of the ISOs in 'Resident' mode on some systems, but the Guest mode seemed to work. Android_x86 also did not seem to like VBox virtual machines much!
See also this video.
You can also try the E2B Grub2 menu system which can boot to PhoenixOS via UEFI&MBR 32&64 and remix via UEFI&MBR 64-bit.
Please tick 'funny' 'interesting' or 'cool' or add a comment to let me know which posts you most enjoy.
Tip: You can tell what drive letter the E2B USB drive is as android boots.
If your mouse is not working in android x86, use the TAB, ESC and ENTER keys as well as other keys to navigate the menus and icons.
Note: I had a few problems booting some of the ISOs in 'Resident' mode on some systems, but the Guest mode seemed to work. Android_x86 also did not seem to like VBox virtual machines much!
See also this video.
UEFI-booting
It seems that the .iso files do not work well with UEFI-booting and there is a separate .img download for UEFI-booting. Simply drag-and-drop one of the EFI .img files onto the MPI_FAT32 desktop shortcut (after installing the MPI Tool Kit), and create a .imgPTN file. This should now UEFI-boot (but won't MBR boot!)You can also try the E2B Grub2 menu system which can boot to PhoenixOS via UEFI&MBR 32&64 and remix via UEFI&MBR 64-bit.
Please tick 'funny' 'interesting' or 'cool' or add a comment to let me know which posts you most enjoy.
No comments:
Post a Comment