This means that a E2B USB drive (or any drive or partition) can contain multiple VHD or VDI Linux files and you can boot to a full Linux and run it at full speed (no persistence file is used). The only problem is that you cannot update the Linux kernel when booting in this way. If you wish to update the Linux version, you should do this by booting the VHD/VDI file under a Virtual Machine again - update the kernel - and then re-run the vtoyboot.sh script again. Then you can copy the new file to the E2B USB drive.
To update your E2B USB drive
See Alternate Downloads - Latest Beta folder for latest E2B version. If you wish to also test grub4efi, you can download the experimental 2.16gEFI version.
agFM v1.92 supports .vtoy files - run Ptn2:\e2b\Update agFM\Download and update agFM_v2.cmd to get the latest version of agFM.
agFM v1.92 supports .vtoy files - run Ptn2:\e2b\Update agFM\Download and update agFM_v2.cmd to get the latest version of agFM.
Note: To boot using E2B/agFM/Ventoy, the file extension must be changed to .vtoy. It is suggested that you name the file using either a .vdi.vtoy or .vhd.vtoy file extension, so that you will remember what the original format of the file was. Since these are fixed VHD or VDI files, you will need lots of space!
The instructions for making a .vdi or .vhd file are on the Ventoy page here. The five steps are basically:
1. Create a new VM with a blank 20GB+ VHD or VDI file (located on a fast internal hard disk - not a USB drive!) and boot from a Linux install ISO which has been configured in the virtual machines DVD drive. For Linux Mint, 15GB may not be quite enough. If you are planning on adding lots of apps, etc. then use a larger size for the virtual disk.
2. Legacy boot to the VM's DVD and install Linux to the VHD\VDI
3. Configure the VHD\VDI for both Legacy and UEFI64-booting
4. Run the vtoyboot.sh script to modify the VHD\VDI
5. Copy the VHD\VDI file to your E2B USB drive (e.g. \_ISO\LINUX folder) and give the file a .vtoy file extension.
The file should now be bootable in E2B (Legacy), agFM (Legacy), agFM (UEFI64), Ventoy for E2B (Legacy), Ventoy for E2B (UEFI64) and if you are using the latest E2B 2.16gEFIBeta which uses grub4efi E2B (UEFI64) - and of course, Legacy and UEFI64-boot on an 'official' Ventoy USB disk.
How to make a Linux Mint Legacy\UEFI64-bootable .vtoy file
I used a Windows 10 system and Virtual Box 5. I used the linuxmint-21-cinnamon-64bit.iso as the source ISO.
1. Configure a new VBox VM with a new 20GB or larger VHD or VDI (must be of the FIXED type - not dynamic) and has the linuxmint ISO in the virtual DVD drive.
2. Start the VM in Legacy mode (not UEFI mode as stated in the Ventoy instructions) and install a Legacy version of LinuxMint to the virtual hard disk.
3. Reboot directly from the Virtual hard disk and ensure the system is stable.
4. Now install the UEFI64 boot files by following the video here. You need to run the commands:
sudo apt-get install grub-efi-amd64-bin sudo grub-install --force --removable --target=x86_64-efi --efi-directory=/boot/efi --bootloader-id=Ubuntu sudo update-grub
5. Check you can still reboot in Legacy mode and then tick the 'Enable EFI' checkbox in the System properties of Virtual Box and then test that you can now also boot in UEFI-mode too.sudo apt-get install grub-efi-amd64-bin sudo grub-install --force --removable --target=x86_64-efi --efi-directory=/boot/efi --bootloader-id=Ubuntu sudo update-grub
6. Boot to the Linux VM and use the browser to go to the https://ventoy.net/en/plugin_vtoyboot.html page and download the vtoyboot ISO using the Linux browser (Firefox).
7. Mount and extract the folder from the ISO to make a new folder on the Linux Desktop. (Tip: keep this folder on the virtual disk in case you later update the Linux kernel and need to re-run the script later).
8. Open a Terminal session and follow the directions on the Ventoy web page by running sudo sh vtoyboot.sh (see screenshot below).
9. Shutdown and reboot the VM in both Legacy and UEFI64-mode several times to ensure all is stable.
10. Copy the VHD\VDI file to your E2B USB drive's \_ISO\LINUX folder and give it a .vtoy file extension - e.g. \_ISO\LINUX\Linux Mint 64-bit.vdi.vtoy.
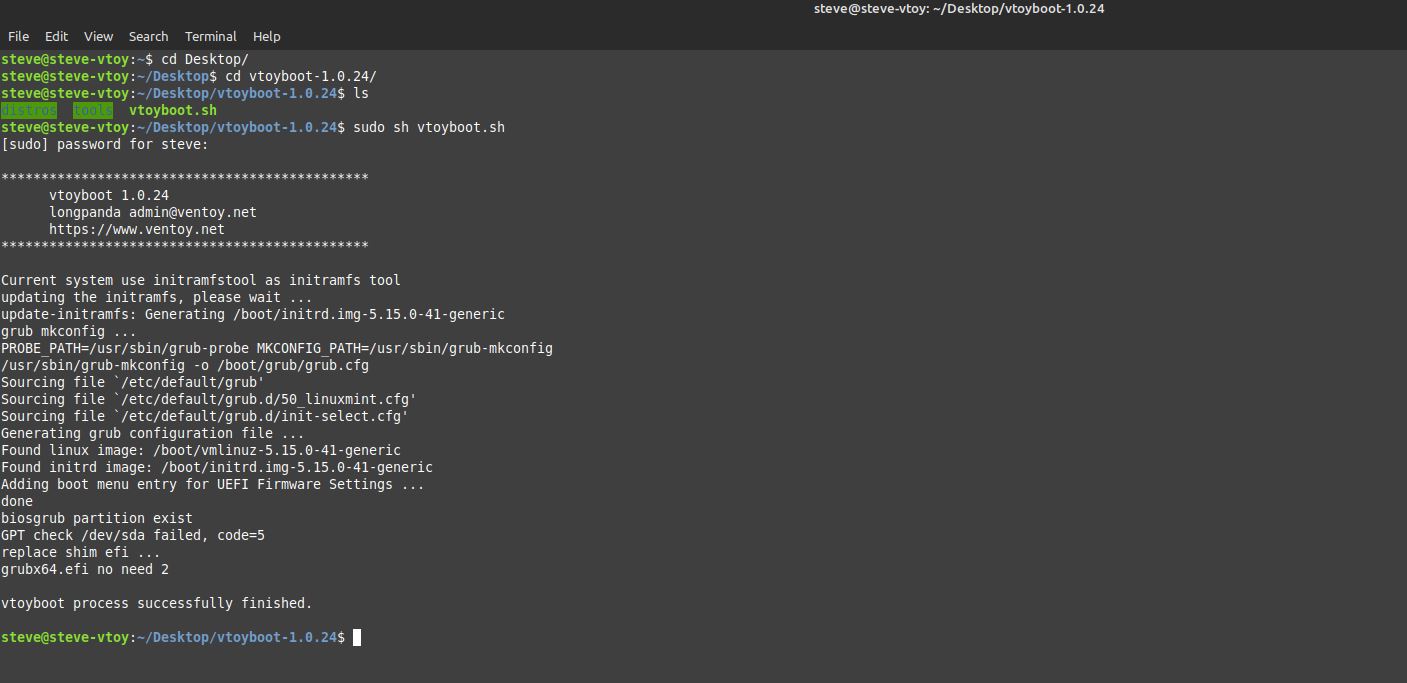 |
| Running the vtoyboot.sh script in the VM. |
Note that I found some systems (e.g. Lenovo IdeaPad 300) did not seem to like booting to a .vtoy file at all - whereas other systems (e.g. Asus Z87 PC or VirtualBox) booted OK.
Also, when UEFI64-booting, you may see a 10-second Ventoy WARNING text message saying that the drive is not an official Ventoy drive, however after 10 seconds, it boots normally anyway.

You can download my 22GB Fixed VDI .vtoy file containing Linux Mint here (4GB .zip file) - LinuxMint User Login: Steve Password: easy2boot. The file should be both Legacy BIOS bootable and UEFI64 bootable.
Note: The 'Getting started with Ventoy' v1.12 eBook also explains how to make Partition 1 accessible from LinuxMint once booted even if not using Ventoy to boot to the .vtoy file.
A1ive grub2 natively supports linux vtoy vhd boot (uefi only), e.g. map --vtoy (hd0,2)/manjaro.vhd.vtoy.
ReplyDeleteFixed vdi should also be supported, but you need to insmod fixed_vdi.mod. (I forget if it is supported or not, it's experimental.)
i386 fixed_vdi.mod doesn't seem to be present in my version of grubfm.or grubfm_multiarch.iso? I tried map --vtoy with my Mint .vtoy file under UEFI but it failed to find BOOTX64.efi. I will add screenshot to end of article.
DeleteI downloaded the Ubuntu Mint.vdi.vtoy you uploaded and converted it to vhd (using vbox), it works.
Deletehttps://imgur.com/a/8f99nKh
oh, nice! I added the .vtoy type and used Ventoys suggested method.
ReplyDelete