If you have purchased a new computer, perhaps have built your own PC or have a PC/notebook which is over a year old, you should check these things now and at least once a year.
Introduction
Modern computers are able to monitor various temperatures, fan speeds and voltages throughout the system. You can easily download software to display these values (often the BIOS setup/configuration menu system will display them too). Using SMART, we can also find out about the health of our internal disk drives too.
If you have received a new or second-hand system recently, a typical problem is that during transportation, the CPU heatsink may have come loose. This would mean that your CPU will get too hot and when this happens, modern PCs will usually 'throttle back' and go slow to avoid permanent damage to the CPU.
If you have a computer that is a few years old, the thermal paste between the CPU and the CPU heatsink may have dried out. Again, your CPU may be getting too hot.
Also, if your PC\Notebook is older than a year or so, it may have accumulated dust and cobwebs! This can seriously affect the air flow through the system and can thus cause the hard drives and CPU to overheat.
If you have overclocked your system, you will need to be particularly careful, because you are probably running it at its maximum performance capabilities - any overheating may cause damage or a system crash!
Some monitoring programs which I recommend you to try are:
- Core Temp - Displays CPU temperatures in stay-ontop box or in System Tray.
- Open Hardware Monitor - reports and plots many different parameters
- Speed Fan - reports and can control fan speeds (depending on hardware compatibility)
- HWInfo - very techy app. (can be dangerous) but extremely powerful. Tick the 'Sensors only' checkbox. Can report if Thermal Throttling has occurred due to CPU overheating.
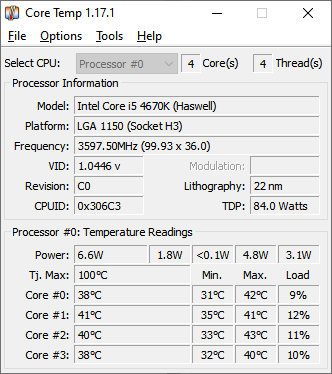 |
| Temperatures can be display in the System Tray and set a threshold. |
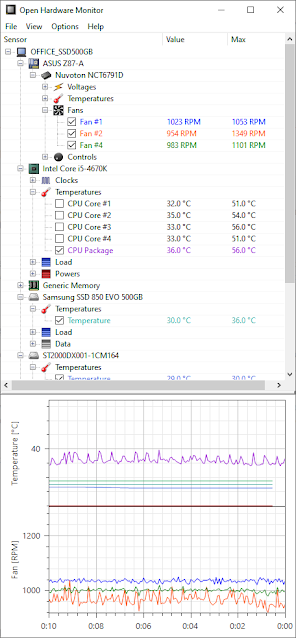 |
| OHM can plot selected parameters. |
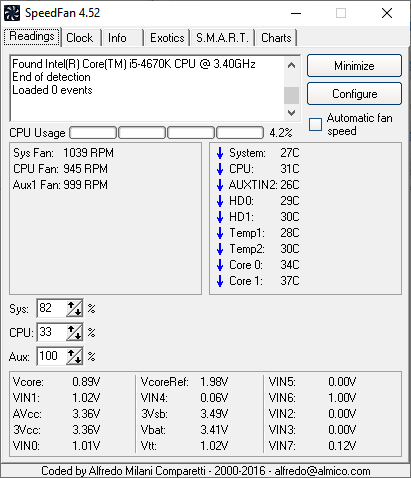 |
| SpeedFan can also control fans speeds (if compatible) |
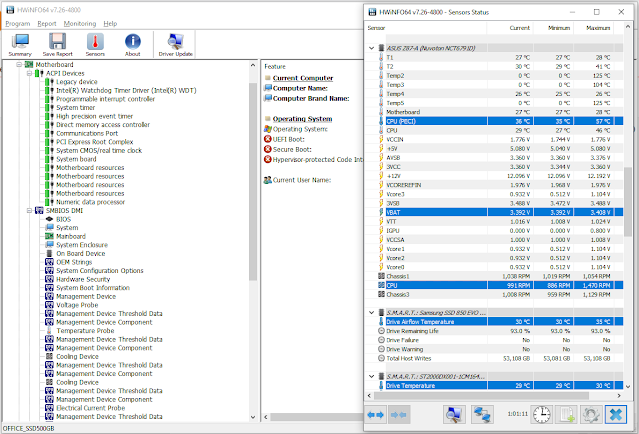 |
| HWInfo is very powerful - use with care if exploring the other options! |
1. CPU Temperature
Your CPU will have a maximum transistor junction temperature specified by the manufacturer (Intel or AMD) called TjMax. Core Temp will display this maximum temp. if it recognises your CPU and knows the specification. However, it may not be correct, so it is best to double-check on the CPU manufacturers website.
The TjMax temperature should never be exceeded because most CPUs will simply slow down if they get too hot and thus dissipate less heat. However, if your CPU Core Temperature is getting within 5 deg C of TjMax, you should be very worried! A CPU Core temperature of 60-70 deg C or less is desirable.
What you should do is stress your CPU (there is a Benchmark stress test tab in CPUID's CPU-Z application - or download a copy of Prime95). Then make a note of the maximum CPU temperature recorded by Core Temp and set a warning threshold above that so that if your CPU starts to get hotter after 6 months or so, you know that your thermal paste is drying up or the air vents are blocked or you have faulty fans!
2. CPU Fan Speed
When I worked for Research Machines, I was responsible for introducing hardware monitoring software into the PC production process in the factory. We produced up to 1000 PCs and notebooks a day. The software would run a stress test and then measure the temperatures, fans speeds and voltages. Because it knew what the expected values were for each system (depending on CPU, case type and mainboard model) we could detect and fail any system which had readings outside of the expected range.
After trialling the software for a few weeks, it quickly became apparent that measuring CPU temperature was NOT a good indication of a faulty heatsink or CPU fan! The reason for this was that if the CPU got too hot, then the CPU fan would simply speed up in order to reduce the temperature of the CPU. Therefore, unless the heatsink was completely missing, the CPU would never get too hot!
Also, because each mainboard was tested using Automated Test Equipment at the manufacturers factory, we very rarely saw any bad voltages on any of these new OEM mainboards or notebooks.
In fact, the most important parameter to monitor was the CPU fan speed! If the CPU heatsink had not been attached correctly or the wrong part used, then the fan would spin at a much faster rate than expected for that CPU+case type+mainboard combination. If you are producing hundreds of systems a day, you can quickly plot a graph from the logged data to show the min., max. and median values for each type of system.
Before the sensor monitoring software was introduced, RM had an overall system customer 'return rate' of 0.4% (half of these were always due to end user error). Once the monitoring software was introduced, the return rate fell to 0.2% (most of these returns were thus due to customer error), and 95% of the extra build faults that were detected in the factory burn-in test stage were due to incorrectly fitted heatsinks on the assembly line! An incorrectly fitted heatsink would be likely to come loose during delivery, thus causing a customer return - hence the great reduction in the end-user return rate.
The moral of this story is that your CPU temperatures may look OK, but your CPU fan may spinning like mad and desperately trying to keep the CPU cool! This could be due to:
- Faulty CPU fan (or fan control software, if installed)
- Loose CPU heatsink
- Insufficient or dry thermal paste
- High internal case air temperature due to blocked vents
- Inadequate heatsink/fan assembly
 |
| Arctic 12 CO for 115x CPUs |
If you just need to replace any dried-out thermal paste on your heatsink with new paste, make sure to buy decent thermal paste which has good performance and does not dry out. Also ensure that when you replace the heatsink, it makes good contact with the top of the CPU (clean all surfaces with isopropyl alcohol first, it is very useful stuff!).
3. Hard Disk Temperatures and Disk Health
Because 'spinning rust' hard disks do not like getting too hot (over 60 deg C) you should check their temperatures in case they have a fever (or Covid19 ;-). Use SMART to do this for each drive (Open Hardware Monitor, Speed Fan, CPU-Z or HWInfo will display disk temperatures via SMART).
SMART will also display your disk's health, although in my experience you rarely get a SMART 'fail' indication until it is too late. If you suspect a disk may be on it's way out, use CrystalDiskInfo to check all the SMART data, especially the Read Error rate, Reallocated Sector value, Seek Error Rate and Uncorrectable errors (the Raw Values column often contains the 'event count' value).
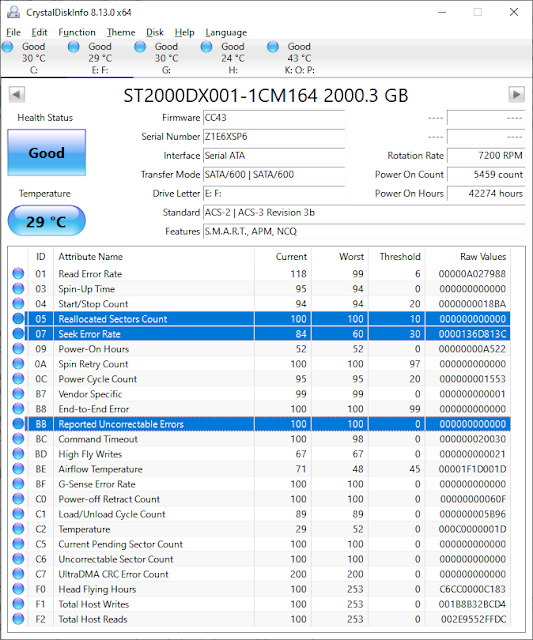
You are supposed to check that the Current Value is well above the Threshold value, but these numbers are 'mangled' by the drive manufacturers and although they seem to use 100 as the start value (for 100% good?), some values start at 200. See here for a real-world explanation and how manufacturers have turned a good idea into a complete and useless mess!
Spinning rust hard disks can be expected to get seek errors but the Reallocated Sector Count (raw value) should be 0, or at least a low number, because it means that the disk has got so many errors from some sectors that it has stopped using that sector and used a different sector instead. Uncorrectable errors are very bad news (it means the OS should have reported a serious disk error and failed in some way). If you get DMA CRC errors it usually indicates you may have a bad disk data cable or bad data connection (more common with older IDE drives).
4. Internal RTC Battery
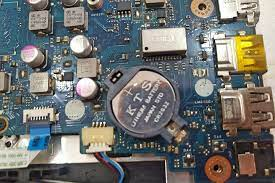 |
| Lest we forget... |
Software such as Open Hardware Monitor or HWInfo may report a 'VBAT' voltage of around 3V, however the reported voltage cannot be trusted because the power supply is on and it may be supplying power to the RTC circuit via the 3V standby rail - so all you are measuring is the PSU voltage.
- When you switch on your system in the morning, it may reset/restart a few times before booting because it has lost its BIOS settings and the BIOS has to figure out what memory configuration/speed, etc. it has to set. It may also lose other BIOS settings on occasion.
- The BIOS configuration menu shows the wrong date and time.
 |
| Set correct BIOS Time and Date (+/- 1 minute). |
- Reboot the computer and go into the BIOS settings - check the Date and Time is correct against your watch within 1 minute (it should be because Windows sets it to the correct (internet) time when it boots). If it is not correct, boot to Windows/Linux and then restart - or set the correct date and time manually in the BIOS.
- Power off the system.
- Disconnect the MAINS cable (if a laptop, also remove the main battery pack).
- Press the Power button (it should not switch on because it has no power!)
- Wait 10 minutes (1 minute is not long enough because you have to detect that the clock is slow by 10 minutes or so in step 7).
- Reconnect the mains cable and switch on the system - quickly press the key to get into the BIOS settings - e.g. ESC or F1 - do NOT let it boot to Windows\Linux (if it does - start at step 1 again!).
- Now read the time and date and check it against your watch - if the date has reset to a much earlier date then your battery is very flat. If the date is correct but the time is slow, it means it had stopped ticking due to insufficient voltage whilst it was off for 10 minutes. So unless it shows the current time and date, your battery needs replacing as it is nearly flat.
No comments:
Post a Comment