I recently came across a YouTube video which booted from a large dedicated USB drive to run Nvidia and AMD diagnostics using MATS (Memory Automated Test System) and MODS (Modular Diagnostic Software).
Nvidia has a proprietary software tool called MODS (Nvidia MOdular Diagnostic Software) which has a standalone VRAM test called MATS. How to use MATS can be found below.
- Here is a written guide on how to use MATS Nvidia Memory Testing Guide.
- Here is a video by MV TechLabs on How to set up and use MATS
- Overview of MATS/MODS: https://rk.edu.pl/en/nvidia-modular-diagnostic-software-mods/
Note: To get the Kings_Overkill USB drive fully working - scroll down!
Also see this article.
To make a new bootable USB HDD with all three test images, see 'How to make a MODS and MATS USB drive' below.
The USB he created comprised of three separate Primary MBR partitions with each partition containing a separate set of bootable files:
- Partition 1: nVidia RTX 30xx Series And Before 5GB
- Partition 2: nVidia RTX 20xx, GTX 16xx/10xx/9xx/7xx/6xx/5xx Series And Before 5GB
- Partition 3: AMD RX4xx/RX5xx/RXVEGA64/R7/R9 Series/HD7xxx 60GB
I made a separate USB drive from the .rar files from the instructions in the video but for some reason the ext4 Partition 3 seems to be corrupt on my drive and would not boot at all :-(.
However I could legacy boot and UEFI64-boot OK to Partitions 1 and 2 of the new USB drive.
I wanted to add some sort of bootable images of these to my E2B drive so I used RMPrepUSB - File - Make grub4dos ISO file function to make a bootable ISO. However, the ISO file only worked when Legacy booting (it hung on a UEFI boot as did Ventoy).
So I used MakePartImage to make some .imgPTN23 partition image files directly from the first two partitions.
 |
| There is also a DOS option. |
 |
| Linux test environment. |
These seem to both Legacy and UEFI64 boot OK, but as I do not have a system with an Nvidia card it does not automatically run the test (as I think it is supposed to).
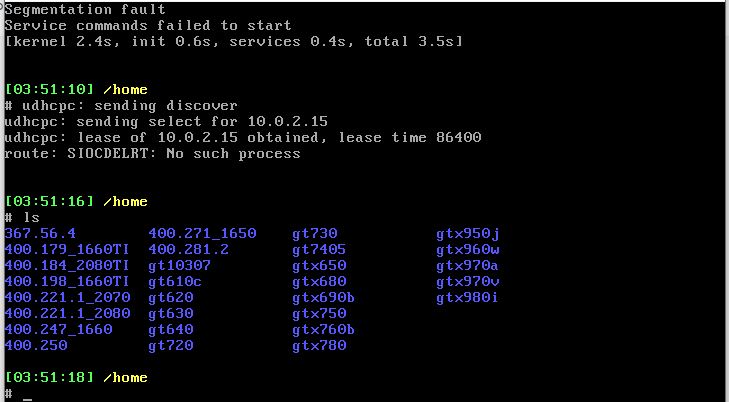
The folders contain different versions of the MATS test in each image:
RTX20xx (Partition 2)
- 400.250
- 400.281.2
- 367.56.4
- 400.271_1650
- 400.247_1660
- 400.221.1_2080
- 400.198_1660TI
- 400.184_2080TI
- 400.221.1_2070
- 400.179_1660TI
- gt610c
- gt620
- gt630
- gt640
- gt720
- gt730
- gt7405
- gt10307
- gtx650
- gtx680
- gtx690b
- gtx750
- gtx760b
- gtx780
- gtx950j
- gtx960w
- gtx970a
- gtx970v
- gtx980i
- 455.127
- 455.107_3060
- 455.120_3080
- 455.107_SKU10_3070
Before testing, you should ensure the integrated graphics is disabled in the BIOS settings (set IGPU?) and disable CPU power management in the BIOS settings also. Secure Boot should be disabled if UEFI64-booting.
Apparently, to run the AMD GPU tests you should:
- Select Option 3
- When the text scrolls up the screen, at the end it says 'Press ENTER for maintenance or press control+D to continue'
- You need to Press ENTER
- Then type ls (LS but lower case) and ENTER
- Now you see a list of AMD GPU models to test.
- To run the test from the list type ./ then the name of the models from the list - for example ./390 for R9-390 and afterwards run ./390g to display the result log.
How to make a MODS and MATS USB drive
Step 1: Download ready-made RTX20xx and RTX30xx E2B image files
- MATS_RTX20xx_password_is_e2b.zip
- MATS_RTX30xx_password_is_e2b.zip
 |
| RTX 20xx legacy boot menu (after switching in the image file). |
 |
| UEFI64-Boot to MAINMENU folder and select a file |
 |
| Press 1 to replace Partition 1 with the selected image. Then reboot to Partition 1 to run the Linux image. |
 |
| UEFI-boot from Partition 2 to restore the E2B partition. |
Step 2: AMD Partition image #2
Running the tests
Useful commands when booted to the Linux images are:
less /report.txt - check report after RTX test run
biosinfo - check type of graphics card as reported by Video BIOS
vga - test vga memory?
mats -h - list mats commands
mats will automatically make a report.log file
reboot
cd rx470
./tserver -boardtest=mylog
cd ./367.56.04
./mods gputest.js -skip_rm_state_init -mfg -notest
./mats -3d_card -e 10
./mods gputest.js -oqa -old_gold -test 178 -fan_speed 70 -dramclk_percent 100 -ignore_fatal_errors -run_on_error -matsinfo
AMD: ./tserver -boardtest=memfa
nVidia 367: ./mods gputest.js -skip_rm_state_init -mfg -notest
nVidia 455: ./mods gputest.js -skip_rm_state_init -notest
nVidia 400: ./mods gputest.js -skip_rm_state_init -short -notest
./mats -3d_card -e 10
./mats -n1 -e10
For the 455.127 test, steps 1,2,3 have errors - use these commands instead:
./mods gputest.js -skip_rm_state_init -notest
for dual graphics card test commands:
./mats -3d_card -e 10
./mats -n 1 -e 10

Search the partition (after switching in the .imgPTN23 file) for .PDF files for more info on how to use the programs.
Some other videos on MODS/MATS are here:
and pages of general info are here and here and here.
Tip: Search for 'easymats 0005' to find a download of a larger 5-partition version with Chinese instructions (but download images are English). I suspect the kings_overkill download was made from this larger disk image. |
| easymats 0005 legacy boot menu |
Fix for Kings_Overkill AMD booting issues

If you make a 3 partition USB drive using the Kings_Overkill files (1.pmf, 2.pmf, 3.pmf) then you can legacy boot to the above grub4dos menu but grub4dos does not seem to like the ext4 partition when you choose menu entry 3 for AMD.
I suspect part of the problem is to do with using a recent version of DiskGenius (or maybe using a 64-bit version instead of a 32-bit version or maybe it was originally ext2 or ext3?).
The very old version of grub4dos that is used in the image does not seem to like the ext4 volume made by DiskGenius and grub4dos cannot read any files from it.
To fix the three/four partition in the KINGS_OVERKILL USB disk made using the latest version of Disk Genius, I did the following:
1. Run RMPrepUSB - Install grub4dos - say Yes for MBR update and Yes to update the grldr file.

Put the 2019 \grldr file on both Partitions 1 and 2
This usually installs the grldr file to Partition 1, but depending on the drive letter given to partition 1 by Windows it may update the grldr on partition 2 instead.
Check the grldr file date on partition 1 and if it is before 2019 then copy the 2019 grldr file on partition 2 to the root of partition 1.
Basically, we are updating the \grldr grub4dos file on partitions 1 and 2 to a newer version which understands ext4.
2. You should now find that the '3 AMD' menu entry now starts to boot to Linux but that it fails with a Linux error message to 'update e2fsck' and something about the 'ext4 64-bit feature is not supported'.
To fix this, I booted to a 64-bit version of Linux Mint in Virtual Box and attached the USB drive to the VM. You could boot to a Mint ISO from an E2B USB drive and then connect the Kings_Overkill USB drive to another USB port.
Under Mint, I first ran the Linux commands to find the correct partition and fix it for any problems:
sudo fdisk -l
sudo umount /dev/sda3
sudo e2fsck -f /dev/sda3
This checks that partition 3 was not corrupt (I did not correct the time clock error as Mint had a different time zone from the Linux on the USB drive and I didn't want to confuse it). I don't know if this would have mattered or not.
I then copied all the Mint fsck* files from \sbin to the \sbin folder on the USB drive. I also did this with the e2fsck file too but I am not sure if that was needed. I mounted /dev/sda3 (the USB drive) onto a 'test' directory as follows (you may need to change the drive letter in sda3 - e.g. sdb3 or sdc3, etc.)...
mkdir test
sudo fdisk -l
sudo mount /dev/sda3 test
sudo cp /sbin/fsck* ./test/sbin/
sudo cp /sbin/e2fs* ./test/sbin
sudo umount ./test
Now I can legacy boot from Partition 1 of the USB drive and run menu entry 3 for AMD...
 |
| Programs are in the /mods folder |
e.g. I can run a test by typing the name.
cd ~ (change to ~ directory - usually already there)
./260
and to see the results log (if one was generated), I type:
./260g
Fix UEFI booting to AMD Partition 3
Partition 3 is an ext4 partition but for UEFI booting, a UEFI boot partition must be a FAT partition. I am not quite sure if UEFI-booting to Ptn 3 was ever working in the original image?
Also, the two FAT partitions use syslinux which cannot boot a kernel file on another partition.
We can create a new UEFI syslinux.cfg boot menu on both Partition 1 and Partition 2 so that UEFI booting from either partition will allow us to choose between an RTX test or the AMD Partition 3 test. To do this we must copy the Partition 3 initial boot files (kernel and ram drive files) to both Partition 1 and Partition 2.
1. Download the .zip file from here (this saves you having to boot to Linux and copy them from the ext4 partition).
2. Copy both the initrd.img-2.6.32-24-generic and vmlinuz-2.6.32-24-generic files to the root of BOTH Partition 1 and Partition 2
3. Copy the syslinux.cfg file in the download for the RTX30xx series to \EFI\BOOT\ folder of Partition 1
e.g. \EFI\BOOT\syslinux.cfg
4. Copy the syslinux.cfg file for the RTX20xx series to \EFI\BOOT\ folder of Partition 2
e.g. \EFI\BOOT\syslinux.cfg
You should now be able to UEFI64-boot to Partition 1 or 2 by pressing your BIOS F8/F12 BIOS Boot Selection key at start-up and choose one of the two EFI FAT partitions:
- Partition 1: RTX30xx or AMD
- Partition 2: RTX20xx or AMD
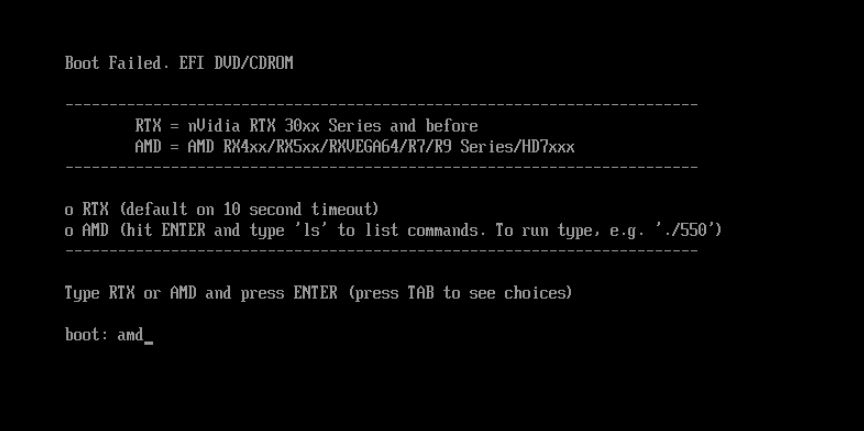 |
| You must type in AMD if you want to boot to Partition 3 |
 |
| Partition 3 requires you to press ENTER at this point. |


Please let me know if you have any comments or more information.
Live online chat support is available on my two websites easy2boot.xyz and rmprepusb.com.
Hello
ReplyDeleteCan you make a video for the steps
Just follow the steps. There is an online help chat facility on my websites, so feel free to ask for help using that. I don't have time to make a video for one person.
DeleteWouldn't be for just one person, I doubt he and I are the only ones who don't understand what to do. I don't need the gigantic part 3 but have no idea how to just make part 2 into something usable on my 16GB USB stick.
DeleteInstructions are in the section 'How to make a MODS and MATS USB drive'. First make an E2B USB drive and then follow Step 1. Free Online Chat help is available on easy2boot.xyz website.
DeleteI'm really struggling with all of this, I just need to test a laptop with a built in 1060 to work out which VRAM has issues, but it won't boot legacy/CSM, only EFI. Will any of this guide work for me?
ReplyDeleteWell, if you make an E2B USB drive and download and add the two .imgptn files then you can UEFI boot and try it. Whether it will work for you or not I cannot fortell the future, so I don't know.
DeleteHello there - this is brilliant! I will follow the guide and test. Does the provided MODS also work on a GTX 480? I have a working MATS version but not MODS. Thanks!
ReplyDeletenot sure - https://repair.wiki/w/Nvidia_Memory_Testing_Guide says to use v367 and there is a 367.56.4 version listed.
DeleteThanks, I'll give that a go but I have 367.38.1 and it looks like MODS is looking for a specific file for the GF100 (the GPU in question) which is not on the image I downloaded - I hope yours is more complete :)
DeleteIs there any way to create a bootable usb for a single device (rx580)?
ReplyDeleteI don't want to download the 70gbs when I only need to test one model.
No, sorry
DeleteHi, I also have a problem and I can't figure it out no matter what I do when I try to open it for AMD it gets stuck every time on a line and the keyboard and the mouse gets stuck. [ 1.583718) ACPI: SSDT 000000007df2d298 005C3 (v02 PmRef Cpu0Ist 00003000 I 20160527) if anyone can help me I would be very grateful. thank you
ReplyDeleteTake a look at the .mnu or .cfg file. You should see that you can add a boot option,
Deletee,g, for the UEFI \_ISO\MAINMENU\RUN AMD GPU TEST.cfg file we have a comment line that begins with #
linux /boot/vmlinuz-2.6.32-24-generic root=UUID=6425f52d-e164-4004-a961-808a1a0afe88 ro single mem=512M noefi quiet
#debug nomodeset ro rootdelay=90 biosdevname=0 net.ifnames=0 consoleblank=0 nomodeset nokaslr
so tack onto the linux parameter line an extra parameter and remove the quiet word, e.g.
linux /boot/vmlinuz-2.6.32-24-generic root=UUID=6425f52d-e164-4004-a961-808a1a0afe88 ro single mem=512M noefi nomodeset nokaslr
I am not sure what other parameters are available, but you can try noapic and noapci and acpi=off and edd=off, etc.
Try and determine from the messages on the screen just what the problem is (edd, acpi, etc.) and then do a google search to see if the is an option to disable it.
https://www.kernel.org/doc/html/v4.14/admin-guide/kernel-parameters.html
Hi thank you for your reply. I tried everything you said but the same thing on that line gets stuck every time. From what I noticed the numbers are different each time in the line but the rest stays the same I don't know what to do with it I searched on the internet but only here I found some help. if i could send you somewhere a picture of what appears on my screen maybe you would understand better. thanks again
DeleteFree chat online on both my websites. e.g. www.easy2boot.xyz or www.rmprepusb.com. You can paste files and pictures into the chat field too.
DeleteWhen making the partitions in disk genius, can I just put the partitions as gpt instead of Mbr so I can boot in uefi mode instead of legacy? Because I got a laptop which cannot change boot mode to legacy.
ReplyDeleteFor E2B to work it requires MBR partitions. Just let the Make_E2B.exe app make the partitions. UEFI works fine using MBR partitions. Just UEFI-boot off the 2nd (FAT32) partition and run the .imgptnrep3 file located on the 3rd partition.
DeleteHi,
ReplyDeleteI have a MSI GL65 10SEK laptop with 2060 6GB. The GPU is taking 100% load almost everytime. But games and benchmarks are crashing like it has some memory error. Is there any way like MODS tool to check VRAMs on my laptop?
Help please..
hi sir , i need amd.imgptn link download . how yo download the file ?
ReplyDelete