Tuesday 13 September 2016

E2B v1.84c Beta available

v1.84c 

  1. Parrot+persistence sample .mnu file added. 
  2. New feature: if user presses u key during early booting to Main menu, the grub4dos USB 2.0 driver will be loaded. 
  3. Change to SDI_CHOCO Sample_MyStartup.cmd so that -y and unchecksummed packages are accepted. 
  4. Add 'Download URLs' folder to \_ISO\docs\ folder. 
  5. Add Win7 SDI_CHOCO XML files. 
  6. Fix SDI_CHOCO.cmd so does not pause if installing Win7. 
  7. Add E2B_WINHELPER_&DW.zip for Zalman\IODD. 
  8. Fix problem of F1 Help menu title not displayed (all languages). 
  9. Sample WinNTSetup diskpart script files added to \_ISO\docs\E2B Utilities\WinNTSetup folder
  10. Fix bug - if animated icon in menu, then XP+DPMS install is broken (asks for floppy disk).
I have found that if you have an animated E2B icon (or any animated icon) on the menu, this causes the installation of XP+DPMS to fail. Setup will prompt you to insert a Firadisk floppy disk and you cannot get beyond this point.
This was caused by the animated .bmp files being loaded as a virtual floppy (fd3) which interferes with the two other virtual floppies used by DPMS. This bug is fixed in this v1.84c Beta version.

Using a combination of WinNTSetup and DPMS, it is possible (I think!) to install XP onto a system that contains only USB 3.0 ports and a SATA or RAID HDD (from an unmodified MS XP SP3 ISO). The system's firmware/hardware needs to be XP-compatible however (many modern BIOSes are not).  The process is a bit messy though! See http://www.easy2boot.com/add-payload-files/windows-install-isos/winntsetup/ for more details.

The file E2B_WINHELPER_&DW.zip contains E2B_WINHELPER_&DW.RMD. This file can be loaded by a Zalman or IODD drive so that it will appear as a E2B 'Helper' Removable Flash drive. This means you do not need to carry a separate Flash drive with your Zalman/IODD drive.
Tuesday 6 September 2016

How to set up multiple backgrounds in E2B (video by Liu Evan)

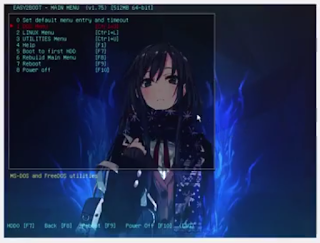
A guy named Liu Evan has posted a YouTube video on how to make wallpaper backgrounds and how to have a different background for each E2B menu.

He has also made some background templates available for you to download, so you can create a 'semi-transparent' square and merge it with the background bitmap using PhotoShop (though I guess you could use gimp or Paint .Net too) on which the E2B menu can be written, as shown below.


The E2B page which describes how to set up multiple backgrounds is here.

Sunday 4 September 2016

Free Paragon Backup and Recovery 16 (until Nov 2016)

https://www.paragon-software.com/home/brh/download.html

You can build a WinPE Recovery ISO using this too (to get the ISO creation option you need to install MS WAIK WinPE support).

Original source DavesComputerTips.

Saturday 3 September 2016

Change the WinPE console font/size/position/minimize/hide, using the SetConsole utility

When running scripts, etc. using the Windows console terminal window, you often want to change it's appearance. To change the size of the window, we can use a command such as:

mode con: cols=160 lines=60

However, changing the font that is used, especially if running WinPE, is a lot more tricky, especially as we cannot reboot after changing the registry.

Whilst looking for a solution, I found the handy SetConsole utility.

Easy2Boot v1.84a Beta available

Beta v1.84a
  • Parrot+persistence sample .mnu file added. 
  • New feature: If user presses u key early when booting to E2B, the grub4dos USB 2.0 driver will be automatically loaded. 
  • Add 'Download LiveCDs' url + some others to a new \_ISO\docs\Download URLs folder. 
  • Change to SDI_CHOCO Sample_MyStartup.cmd so that -y not required and unchecksummed packages are accepted. 
  • Add Win7 SDI_CHOCO XML files. 
  • Fix SDI_CHOCO.cmd so does not pause if installing Win7. 
  • Add E2B_WINHELPER_&DW.zip for Zalman\IODD.

The Download LiveCDs.url points to a convenient web page where you can quickly find many liveCDs.

I have now tested SDI_CHOCO with Win7 and made a few tweaks as well as adding some XML files for Win7.
Note that Chocolatey automatically installs DotNet4 (which takes 10-20 minutes!) on Win7.

It seems Chocolatey now requires the packages to be checksummed and many are not. I have added some configuration lines into the Sample_MyStartup.cmd file which disables this checksum requirement and also added an option so that -y is not required (so just choco teamviewer will work automatically). if you already have a MyStartup.cmd file, you will need to add in these lines.

If you have a IOD2531 or 2541, you can load the E2B_WINHELPER_&DW.RMD file into it, and it will emulate a WINHELPER E2B USB Removable media flash drive (cool!). See my previous blog for details. If anyone owns a Zalman disk caddy, please try this file and let me know if the whole hard disk is write-enabled after it is loaded and what model/firmware you tested it on (the HDD is write-protected on the VE200, which is no good for E2B!).

Friday 2 September 2016

Using E2B with Zalman\IODD disk drive enclosures (is the IODD 2531 the best USB HDD enclosure for E2B?)

As you know, E2B keeps its menu folders under the \_ISO folder.

The folder name of \_ISO was not a random decision on my part, it was chosen because the drive emulation disk enclosures made by IODD and Zalman both use the \_ISO folder to store payload files.

Keep reading to see how you can use the features of these devices to enhance E2B!

For those of you that don't know, with these HDD enclosures, you can select one or more payload files, and they will be emulated as a USB device.

Zalman ZM-VE200


For instance, if you select Ubuntu.iso, then any system that the HDD enclosure is connected to, will 'see' a USB CD/DVD drive containing the Ubuntu ISO file contents, just as if it were accessing a real CD/DVD drive containing a real CD\DVD (except much faster)!

Now, I recently purchased a Lenovo IdeaPad 300, and decided to try my old Zalman ZM-VE200 out on it. I found that IdeaPad 300 did not respond too well when trying to boot from an ISO loaded as a virtual CD into the Zalman VE200. It looked like the Zalman could not load the ISO quickly enough on power-on, so the IdeaPad BIOS did not detect it (even when using an SSD HDD).

Since the Zalman ZM-VE200 is USB 2.0 and therefore not very fast, and also had this issue, I decided to purchase a new emulation HDD enclosure. My choices were:

Unencrypted - IODD 2531 (SATA3) or Zalman VE300 (SATA2) or Zalman VE350 (SATA3 compatible)
Encrypted     - IODD 2541 (SATA3) or Zalman VE400 (SATA2) or Zalman VE500 (SATA3 compatible)

I have read some Amazon reviews that the Zalman VE350 is a poorer-quality version of the VE300 and the VE500 is a poorer-quality version of the VE400 as they are made by a different manufacturer (not IODD). The Zalman documentation is poor. It does not mention support for VHD, RMD, DSK for instance even though I think they are supported by the Zalmans.

Tuesday 30 August 2016

Install Windows for UEFI booting from E2B in MBR mode (using WinNTSetup)

If you have an E2B USB hard disk and you want to install Windows onto a UEFI-system, it can be a bit of a pain the make the .imgPTN file and get it working. Especially if you want to use SDI_CHOCO.

However, you can install Windows from an E2B USB drive using WinNTSetup by JFX. This way you do not need to modify the ISO or create a .imgPTN file or modify the boot.wim files, etc. to perform a UEFI\GPT installation. Also a WinHelper USB Flash drive is not required.


This means you can boot from a Win8/10 Windows Install or WinPE ISO and then use WinNTSetup to install Windows from any ISO on the E2B drive.

  • There is no need to UEFI-boot from the E2B USB drive
  • No modification of ISOs required
  • No .imgPTN file or modification of boot.wim is required
  • No WinHelper USB Flash drive required
  • You can use SDI_CHOCO XML files
There are many videos on YouTube about WinNTSetup, if you want to see it in action. You can even boot to one of the DLC WinPE ISOs which already contains WinNTSetup, instead of booting from a Windows Install ISO.

Tip: JFX has revised v3.8.7 Beta 4 so that you can run diskpart scripts using CTRL+SHIFT+D (see tools\diskpart folder).

For instructions see the WinNTSetup page on the E2B site here.


Monday 29 August 2016

A persistent parrot

Kevin asked me how to add persistence for Parrot linux.

Parrot speaks to you when it loads!

Since  this is based on Ubuntu, I simply modified the Ubuntu_2016_Persistence.mnu file.

I have added a copy of Parrot_3.1.1_Persistent.mnu to the Alternate Downloads Area - mnu files - linux folder, if you want it.

Sunday 28 August 2016

Booting USB drives using Virtual Box (VMUB tip)

In case anyone is still living in the Stone Age and is using QEMU to test their bootable USB drives, this is just a short blog to make sure you are aware of DavidB's utility VMUB (Virtual Machine USB Booter) for use with Oracle Virtual Box.

I wrote a previous blog about it here. There is also a YouTube video.

I use VMUB all the time because it is much quicker than using QEMU and it can boot a variety of different Virtual Machines (including MBR 64-bit, UEFI 32-bit and 64-bit booting).

The VMUB utility gives much better results than using a manually created .vmdk file for your USB drive because VMUB also dismounts the USB drive before running VBOX. This eliminates some of the problems that you get when using a simple .vmdk file with VBOX.

VMUB tip (use the CTRL key)

If you are designing and testing a new menu system for E2B (or making a custom CSM menu for .imgPTN files) then here is a handy tip:

Saturday 27 August 2016

E2B v1.83 released


  • Bugfix for grub4dos so does not absorb key presses before menu is displayed. 
  • Make_E2B_USB_Drive (run as admin).cmd now checks for more versions of bootmgr (whitelist has new additions). 
  • Warning message if try to use .imz file extension (you need to convert to .ima). 
  • Added sample .mnu files for Remix OS x86 with persistence (thanks Sergio!). 
  • Small changes to German language files (thanks Frettt). 
  • Add fmt_ntfs.sh script and udefrag utility to docs\linux_utils folder - can now make and maintain an NTFS E2B drive under linux
  • Update FreeDOS floppy image to allow access to NTFS files under FreeDOS (E2B drive = C: ). 
  • Updated SDI 'Snappy' executables.