Wednesday 18 August 2021

Latest E2B+agFM Betas now support grub4efi

You can now have the same E2B menu system in both MBR\Legacy mode and UEFI mode! 

grub4efi by chenall\yaya2007/a1ive is the UEFI version of grub4dos.

Most of the commands in grub4efi are the same as used by grub4dos.

The latest Beta of E2B now contains grub4efi.

How to update your E2B USB drive

Wednesday 11 August 2021

Check your system for Win11 compatibility

 A new app which is downloadable from github or the Microsoft Store is provided by 'ReadySunValley'.

It must be run in Admin mode...


It does not seem to be an official Microsoft app however.

Friday 6 August 2021

Windows password bypass utility 'PassPass' in E2B now updated to work with recent Windows 10 versions

 E2B v2.10eBeta has an updated version of PassPass which should now work with recent Windows 10 versions (2020/21).

Using PassPass you can bypass the password entry required for any Windows Local Account.

It does not work on Microsoft online (email) accounts however.

More details on PassPass here.

See the sidebar 'Useful pages' for a link to download the E2B Beta versions from the Alternate Download websites.

P.S. E2B v2.10f has revised patches which also works on Win11 Beta x64.

Tuesday 20 July 2021

Ventoy for Easy2Boot 'seven-of-nine' themes


A simple Ventoy theme with the 'Seven of Nine' background is available here.

These themes can be used on 'official' Ventoy drives too not just for E2B.

It also contains the Windows 11 TPM patch registry xml files for Pro and Home.

It includes a \ventoy\ventoy.json file, so be careful not to overwrite your own ventoy.json file (if you already have one).


Saturday 17 July 2021

Ventoy for Easy2Boot v1.0.47 download available

 Ventoy 1.0.47 was released today on the ventoy.net website.

I will release the new E2B 1.0.47 version fully after a few weeks, but if you don't want to wait...

1. Download the 'Ventoy for Easy2Boot" v1.0.47 .zip file from here.

2. Drag-and-drop the ventoy-1.0.47-windows.zip file onto the \e2b\Update agFM\Add Ventoy.cmd file located on the 2nd partition of the E2B USB drive - follow the instructions.

Ventoy 1.0.47 release

  1. Optimizations for booting openwrt
  2. Support some floppy images in Memdisk mode
  3. Remove the 2TB limit for the reserved space in Ventoy2Disk.exe
  4. Fixed a bug when booting big boot.wim file.
  5. Compatibility improvement for WinPE which contains PECMD.EXE
  6. Fix Parabola rEFInd booting (#989)
  7. Add check for the built-in browser in WebDeepin.sh
  8. Speedup md5sum/sha1sum/sha256sum/sha512sum command
  9. languages.ini update
  10. New image support
    HBCD_PE_x64.iso v1.0.2 (Legacy + UEFI)
    MocaccinoOS-MATE-0.20210714.iso (Legacy + UEFI)

See https://www.ventoy.net/en/doc_news.html for detail.

P.S. Don't forget to subscribe to always get the latest versions and news!

Thursday 15 July 2021

How to configure Ventoy to skip the Windows 11 TPM and Secure Boot check

 I have written a How To article here.

We can use an XML file to run the registry bypass hack automatically.


P.S. Six different Ventoy themes can be downloaded from here. The ventoy.json script will choose one at random.

Wednesday 14 July 2021

agFM v1.73 released


Thomas came across a problem with agFM recently when booting to Windows ISOs. He was not able to boot to the Windows ISOs on a specific model of notebook:

The same stick and method was used on tons of notebooks of the previous model Lifebook U7410. 
It just fails with the new Model Lifebook U7411.

(Fastboot disabled, Secureboot disabled)
Booting the ISO with .isodef works, but I need to use .isowin for using unattended.xml. When starting the ISO using .isowin (even directly without unattended.xml), it stops loading with the following message:
\"Loading (memdisk)/boot/grubfm/null.cpio
# GRUB Environment Block
installiso=\\\\_ISO\\WINDOWS\\WIN10\\Win_10_2004.2_64BIT_Ger_EDU.ISO
##############
##############
error: xz file corrupted or unsupported block options.
Add: (wimboot)/bootmgfw.efi -> bootmgfw.efi
Add: (envblk)/null.cfg -> null.cfg\"

In the past, I have had a few people report the same .xz error but I have never been able to reproduce it...

Sunday 11 July 2021

agFM v1.72 and 'Ventoy for Easy2Boot' v1.0.46 are now fully released

These latest released versions will be installed if you make a new E2B drive, or you can update an existing E2B USB drive:

Instructions - update to agFM  v1.72

Instructions - update to Ventoy for Easy2Boot v1.0.46

Latest E2B is v2.10b (for Win11) - download .zip file and extract files to a new folder and run Make_E2B.exe and then use the Update_E2B button or just extract the files straight onto your E2B USB drive's Partition 1.

Thursday 8 July 2021

How can you check using a Windows batch file what AntiVirus s/w is active?

Windows Defender is the standard Windows Antivirus software that comes with Windows 10 and it does a pretty good job.

However, many people like to install 3rd-party AV and anti-malware software too.

In fact, some people may be running 3rd-party AV software without even knowing it!

For instance, many types of Acronis backup products may also install Acronis Cloud Protect without you even being aware of it.

One way to detect AV software and Services is to trawl through the Windows task list and try to recognise the names of the software products but I wanted to write a small .cmd Windows batch file to show the user what AV software was installed and if it was enabled or not so that I could add the code  into the E2B Make script to warn the user that they have AV s/w installed and it may be blocking write access to their USB drive's boot sector.

Here is what I ended up with...

Tuesday 6 July 2021

Install Windows 11 using E2B and agFM onto any system

 E2B and agFM can automatically run the registry hack to skip the Windows 11 TPM\RAM\SecureBoot checks.

1. First update to agFM v1.72 or later version (just over-write files on Partition 2 with the latest download) and also update to latest E2B v2.10 Beta which has the WIN11 folder support (run Make_E2B.exe as Admin and click on the Update E2B button). Download areas for latest Betas

2. Copy your Win11 ISO to the \_ISO\WINDOWS\WIN11 folder.

Download Win 11 ISO from here. Select 'Latest Dev Channel' - Cumulative Update for Windows 11 (10.0.22000.51) (untick 'Integrate updates' option for faster build and download). The fewer Editions you tick the quicker the build - I ticked Home\Core + Pro. The download and build of the ISO may take a few hours or more!

Note: If you only tick one Edition, the Install.wim that is made is non-standard and does not contain an XML file. I suggest you include at least two Editions.

3. Create a .cmd text file which has exactly the same name as the Win11 ISO file and place the following three lines of code in the .cmd file:

reg add "HKLM\SYSTEM\Setup\LabConfig" /v "BypassTPMCheck" /t REG_DWORD /d 1
reg add "HKLM\SYSTEM\Setup\LabConfig" /v "BypassRAMCheck" /t REG_DWORD /d 1
reg add "HKLM\SYSTEM\Setup\LabConfig" /v "BypassSecureBootCheck" /t REG_DWORD /d 1

Tip: If you suspect this cmd file is not being run, add an extra line at the bottom which will wait for you to press ENTER:

pause

4. Copy the \_ISO\WINDOWS\WIN10\Windows 10 Pro (no prompt to repair).xml file to \_ISO\WINDOWS\WIN11 folder (your ISO must include Win11 Pro Edition - if not use a different XML file - e.g. Win10 Home, etc.)

You should now have the following files:

Monday 5 July 2021

Easy2Boot v2.10a Beta available with Win11 support

The new E2B Beta is here.

It adds a \_ISO\WINDOWS\WIN11 folder.

I have also speeded up the loading of the Main Menu if you have lots of files in the \_ISO\WINDOWS\xxxx folders. The Main menu no longer shows you how many payload files are present as they are no longer counted.

I installed a version of Win11 using VBox and E2B legacy and agFM UEFI64 successfully.

To update, just extract the files onto your USB drive.

Bypass the Win11 Compatibility check

To avoid the Win11 'compatibility check' you can install Win11 using WinNTSetup.

If you install to a Virtual Machine, the 'compatibility check' is skipped.

Or you can run these commands as soon as Setup is loaded to skip the checks:

Saturday 3 July 2021

'Ventoy for Easy2Boot' v1.0.46 is now available for download

 I have now made an update for 'Ventoy for Easy2Boot' so it is now v1.0.46.

This is not the Ventoy image files but the modified version which is directly added to Partition 2 and can be booted to without switching in an image.

I had a problem with it where it would not boot Ubuntu ISOs and many other Linux ISOs unless Partition 2 was exactly 32MB in size - this is now fixed.

You can find the .zip file in the Latest Beta folders.

Instructions

1. Download the ventoy-1.0.46-windows.zip file

2. Drag-and-Drop the file onto the \e2b\Update agFM\Add_Ventoy.cmd  windows batch file using Explorer - answer Y to copy the files across.

You should now have the latest version of Ventoy for Easy2Boot

Please report any issues.

I will update the E2B server release version to this version in  a few days if no issues are reported.


Tuesday 29 June 2021

agFM v1.72d Beta now available

 For those of you following my last few blog posts, agFM v1.72d includes the latest version of the Ventoy disk image scheme.

I have tidied it up a bit and renamed some files so that they appear first in the Ventoy menu system.

Also a new .mnu file is added to the \_ISO\MAINMENU folder to allow you to restore the original E2B partitions from a Legacy boot. This is quicker than booting to E2B - then Ventoy - then grubfm_multiarch.iso - then selecting 'Restore agFM Partition 2'. It also does not need to reboot.

So as not to clutter up the MAINMENU, I have not added three menu entries to switch in the Ventoy disk image files from E2B - you can just run agFM from the E2B menu and then switch in one of the Ventoy disk image files from the agFM Legacy menu.

To try it just extract the agFM download files onto Partition 2 (make sure you have the original agFM partition on Partition 2 first - not the Ventoy 32MB partition 2!).

Monday 28 June 2021

Ventoy+Kaspersky Secure Boot bypass now available

agFM v1.73c Beta now makes 3 Ventoy 32MB images when you run the Make_Latest_Ventoy_Partion_Image.cmd script.

1. Ventoy with Secure Boot/MokManager

2. Ventoy (no Secure Boot)

3. Ventoy with Kaspersky shim - can Secure Boot as long as the Kaspersky shim is not blacklisted in the BIOS UEFI DBx blacklist database (same as used by agFM).

Please update to v1.73c if you want to try out this new Kaspersky Secure Boot Bypass version of Ventoy.


Ventoy images are now made with and without Secure Boot

The standard Ventoy image that was made by the Make_Latest_Ventoy_Partion_Image.cmd script contained the Secure Boot enabled EFI boot files.

However, this version does not boot on many systems (such a Lenovo laptops, etc.) - I get a 'Linpus Lite' boot option but it won't Secure Boot or load MokManager.

So I have now modified the script to produce two Ventoy images, one with the Secure Boot (InSecure Boot) files and the other image which does not support Secure Boot. which is much more compatible (but won't work if Secure Boot is enabled in the BIOS).

I also find that MokManager does not work on many Secure BIOSes (crashes/hangs/doesn't load) which is why E2B does not use it.

So you can now you pick which Ventoy image you want (no need for two Ventoy USB drives).


Note: v1.72c now makes 3 images, the last one includes the Kaspersky Secure Boot bypass mechanism so you can Secure Boot to Ventoy without needing MokManager.

Update Instructions

First follow the previous blog article, then...

1. Download the latest agFM v1.72b Beta version

2. Extract it to Partition 2 of your E2B USB drive

3. Run \e2b\Update agFM\Make_Latest_Ventoy_Partion_Image.cmd to make the new Ventoy image files.

You should now have two img files on Partition 2:


The startup_default.cfg file will also be updated, but you will need to change your startup_menu.txt file if you have made your own  agFM startup menu.


if [ -f (${user})/ventoy.disk.img -a -f (${user})/Switch_Ventoy.cfg ] ; then
menuentry "Ventoy image (Secure Boot) [Ptn2=32MB image]" --class=img {
set vdisk=ventoy.disk.img
grubfm_open "(${user})/Switch_Ventoy.cfg"
}
fi
if [ -f (${user})/ventoyNS.disk.img -a -f (${user})/Switch_Ventoy.cfg ] ; then
menuentry "Ventoy image (no Secure Boot) [Ptn2=32MB image]" --class=img {
set vdisk=ventoyNS.disk.img
grubfm_open "(${user})/Switch_Ventoy.cfg"
}
fi

Sunday 27 June 2021

Easy2Boot now supports all Official Ventoy images!

The current 'Ventoy for Easy2Boot' version is a modified version of Ventoy v1.0.35. It is a modified, re-compiled version of the 'official' Ventoy v1.0.35.

The E2B version of Ventoy is exactly the same as the official version but the size check of the 32MB Partition 2 has been removed so that we can have a Partition 2 greater than the paltry 32MB installed by the Ventoy tool.

agFM v1.72a can now switch-in any 'official' Ventoy Partition 2 image file in-place of the agFM partition.

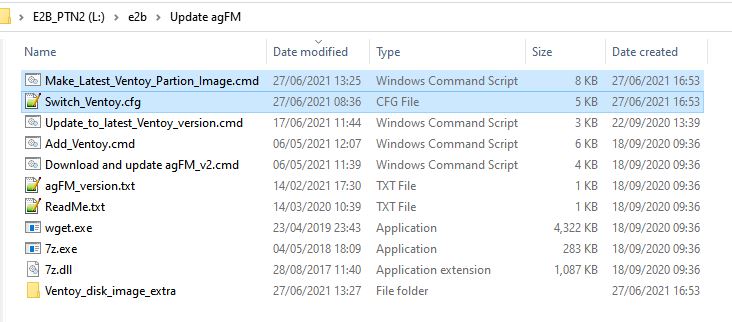
You can make the image file simply by running the Make_Latest_Ventoy_Partition_Image.cmd file:

This will automatically download and extract the latest 32MB ventoy.disk.img file from the Ventoy github folder.

Once switched-in, you now have an 'official' Ventoy USB drive with exactly the same partitions that the Ventoy utility would create. All the Ventoy code is 100% official, unaltered and original.

Update Instructions

This assumes you have E2B v2.09 installed already with agFM and Ventoy.

1. Ensure that your E2B USB drive does not have any .imgPTN partition image already switched in - the easiest way to check this is to run \_ISO\SWITCH_E2B.exe - if the 'Restore E2B Partition(s)' button is NOT greyed-out then click it to restore the original E2B partitions.

2. Download the latest v1.72a Beta zip file of agFM and extract all the files to Partition 2 of your E2B USB drive - this overwrites the existing agFM files.

3. Run \e2b\Update agFM\Make_Latest_Ventoy_Partition_Image.cmd
    from Partition 2 of the USB drive - if prompted to download the grubfm iso file - answer 'Y'.


4. Run \MAKE_THIS_DRIVE_CONTIGUOUS.cmd

If you have used your own \boot\grubfm\startup_menu.txt file for your agFM menu, you will be warned and you will need to add an extra menu entry into your startup_menu.txt file. If you are just using the startup_default.cfg file then this will be updated for you automatically.

The file \ventoy.disk.img on the second partition is the new Ventoy image - do not move this file - it must be located on Partition 2.

If you do not already have ImDisk installed on your Windows system, you can download it from here.

Usage

To switch-in the new Ventoy partition image into Partition 2 we use the agFM menu entry.

To switch back to the original agFM partition 2, we need to first boot to the grubfm iso (which is on the root of the E2B Partition 1) - once booted to grubfm - a special menu is loaded where you can restore the original partitions.

Note: Ventoy does not contain dd and so we cannot use the grub2 dd command to change the disk partition table so we must boot to grubfm which does support dd.

Step 1 - Switch-in the Ventoy Partition image

1. Boot to agFM (either Legacy\MBR boot to the E2B menu and then load agFM or UEFI-boot direct to agFM on Partition 2.

2. Select the new 'Official Ventoy' menu entry - the image file will be switched in and the system will reboot.


You can now Legacy\MBR boot to the new Ventoy image via the E2B Legacy menu or directly UEFI boot to Ventoy.

Note: Do not attempt to switch-in any .imgPTN partition images whilst in this state! Do not attempt to 'fix' the drive if prompted by E2B.

Step 2 - Restore the original agFM

1. First boot to Ventoy and then select the grubfm_multiarch.iso entry:


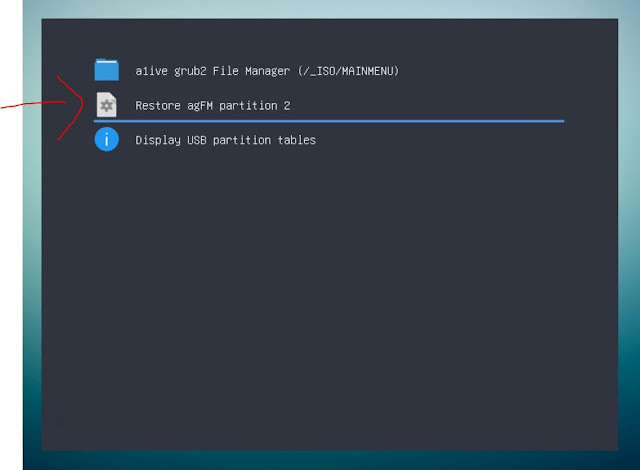
You should now see a new grubfm menu:

grubfm multiarch will load the user menu in the Ventoy partition.

Note: Do not delete the grubfm multiarch ISO file from the root of the E2B USB drive. You can copy it to a 'normal' menu folder as well, if you find it useful.

2. Select the 'Restore agFM partition 2' menu entry - confirm by pressing 1 and ENTER when prompted. The original partitions will be restored and Partition 2 will contain the agFM (and old Ventoy) files. The system will reboot.

Future Ventoy updates

When a new version of Ventoy is released, simply run the
\e2b\Update agFM\Make_Latest_Ventoy_Partition_Image.cmd script again.

If a later version of grubfm multiarch iso is released by a1ive, you can update the ISO file if you like, it should still work OK.

Please let me know if you find any issues.

Thursday 17 June 2021

eBooks updated

  •  eBook #4 - agFM - now v1.21
  • Getting started with E2B - now v2.20
  • How to make $1000 a month from the internet - now v1.03

To obtain your free update, use the original email that was sent to you on initial purchase.

Purchase eBooks from here. Most are just $5 each and you get a 10% discount on all of them if you buy more than one! Read some reviews to see what others have to say before you buy.

'How To' articles on easy2boot.xyz

 Visit https://easy2boot.xyz/blog/  for new articles as well as the posts in this blog which are listed here.

Easy2Boot v2.09 and agFM v1.71 latest release available

E2B v2.09 changes
  • New default background
  • Changes to UPDATE_E2B_DRIVE.cmd, E2B Launcher.exe, SWITCH_E2B.exe, SUB_MENU_Maker.cmd, E2B SUBMENU Maker.cmd, StartupCheck.cmd, Add_Ventoy.cmd, CheckForUpdate.cmd, Download and update agFM_V2.cmd, MAKE_E2B_USB_DRIVE.cmd
  • Sample mnu files added: PTN3_IMGPTNREP3_MENU.mnu, PTN3_MNU.mnu, PTN2_AUTO.mnu, PTN3_AUTO.mnu. PTN_LOG1_AUTO.mnu, Parrot_4.11.2_Persistent.mnu
  • REP3.g4b and RestoreMBR.g4b added
  • wimboot updated (bugfix for bootmgr)
  • DLC and Strelec now always swaps hd0 with hd1 before boot
  • bugfix for .isopup extension
  • Fix Win7 install not swapping hd0-hd1
  • Add .imgPTNREP3 support
  • Support for xxx_ file prefix
  • .isodd no longer supported - use .isodef
  • SDI_CHOCO.cmd improved for Win8 installs (fix access denied error with some versions of Win8 fixed)
  • PassMark Memtest86 .imgPTN23 updated to latest version 9.1 Free

agFM v1.71

  • Latest PassMark Memtest86 9.1 Free
  • Improve .imgptnREP3 support
  • Support for Strelec ISOs on UEFI32 devices with 64-bit CPUs (e.g. Asus T100).
  • Add DrWeb+persistence .grubfm example to \e2b\Sample agFM Menu Files folder
  • Add slacko_v7.grubfm and .cfg sample file added to \e2b\Sample agFM Menu Files\Linux folder for Puppy booting.
  • More file extensions supported

agFM v1.71 is live and you can update using 
"\e2b\Update agFM\Download and update agFM_v2.cmd" 
or just get the latest 1.71 zip version and extract it to Partition 2.

E2B v2.09 is on the Alternate Download sites

Please make a new drive and let me know if you find any issues.


Sunday 6 June 2021

How to fix Windows when it no longer detects your USB drive

Windows 10 seems to have a nasty habit of sometimes not detecting a USB drive that had been working fine 5 minutes ago and still works OK in other systems - just not the one you are using!

I can have no problem for months and then one day, Windows 10 does not seem to recognise my USB drive because it does not list the drive volume letters in Explorer - but only if I connect it to a certain specific USB port! I can connect the same drive to a different USB port and everything works as normal.

One month it can be the lower USB 3 port and the SanDisk Extreme 3 USB drive - another time it can be my super-fast SilverStone USB 3 M.2 SSD enclosure and a different USB port. It's just pot luck!

Another issue I often come across, is that I insert a particular USB drive into a particular USB port and Windows goes into an everlasting cycle of mounting the drive and then dismounting it again and again and again ('dong-diddle-ding' - then 'ding-dang-dong', etc. etc.)!  Often a reboot fixes this (as long as I first unplug the USB drive before a Windows Restart).

Here is what I do to fix USB drive issues (after trying a Windows Restart, of course)

Note: A simple Windows Shutdown is not good enough! You must use Restart or SHIFT+Shutdown so that Fast boot is not used when you next switch on.

Saturday 5 June 2021

E2B v2.09h Beta available

 E2B sorts payload files alphanumerically, so Ubuntu.iso will be listed after Tails.iso in the E2B menu.

E2B also supports filename prefixes in the form of  _*_ (underscore - any number of characters - underscore), e.g.:

_100_Ubuntu.iso
_110_Tails.iso

These will be listed in the E2B menu as:

Tails
Ubuntu

File extension override suffixes

You can also add file extension override suffixes, these too will not be displayed in the E2B menu system, e.g.

Format:  _ (file extension _ [agfm (agfm file extension)] . file-extension

_100_Ubuntu_.isodef_agfmisoagfm.iso
_110_Tails_.isodef_agfmismap.iso

The agfm file override is optional. If not specified then the first file suffix will be used for both E2B and agFM - e.g. _100_Ubuntu_.isodef.iso.

These will be listed in the E2B menu as:

Tails
Ubuntu

BUT both agFM and Ventoy will list the full filename. 

E2B will boot as if the file had a .isodef file extension, agFM will boot as if the file had a .isoagfm (or .isomap) file extension.

Note: If E2B MyE2B.cfg is configured to show the file extension (EXTOFF) then E2B shows the whole filename but without the prefix - e.g. Ubuntu_.isodef_agfmisoagfm.iso.

Hotkeys

Wednesday 2 June 2021

E2B v2.09g/h and agFM v1.71f Betas

Previous versions of agFM recognised the .imgPTNREP3 file extension.

If you have a partition image .imgPTNREP3 file  (e.g. hfs partition containing a bootable Mac OSX installer files) on Partition 3, you could select it in the agFM menu system and it would replace the current Partition 3 (if any) with the new image. The partition should be recognised as being in FAT/NTFS/hfs format and use the correct Partition type (e.g. hfs= 0xAF).

You can thus UEFI-boot to agFM, switch-in any image to partition 3 and then boot to it from the agFM F3 boot menu or the MAC boot menu (e.g for Catalina Installer hfs image).

To restore the original partitions, you can UEFI-boot to the agFM menu system and choose the 'Restore E2B Partitions' menu option.

agFM v1.71f

Monday 10 May 2021

Add Kali+Persistence to agFM menu system

 I have added a post here which describes how to add a .cfg file to boot Kali with Persistence.

agFM seems to have a small problem when the findiso parameter is used. It seems to 'lock' a partition and this causes Kali to not shutdown. The persistence file seems to be saved OK, but it won't then turn off the system or restart it.

This also occurs if you just boot the Kali ISO using agFM (without persistence) and choose the 'Debian - Debian Live' boot entry (which also uses findiso=).


I cannot report the issue as a1ive's grub and grubfm project seem to be in 'archive' read-only status recently.

Thursday 22 April 2021

Add a Secure Boot partition to your E2B USB drive

 A recent Windows Update in Windows 10 has meant that the Kaspersky Microsoft-signed EFI boot file that is used by agFM on the Easy2Boot USB drive is often blocked by the target systems UEFI Firmware.

This prevents us from Secure UEFI-booting.


Apart from disabling Secure Boot in the BIOS, you can go into the BIOS Setup menu and delete/clear/reset the DBx UEFI database - or - another way around this problem is to place a version of WinPE on a new FAT32 3rd partition of the E2B USB drive.

Tuesday 13 April 2021

'How to make $1000 a month from the Internet' eBook price now reduced to only $5


My latest eBook 'How to make $1000 a month from the Internet' has now been reduced to only $5 (was $10). It also now updated to revision v1.01.

If you want to supplement your income with some passive income from the Internet, then this book should help you.

See here for more details.

Monday 12 April 2021

Fedora 33 live boot with persistence (fixed)

Fedora 33 with persistence

The Fedora LiveCD ISO can support persistence but the persistence file must be on a FAT32 or ext2/3/4 partition.

To boot from an Easy2Boot NTFS USB drive, we can convert the ISO to a FAT32 .imgPTN file and then add in the persistence file to the new FAT32 partition.

This process was described in a 2017 blog article here, however it seems Fedora persistence has changed slightly since then and recent versions no longer recognise the persistence file.

The blog instructions have now been updated so that you can Legacy and UEFI64-boot to a Fedora 33 .imgPTN file with a persistence file. Two folders needed to be added inside the persistence volume to fix the problem.


Tuesday 6 April 2021

Latest Betas with bugfixes available and Puppy persistence

 E2B v2.09c

  • Add check in various .cmd files to check for wmic command in PATH 'wbem' environment
  • Remove Update E2B link from Launcher app.
  • Memtest86 .imgPTN23 updated to v9 build 2020 free version
  • Small text help changes to some Mainmenu .mnu files
  • Bugfix - fix Puppy ISOs with .isopup extension not booting

agFM 1.71c

  • Support for Strelec ISOs on UEFI32 devices with 64-bit CPUs (e.g. Asus T100).
  • Memtest86 v9 build 2020 EFI files updated.
  • Add DrWeb+persistence .grubfm example to \e2b\Sample agFM Menu Files folder
  • Add slacko_v7.grubfm and .cfg sample file added to \e2b\Sample agFM Menu Files\Linux folder for Puppy booting.
The new Beta versions can be found in the 'Latest Betas' folder in either of the two 'Alternate Download Areas' (see sidebar).

Puppy (.isopup)

I discovered that the .isopup file extension seems to no longer work in recent versions of E2B (grub4dos seems to have changed and broken it!), so I have modified the code in QRUN.cmd to now work again. 

Wednesday 31 March 2021

31st March is World Backup Day!

 So when was the last time you backed up your files?

I tend to keep most of my 'important' files in the 'Cloud' these days, but if my main Windows SSD went kaput, it would still probably take me a good day to re-install Windows and add all the applications that I use and then I would need to allow all the files to re-sync with the 'Cloud'.

Kon-Boot v3.8 is released

 Kon-Boot (#ad) is currently the only solution worldwide I am aware of that can bypass Windows 10 online passwords!

The latest release fixes issues with Win10 20H2

 Main updates:

  • Updates for Windows 10 (Fixed issues and blue screen errors in newest Windows 10 releases (20H2 with newest security updates))


Kon-Boot can be added to your E2B USB drive (see previous article here). You will need to 'register' your E2B USB drive as a 'Kon-Boot' drive by first installing Kon-Boot and then wiping the USB drive and re-installing E2B (and then add back the Kon-Boot files).

Monday 29 March 2021

RMPrepUSB.com change of host and a new Easy2Boot.xyz website

I have been doing a lot of work to transfer the content from the old RMPrepUSB.com website (which was hosted by Google Sites) to a WordPress website (now hosted by Hostinger). Well over 150 pages of text and about 300 images!

There was a lot of swearing, fist-banging and tears, I can tell you, because there was no easy, automated way to transfer it all! I have written up how I did it here, in case others want to move away from the 'New Google Sites' which we are being forced to do by Google because they are discontinuing the old Google Sites hosting. The New Google Sites cannot be integrated into Ezoic and it does not support Google AdSense(!). and so it is even less versatile and compatible than the old CMS version was.

I guess that's the problem with free sites and services - they can just decide to withdraw or drastically change them at any time! It wouldn't surprise me if Blogger wasn't up next for an 'improvement'. Actually this Blogger site and it's CMS is quite adequate for my needs and is free too, so they will probably muck that up soon as well!

My old rmprepusb.com site can still be found at the 'New Google Sites' 
https://sites.google.com/rmprepusb.com/www/home

But www.rmprepusb.com now points to the new WordPress site. At the moment it does not go through Ezoic however, so any ads on the site are placed there by Google AdSense automation.


New Easy2Boot.xyz site!

I have also started a new WordPress website at www.easy2boot.xyz - this is intended to be a 'simple' website for anyone who is new to E2B. The 'old' site is still at www.easy2boot.com.

Please look at the new site and let me know if there is anything I have missed out, that someone will need to get started.

At least the experience of migrating to WordPress has proved useful to me whilst writing my new eBook 'How to make $1000 a month from the Internet'!

If you are thinking of building a website, here is a tip for you - always go for a WordPress hosting site (Linux based) - never go for a host that only offers their bespoke Content Management Systems like Wix, etc. and don't be sucked-in by offers of free or very cheap rates for the first year (because the following year's rates won't be cheap)! More info in the eBook ;-).

Friday 26 March 2021

How to make $1000 a month from the Internet


Since I retired in 2011 (actually I was made redundant, but that's another story), I have been experimenting with booting from USB drives and I first started the blog site www.rmprepusb.com to write up my experiments for others to follow (mostly the members of reboot.pro). It was also a handy way for me to learn how to make a website (which was all new to me).

Some people were grateful for the articles and ask me to set up a 'Donate' page so they could buy me a cup of coffee or two.

After a while, I placed AdSense ads on that site and so I started to get some revenue from the adverts. After that, I realised that I could actually make some money from the website and it helped to pay the website host costs which were approx. £100 a year.

Since then, I have made YouTube videos, blogs, an E2B website and written some eBooks - all of these have helped to pay my expenses as well as bring in an income.

I have chatted to friends over the years, and I even managed to convince a few of them that they also can make money from the Internet (which a few have done). 

I have now scribbled down a lot of my ideas, methods, hints, tips and mistakes into an eBook called 'How to make $1000 a month from the Internet'.

I chose the figure of $1000/month because I really do feel that it is possible for almost anyone who is willing to spend a little time and effort to achieve that figure (if not more).

Tuesday 23 February 2021

eBook #3 How to install Microsoft Windows using Easy2Boot new revision available

I have now updated eBook #3

How to install Microsoft Windows using Easy2Boot_v1.8.pdf

If you want the latest version, please use link in your original Payhip email receipt to download it.

Updates are free!

How to Install Windows using Easy2Boot (v1.8 2021-02-23)

Contents

Saturday 20 February 2021

Easy2Boot v2.08 is now released

Changes from v2.07:

1. Bugfix - Windows ISO Repair option sometimes doesn't work
2. Bugfix - Fix Make_E2B cmd script aborting when XP Home used as host OS
3. Add E2B 'Disable Kaspersky shim' menu option to disable Insecure boot feature
4. Trad Chinese language improved
5. New file 'Test_file_access_speed.lua' added to UTILITIES menu for agFM menu system

If you run Make_E2B.exe and click on the Update E2B drive button, it will update both E2B and agFM to the latest release versions. 

To update Ventoy, double-click on:
\e2b\Update agFM\Update_to_latest_Ventoy_version.cmd 
which is on the 2nd partition (requires internet access)

Friday 19 February 2021

How to UEFI64-boot to the AntiVirusLiveCD ISO

The AntiVirusLiveCD ISO only supports 64-bit CPUs and Legacy\MBR booting. MBR-booting on a system with a 32-bit CPU causes a 'not 64-bit CPU' error message to be displayed. 

When I downloaded the AntivirusLiveCD-36.0-0.103.0.iso file, I found by using 7Zip, that it did not contain a \EFI folder or any boot image which contained any .efi boot files. So the ISO does not support UEFI-booting. 

Even though the ISO does not contain UEFI64 boot files, it is possible to first UEFI64-boot to grub2 and then load the linux kernel and initrd ramdrive files under grub2. As long as the kernel does not rely on any Legacy BIOS calls, it should still boot OK.

I examined the AntivirusLiveCD-36.0-0.103.0.iso's \boot\isolinux\isolinux.cfg file:

Wednesday 17 February 2021

How to fix a website browser display problem

When using a web browser, you can sometimes find that the browser is not displaying a particular website 'correctly'.

I quite often find that Chrome will sometimes insist on displaying a website page on my PC as if it was a mobile device and insists on using the mobile  'm.xxx' URL site address rather than the desktop site URL. It can also display a dark theme (which I personally don't find easy to read) or display the site using a different theme or layout than is displayed on other devices or browsers. 

If I am browsing on a mobile device, the Chrome hamburger menu icon will often give me the option for 'Desktop site', but when using a desktop PC/notebook, this option is not available even if the mobile version of the website is being displayed by the browser.

Here are some things that I try:

  • Try a different browser
  • Try the Incognito tab
  • Delete/edit cookies for site
  • Deep-dive using F12

My first attempt to fix this is to try a different browser such as Windows Edge or Opera.

Tuesday 16 February 2021

Ventoy for Easy2Boot v1.0.35 now available

 1. Download the modified version from here

2. Drag-and-drop the .zip file onto the USB Partition2 \e2b\Update agFM\Add_Ventoy.cmd file.

Allow the new files to overwrite the old version of Ventoy.

If there is a problem and you want to go back to the latest release version, run \e2b\Update agFM\Update_to_latest_Ventoy_version.cmd.


Ventoy for Easy2Boot

Please note: This is NOT the official Ventoy - it has been modified to work with E2B, so please don't report problems to Ventoy/LongPanda unless you can reproduce the problem on a real official Ventoy USB drive made with the Ventoy2Disk application provided.

If you have downloaded and tested the new version (UEFI and Legacy) please tick the 'It worked for me' checkbox.


Sunday 14 February 2021

agFM v1.70 available plus eBook #4 updated rev. 1.20

 I have now updated agFM to v1.70. It is available from the Alternate Downloads sites and should also be live if you run the \e2b\Update agFM\Download and update agFM_v2.cmd script. 

The PDF eBook #4 for agFM has also been updated to rev. 1.20 to match agFM v1.70 (contents list below). Later revisions of all E2B eBooks can be downloaded for free using the original download link that you received in the email when you first purchased it from Payhip.

agFM v1.70 2021-02-14

  • Recognise the .binacpi file extension (e.g. to run DSDT.bin files).
  • Add Enable\Disable Kaspersky shim EFI menu entry.
  • rEFInd EFI booloader/manager by Rod Smith added (EFI boot manager) added.
  • SAMPLE startup menu files now include new entries to run rEFInd.
The latest Beta version of Easy2Boot is v2.08e. The Beta history for v2.08e is:
2.08a - add \_ISO\MAINMENU\DisableKasperskyShim.mnu
2.08b - bugfix in Make_E2B_USB_Drive.cmd drive creation script due to XP Home not having tasklist.exe
2.08c and d - bugfix for Win7 Repair option (did not swap hd0 with hd1), did not wait 3 secs on wimboot prompt on Dell PC - thanks to Jose C for reporting the issue
2.08e - improve Trad Chinese language file, E2B ignores .lua files, Test_file_access_speed.lua added to UTILITIES folder for agFM menu system (test file access speeds under agFM)

and I suggest you also update your E2B files to this latest version too as it adds new features and bugfixes.

eBook #4: UEFI multi-boot using the a1ive grub2 File Manager

Contents:

Friday 12 February 2021

How to fix intermittent errors when booting from a USB drive

Around 1998 we got introduced to USB 1.0. The pure data bit rate could reach an amazing 12Mbits/s (approx 1MByte/s in real life). Then we got USB 2 at the start of the new Millenium which gave us up to 60MBytes/s (much faster than slow-spinning CDs!). 

Later still (after 2008) we got USB 3, 3.1 and 3.2 with up to 2.4GBytes/s and very recently we have USB 4 (based on Thunderbolt 3) and are promised speeds of up to a staggering 40GBytes/s.

The names which were given to these different technologies (and seem have been randomly assigned with little forethought) are:

  • USB 1 - Low Speed
  • USB 1 - Full Speed
  • USB 2 - High Speed
  • USB 3 - Super Speed
  • USB 3.1 Gen 1 Super Speed
  • USB 3.1 Gen 2 Super Speed+
  • USB 3.2 Gen 1x1
  • USB 3.2 Gen 2x1
  • USB 3.2 Gen 2x2
  • USB 4 Gen 2x2
  • USB 4 Gen 3x2 - USB4 routing for tunnelling of USB3.x, DisplayPort 1.4a and PCI Express traffic and host-to-host transfers, based on the Thunderbolt 3 protocol
So what started out as 1MB/s wired protocol has ended up as having a 40+GB/s Input/Output transfer protocol zipping along at radio frequencies!

Now when considering booting from a PC or Notebook, the BIOS/Firmware driver is responsible for USB I/O communication. Most computers which have USB 3 ports, have both USB 3 and USB 2 drivers embedded in the firmware. However, these BIOS drivers will probably not be fully featured like full-blown Windows or Linux drivers. Hence, they may not fully implement the Super Speed protocols and error handling may be limited.

The transfer protocols used by the driver will determine how fast I/O access is and thus how fast we can boot from the USB drive. Moving large blocks of data using a high-speed USB block-transfer protocol under Windows can give us those high speeds, but the BIOS firmware is probably using a more primitive and slower protocol to access the USB drive.

Another point to keep in mind is what BIOS code is used. If we Legacy\MBR-boot from the USB drive it will use the real-mode IBM-compatible BIOS USB driver, but if we UEFI-boot then a completely different UEFI USB driver will be used by the BIOS.

Because the BIOS\Firmware knows what USB chipset is present, it is possible for the BIOS developers to make sure that the USB speeds are optimized. However, most BIOS developers just use generic USB 2/3 drivers to add into their Firmware whilst others may spend some time and effort tweaking the USB BIOS code (e.g. Apple).

Gotcha's

Sunday 7 February 2021

11 useful Antivirus ISOs all in one downloads

 In a fairly recent article, Jayro (the developer of Medicat) has provided a separate 7GB .zip file download of useful antivirus ISOs.

You can extract the contents to a Ventoy USB drive or to the root of an E2B USB drive (except for the two autorun files).

If you don't want to use Ventoy (because it will overwrite the \ventoy\ventoy.json file) then just copy the ISO files to the \_ISO\ANTIVIRUS folder.

Note that some of the ISOs do not support UEFI (Avast, Sophos,AVG and Comodo do not even contain EFI boot files). Jayro has disabled UEFI boot in the Ventoy configuration file because many of the others are problematic when attempting to UEFI-boot from them. Only DrWeb, Eset and MalwareBytes seem to UEFI64 boot using agFM.


Updated:

~ I actually downgraded the 2018 Malwarebytes Bootable WinPE to a 2016 version for added stability, it boots up WAY faster, uses much less RAM, and has a smaller file size. Has a startup sound with audio instructions to get you started. This older version is only temporary, until I have the time to build a proper one that's more up to date.

~ Minimum memory requirements have been reduced at the bottom of this changelog, to better reflect the memory needs of the included WinPE WIM files. Minimum RAM requirements below has dropped from 3GB down to 2GB, but you'll still want 4GB or more for comfortable usage. Luckily most modern PCs and laptops come with no less than 4GB these days.

~ Malwarebytes virus definitions to v2020.12.08.03

Thursday 4 February 2021

Add Medicat v21.01 to your E2B USB drive

 Medicat 21.01 is in the form of zip files for use with 7Zip and Ventoy. You are supposed to extract the contents to the first partition of a previously-made Ventoy USB disk. Instead, you can just copy all the files (except \autorun.inf and \autorun.ico) to the root of your E2B first NTFS partition and only use Ventoy to boot to Medicat. This will add lots of folders to the root however and you may overwrite the contents of your \ventoy folder which will affect your existing Ventoy theme and menu settings (if you have any).

See also: https://rmprepusb.blogspot.com/2022/01/quickly-add-medicat-2112-to-easy2boot.html

Remember to disable your AntiVirus first (and check that it does not 'quarantine' any files on the USB drive once you have completed the copy and re-enabled your AV).


Medicat v21.01 zip file contents

Then simply boot to Ventoy from the E2B USB drive.

Note that copying the Medicat files will also add the \ventoy folder to the first E2B NTFS partition which includes a ventoy.json file. This will change the Ventoy theme and also change the menu entry names. You may find it educational to look at the ventoy.json to see what it does because a few ISO mey require special settings.

I found that quite a few of the menu entries had problems UEFI-booting on my Lenovo IdeaPad - maybe you will have better luck...

The alternative would be to selectively pick only the ISO or WIM files that you want, and add them into the existing E2B menu folders. This means you don't need to boot to Ventoy.

In most cases you do not need to add any of the other files (some may require the ventoy.json if anything 'special' needs to be done to run the ISO using Ventoy - so you may need that too).

Medicat Mini Windows

To add the Medicat WinPE, we need the file:
\Boot_an_Operating_System\[UEFI]_Mini_Windows_10.iso

Copy the ISO file to the \_ISO\WINPE folder (for instance). 

You will also need to copy the following files and folders to the root of the E2B NTFS partition #1 as they are required by Medicat Mini Windows 10 too (the Mini_Windows_10.iso only contains boot files and the boot.wim file):

\Start.exe
\CdUsb.Y
\autorun.cmd (optional)
\PortableApps
\Programs
\System (optional)

To save a key press or two in the E2B and agFM menus, you can rename the extension to _.isodef.iso.

Issues?

  • AntiVirus - MalwareBytes: UEFI64 does not seem to boot using Ventoy. Boots OK using agFM menu system and choosing .isowin or .isomap options however.
  • Some other Windows ISOs also seem to have problems. Try .isomap option in agFM.
  • Ventoy has problems with some payloads if testing using VirtualBox+VMUB but on a real system it usually works OK.
  • If you have intermittent problems when booting large ISOs, etc. then try a USB 2 port or connect a USB 2 extension cable to the E2B USB drive so that only USB 2 speeds are used instead of USB 3 speeds.
  • If you are using a USB 3 SSD device and experience problems, try using a USB Flash drive or USB spinning Hard Drive instead - I have seen some issues when booting some Linux distros (e.g. Slax) from a USB SSD (the USB drive is not detected by the kernel and  fdisk -l does not list the USB drive)!
  • To boot using agFM, you may require > 4GB of RAM in the system.
Recommended for E2B: SanDisk Extreme Pro 3.1 (#ad)


Monday 25 January 2021

Latest Windows update KB4535680 blocks agFM Secure Boot!

You can Secure UEFI64-boot to agFM on the E2B USB drive because it uses the Kaspersky bootx64.efi signed grub2 shim file. This boot file originated from Kaspersky and was signed by Microsoft as being 'Secure'. However, it contained a loophole which allowed us (via some clever programming) to load unsigned modules and hence an unsigned version of grub2 (e.g. grubfm or agFM or Ventoy, etc.).

A year or so ago, Microsoft released a KB Update which added a 'blacklist' entry into the UEFI BIOS non-volatile RAM of the Windows system UEFI firmware. This is called the DBx (or dbx) list and it can usually be found in your UEFI BIOS settings.

The DBx list was specifically intended for this purpose - to blacklist boot files which Microsoft had signed as 'Secure' but later turn out to be not as 'secure' as they thought!

The update provided by Microsoft immediately caused a lot of issues on certain Secure Boot OEM systems which also used this same EFI boot file (Lenovo?, HP?) and thus the update prevented them from booting after it was installed! Microsoft quickly withdrew the Windows Update and left their victims to try to rescue their secure but unbootable systems.

Now it seems Microsoft have tried again (KB4535680 2021-01-12) but the new Windows update is only applied to certain systems (and probably only those that boot via UEFI and have GPT partitions on the boot disk):

Friday 22 January 2021

Add rEFInd to agFM

Clover identifies EFI files on all partitions.
You can also add your own menu entries if you wish.

If you want to add rEFInd to your Easy2Boot USB drive, then you can download the current rEFInd files to the \EFI\refind folder, rename the bootx64 and bootia32 .efi files and then simply add all the files to the 2nd FAT32 partition (agFM partition) of your E2B USB drive.

You can configure the rEFInd menu by editing the \EFI\refind\refind.conf text file.

Instructions

Monday 18 January 2021

agFM 1.70b Beta and E2B v2.08a Beta available (BUGFIX for Blank screen on UEFI booting)

It has been reported that some notebooks such as the Lenovo IdeaPad S145 and ZYREX SKY 232 do not like the UEFI64 Kaspersky .EFI boot shim which agFM uses by default.

The Kasperksy .EFI boot file is signed by Microsoft and allows us to boot to agFM which then temporarily disables Secure Boot, thus allowing us to run agFM grub2 and boot from both signed and unsigned (insecure) ISOs and other boot files.

However, some systems will not UEFI64 boot to the Kaspersky+agFM boot files (even if Secure Boot is disabled in the BIOS). The reason for this is unknown.

Another problem with the Kaspersky shim is that it may be blacklisted by a Linux or Windows update which can add an entry into the BIOS's DBx blacklist EEPROM firmware list. This means that if Secure Boot is enabled in your BIOS on your system, it will not allow the Kaspersky EFI boot file to load and you may see some sort of 'Security Violation' error from the BIOS on boot. You can check your BIOS DBx list to see if has any entries (and clear the list).

The solution to both these issues is to remove the Kaspersky shim and this process is documented on this page in the Troubleshooting sections and in the FAQ page.

In these latest Beta versions, I have modified the E2B and agFM menu system so that you can enable or disable the Kaspersky shim by using a menu entry. If you remove the Kaspersky Secure Boot EFI file, you will not have the ability to secure boot to the agFM menu.

Update Instructions

Wednesday 13 January 2021

agFM v1.70aBeta available

The latest agFM v1.70aBeta version now understands files with the new .binacpi file extension.

If you have a binary acpi file which you want to patch your BIOS with (for instance to try to get ACPI support working under XP using a DSDT.bin file), you can change the extension of your file from .bin to .binacpi.

It will then by listed in the agFM menu system and agFM will present you with this menu when the .binacpi file is selected:


Monday 11 January 2021

E2B v2.07 is now released

 The latest version 2.07 is now live.

1. \E2B Launcher.exe application added

2. Add .ventoyignore dummy files to \_ISO\docs and \_ISO\e2b folders for faster Ventoy startup

Sunday 10 January 2021

Why not treat yourself?

Having problems booting UEFI payloads with E2B, Rufus, Ventoy, etc.?

Maybe you didn't get the present you really wanted at Xmas or you are just feeling depressed at having to stay indoors during Covid Lockdown? Then why not treat yourself to an IODD Mini SSD  CD\DVD emulator (#ad).


This small device fits easily into any pocket and being SSD-based it is robust, light and fast.

In case you didn't get the memo - the Mini can not only load any ISO as a virtual DVD drive, but it can load up to FOUR different VHDs at the same time! That means you can have any four USB disks you like. Each disk can contain multiple partitions, so you can have four different complete OS's on those disks and boot to any of them (not counting the SSD disk itself). You can also set each Virtual disk to be a Removable USB device and thus emulate a USB Flash drive instead of a USB HDD (or up to four USB flash drives).

If you copy on an empty file with a .VHD extension (or any file) and select it - you now have a blank 'disk' which you can install anything you like onto (after partitioning it and formatting it like any other blank disk).

Do you have many small bootable USB drives, each with a different payload? Then why not just convert each one to a .VHD file (e.g. using RMPrepUSB - Disk to File) and store them on the IODD?

Note: VHD files are  just disk images. The file needs to be contiguous.

Of course, it can't do fancy stuff like auto-install Windows, apps, drivers and updates using user XML files like E2B can with SDI_CHOCO, it can't attach a persistence file to an ISO and boot the live ISO with persistence, it can't Secure-boot boot non-secure ISOs, it can't run ISOs that were actually designed to be extracted onto a flash drive rather than boot as a liveCD, it doesn't contain PassPass or UtilMan XML files to bypass Windows account logins and all the other good stuff that E2B+agFM+Ventoy can do - BUT the good news is you can simply add E2B+agFM+Ventoy onto it!

Prices are around $130 for the 256GB version. You know you deserve it :-)


agFM v1.69 and 'Ventoy for Easy2Boot' v1.0.32 released

 agFM v1.69 and 'Ventoy for Easy2Boot' v1.0.32 are now released and will be automatically downloaded when you make a new E2B USB drive or run the appropriate \e2b\Update agFM cmd files to update agFM and Ventoy.

eBook #4 for agFM has been revised and updated for the new F1 and F5 menu structure in agFM. Updates are free - just use the link in the original email receipt from Payhip.

E2B v2.07 will be released soon - the only changes to E2B are the new E2B Launcher utility and the addition of some .ignoreVentoy dummy files to speed up booting to the Ventoy menu.

Please donate!

If you use E2B+agFM+Ventoy, please donate something to a1ive and LongPanda who are the developers of grubfm and Ventoy. They deserve at least a cup of coffee for all their excellent hard work which they provide for free! Think where we would be if we didn't have these utilities to use on modern UEFI systems!


Friday 8 January 2021

'Ventoy for Easy2Boot' v1.0.32 with UEFI32 support now available

 Ventoy now supports UEFI32 (experimental) as well as UEFI64.

I have compiled a version for Easy2Boot from the v1.0.32 Ventoy sources.

To update your E2B USB drive...

Monday 4 January 2021

'Ventoy for Easy2Boot' v1.0.31 is now available

 Download ZIP file and drag-and-drop onto \e2b\Update agFM\Add_Ventoy.cmd to update.

The download is in the latest Betas folder on Alternate Downloads site.

https://1drv.ms/u/s!AqlrQcdsFA-K7S2G6_UPKR7HCecH?e=dhknNv

I will release in a few days unless someone reports a problem.

This is NOT the official version of Ventoy - it is modified - so do not report any problems to the Ventoy author!

Ventoy UEFI32 is not supported.

Don't forget to subscribe for the latest news and tips!

Friday 1 January 2021

a1ive grub2 code to check for an expiry date

 If you have added your own \boot\grubfm\startup_menu.txt file, you can check for an expiry date. This would force the user to update their USB drive. Here is an example of how to test dates.

Check expiry date

You can add the lines below to check that an expiry date has not been met or exceeded. Change the value of LOWERDATE  and UPPERDATE as required to set a valid range.

The code gets the current date in YYYYMMDD format into sdate. The regexp command is used to get the first 8 characters only.

It then compares that dates and reboots the system if the expiry date has been met or if the date is before or equal to the LOWERDATE. The LOWERDATE test helps to prevent the user from cheating by setting the RTC (Real Time Clock) to an earlier date.

This may be of use if you want to force the user to update the USB boot drive after a specific date (.e.g. example = expires Feb 01 - valid for any day in January).

# check date - reset if UPPERDATE (YYYYMMDD) is equal to or smaller than current date
set LOWERDATE=20201231
set UPPERDATE=20210201
unset now;date -s now;regexp -s sdate '(........)' "$now"
# display RTC date and time in human form (optional)
date -m
if [ "${sdate}" -le "${LOWERDATE}" ]; then echo "ERROR: INCORRECT RTC DATE - rebooting..."; sleep 5; reset -w; fi
if [ "${sdate}" -ge "${UPPERDATE}" ]; then echo "ERROR: THIS SOFTWARE HAS EXPIRED ($sdate >= $UPPERDATE) - rebooting..."; sleep 5; reset -w; fi 
unset now;unset UPPERDATE;unset sdate;unset LOWERDATE

Taken from E2B eBook #4 - UEFI-multiboot using the a1ive grub2 File Manager